Difference between revisions of "Template:FMB64 First start card"
From Wiki Knowledge Base | Teltonika GPS
| (9 intermediate revisions by 3 users not shown) | |||
| Line 3: | Line 3: | ||
<b>{{{description|Leading LTE/GNSS/BLE Terminal for advanced applications}}}</b> | <b>{{{description|Leading LTE/GNSS/BLE Terminal for advanced applications}}}</b> | ||
| − | {{{pic|[[Image: | + | {{{pic|[[Image:FMB640 New Case Laser.png|400px|right]]}}} |
| Line 14: | Line 14: | ||
# '''Unscrew''' 4 screws counterclockwise that are located on the '''bottom''' of the device. | # '''Unscrew''' 4 screws counterclockwise that are located on the '''bottom''' of the device. | ||
# Remove the '''cover'''. | # Remove the '''cover'''. | ||
| − | # Insert '''SIM''' card as shown with '''PIN request disabled''' or read '''[[{{{model|FMB640}}} Security info|Security info]]''' how to enter it later in [[Teltonika Configurator]]. Make sure that SIM card '''cut-off corner''' is pointing | + | # Insert '''SIM''' card as shown with '''PIN request disabled''' or read '''[[{{{model|FMB640}}} Security info|Security info]]''' how to enter it later in [[Teltonika Configurator]]. Make sure that SIM card '''cut-off corner''' is pointing forward to slot. {{{dual_sim|'''SIM slot 1''' is closer to PCB, '''SIM slot 2''' is the upper one.}}} |
{{{be_battery|# Connect '''battery''' as shown to device.}}} | {{{be_battery|# Connect '''battery''' as shown to device.}}} | ||
# After '''configuration''', see “'''[[{{{model|FMB640}}}_First_Start#PC Connection (Windows)|PC Connection (Windows)]]'''”, attach device '''cover''' back. | # After '''configuration''', see “'''[[{{{model|FMB640}}}_First_Start#PC Connection (Windows)|PC Connection (Windows)]]'''”, attach device '''cover''' back. | ||
| Line 22: | Line 22: | ||
| − | [[File:Alert.png|left|link=]] | + | {| |
| + | |- | ||
| + | |[[File:Alert.png|left|link=]]||<b>{{{sim_type|Micro-}}}SIM card insertion/removal must be performed when device is powered off – external voltage {{{battery|and internal battery}}} disconnected. Otherwise {{{sim_type|Micro-}}}SIM card might be damaged or device will not detect it.</b> | ||
| + | |} | ||
| − | + | =='''How to insert microSD card into {{{model|FMB640}}}'''== | |
| − | |||
| − | |||
| − | |||
| − | |||
| − | |||
| − | |||
| − | |||
| − | |||
| − | + | [[File:Micro sd insert V1.2.gif|500px|right]] | |
<br> | <br> | ||
| − | |||
# Push microSD card lock case. | # Push microSD card lock case. | ||
# Open microSD card locker. | # Open microSD card locker. | ||
Revision as of 11:04, 23 October 2020
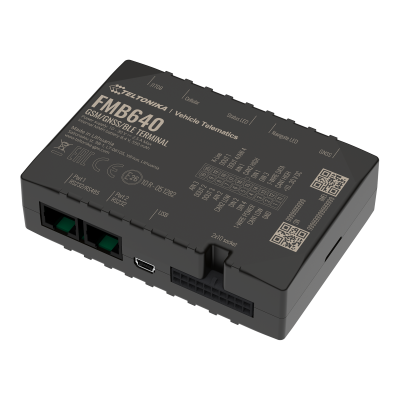
Leading LTE/GNSS/BLE Terminal for advanced applications
How to insert SIM card and connect the battery
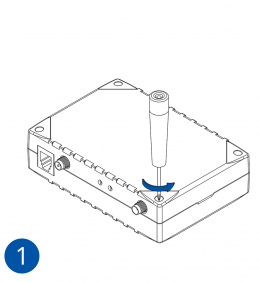
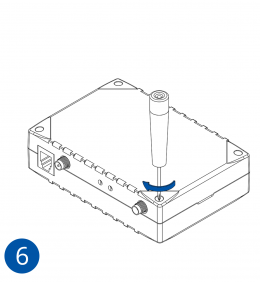
- Unscrew 4 screws counterclockwise that are located on the bottom of the device.
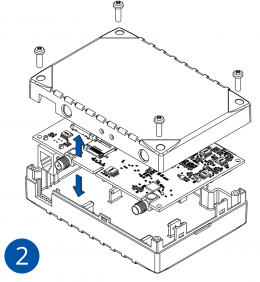
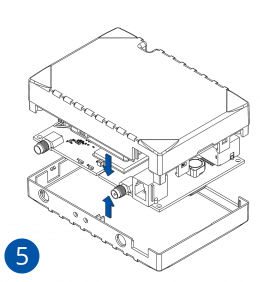
- Remove the cover.
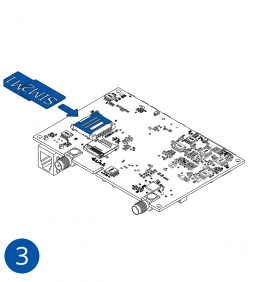
- Insert SIM card as shown with PIN request disabled or read Security info how to enter it later in Teltonika Configurator. Make sure that SIM card cut-off corner is pointing forward to slot. SIM slot 1 is closer to PCB, SIM slot 2 is the upper one.
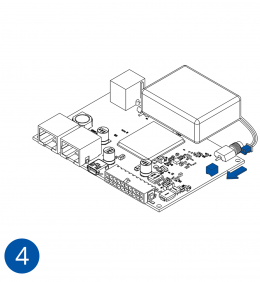
- Connect battery as shown to device.
- After configuration, see “PC Connection (Windows)”, attach device cover back.
- Screw in all screws. Device is ready to be mounted.
 |
Micro-SIM card insertion/removal must be performed when device is powered off – external voltage and internal battery disconnected. Otherwise Micro-SIM card might be damaged or device will not detect it. |
How to insert microSD card into FMB640
- Push microSD card lock case.
- Open microSD card locker.
- Correctly insert microSD card into slot.
- Close microSD card locker.
- Push microSD card lock case to locked position.

