Difference between revisions of "TacoSync"
From Wiki Knowledge Base | Teltonika GPS
| Line 5: | Line 5: | ||
[[File:Vehicles main page.png|1100px]] <br> | [[File:Vehicles main page.png|1100px]] <br> | ||
| − | Press '''Add | + | Press '''Add Vehicle''' button shown in <b>Figure above</b>. Now you will have to fill the vehicle registration form shown in <b>Figure below</b>. |
| − | [[ | + | [[File:Vehicle definition.png|1100px]] <br> |
{| class="nd-othertables_2" | {| class="nd-othertables_2" | ||
|+ | |+ | ||
| − | ! style="width: 200px; border-bottom: 2px solid #0054A6; vertical-align: middle; text-align: center;" | ROW | + | ! style="width: 200px; border-bottom: 2px solid #0054A6; vertical-align: middle; text-align: center;" |ROW |
| − | ! style="width: 500px; border-bottom: 2px solid #0054A6; vertical-align: middle; text-align: center;" | DESCRIPTION | + | ! style="width: 500px; border-bottom: 2px solid #0054A6; vertical-align: middle; text-align: center;" |DESCRIPTION |
|- | |- | ||
| − | ! style="border: 1px solid white; border-bottom: 2px solid #E8E8E8; text-align: left; vertical-align: center; background: white; color: black;" | | + | ! style="border: 1px solid white; border-bottom: 2px solid #E8E8E8; text-align: left; vertical-align: center; background: white; color: black;" | Company |
| − | | style="text-align: left; vertical-align: top;" | Name of | + | | style="text-align: left; vertical-align: top;" | Name of your company |
|- | |- | ||
| − | ! style="border: 1px solid white; border-bottom: 2px solid #E8E8E8; text-align: left; vertical-align: center; background: white; color: black;" | | + | ! style="border: 1px solid white; border-bottom: 2px solid #E8E8E8; text-align: left; vertical-align: center; background: white; color: black;" |Vehicle number |
| − | | style="text-align: left; vertical-align: top;" | Enter | + | | style="text-align: left; vertical-align: top;" |Enter your vehicle number (Mandatory) |
|- | |- | ||
| − | ! style="border: 1px solid white; border-bottom: 2px solid #E8E8E8; text-align: left; vertical-align: center; background: white; color: black;" | IMEI | + | ! style="border: 1px solid white; border-bottom: 2px solid #E8E8E8; text-align: left; vertical-align: center; background: white; color: black;" |IMEI |
| − | | style="text-align: left; vertical-align: top;" | Device IMEI (Mandatory) | + | | style="text-align: left; vertical-align: top;" |Device IMEI (Mandatory) |
|- | |- | ||
| − | ! style="border: 1px solid white; border-bottom: 2px solid #E8E8E8; text-align: left; vertical-align: center; background: white; color: black;" | | + | ! style="border: 1px solid white; border-bottom: 2px solid #E8E8E8; text-align: left; vertical-align: center; background: white; color: black;" | Description |
| − | | style="text-align: left; vertical-align: top;" | | + | | style="text-align: left; vertical-align: top;" |Description of your vehicle (Optional) |
| − | |||
| − | |||
| − | |||
| − | |||
| − | |||
| − | |||
| − | |||
| − | |||
| − | |||
| − | |||
| − | |||
| − | |||
|- | |- | ||
|} | |} | ||
| − | ==Deleting vehicles== | + | ==Deleting vehicles and removing schedules== |
| − | Select | + | Select vehicles that you wish to delete or remove schedule of and press corresponding option. |
| − | [[ | + | [[File:Deleting vehicles schedules.png|1100px]] |
| − | ==Creating schedule | + | ==Creating schedule== |
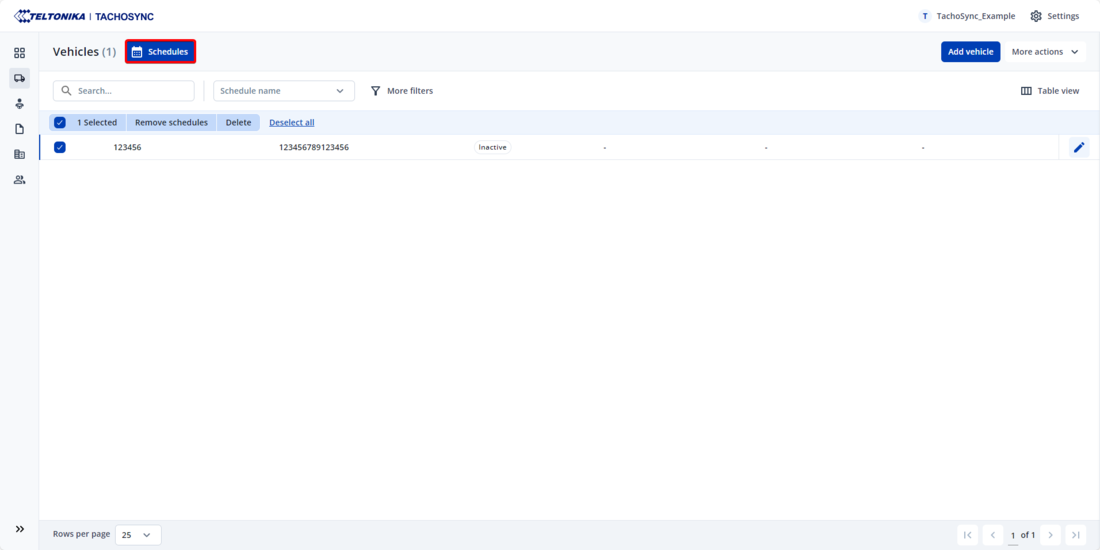
| − | + | Press '''Schedules''' button for creating schedule group shown in <b>Figure below</b>. | |
| − | [[ | + | [[File:Schedule for all vehicles.png|1100px]] |
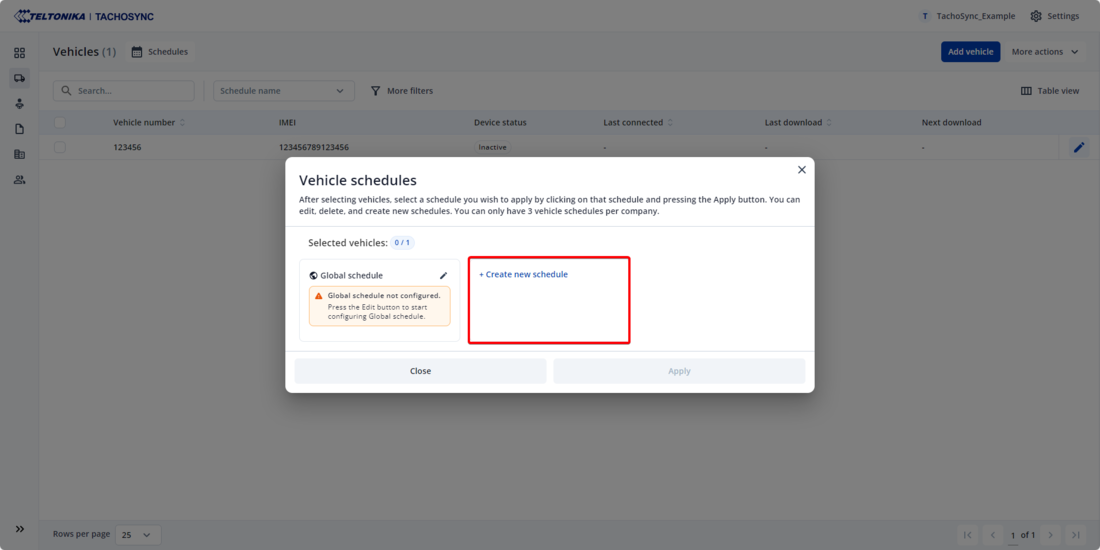
| − | + | In pop-up window shown in <b>Figure below</b> select '''Create new schedule'''. | |
| − | |||
| − | [[ | + | [[File:Create new schedule.png|1100px]] |
| − | |||
| − | |||
| − | |||
| − | |||
| − | |||
| − | |||
| − | |||
| − | |||
| − | |||
| − | |||
| − | |||
| − | |||
| − | |||
| − | |||
| − | |||
| − | |||
| − | |||
| + | ==Creating schedule for selected vehicle== | ||
| + | To create a schedule for the selected vehicle, press on '''Schedule''' in <b>Figure below:</b> | ||
| + | [[File:Schedules1.png|1100px]] | ||
| − | |||
[[Category:TacoSync | [[Category:TacoSync | ||
| − | [[File:Vehicles main page|thumb|vehicles main page]] | + | [[File:Vehicles main page|thumb|vehicles main page|link=Special:FilePath/Vehicles_main_page]] |
]] | ]] | ||
Revision as of 14:49, 10 October 2024
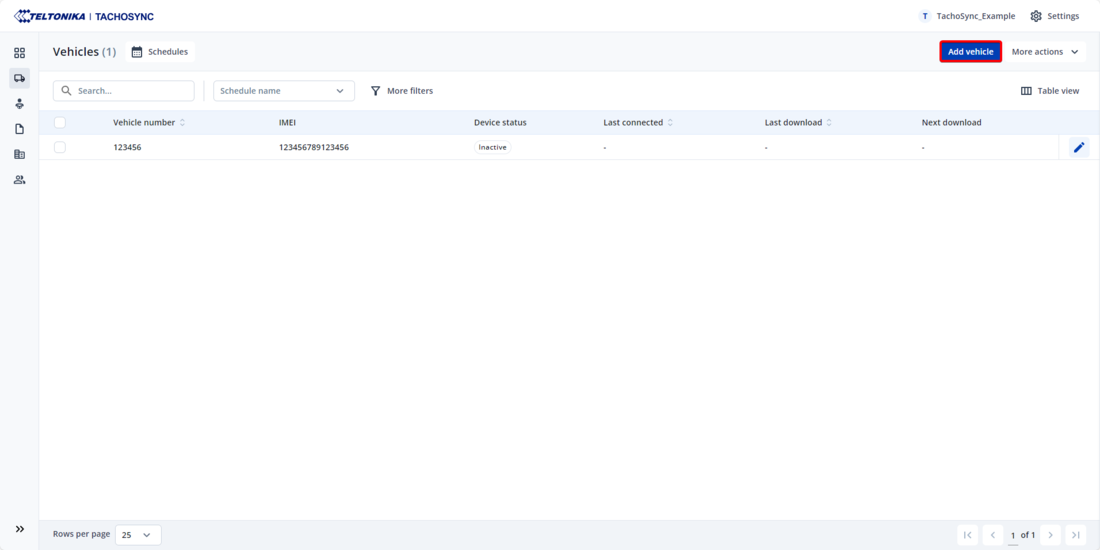
The vehicle section is the main window of objects control, which provides the ability to add vehicles, monitor and download files, and observe schedule status changes.
Adding vehicles
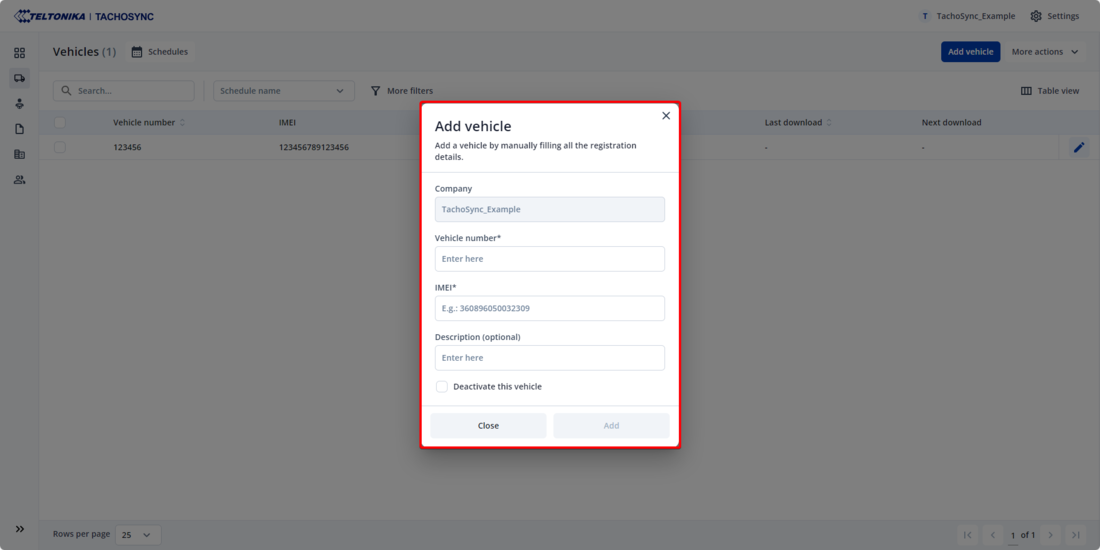
Press Add Vehicle button shown in Figure above. Now you will have to fill the vehicle registration form shown in Figure below.
| ROW | DESCRIPTION |
|---|---|
| Company | Name of your company |
| Vehicle number | Enter your vehicle number (Mandatory) |
| IMEI | Device IMEI (Mandatory) |
| Description | Description of your vehicle (Optional) |
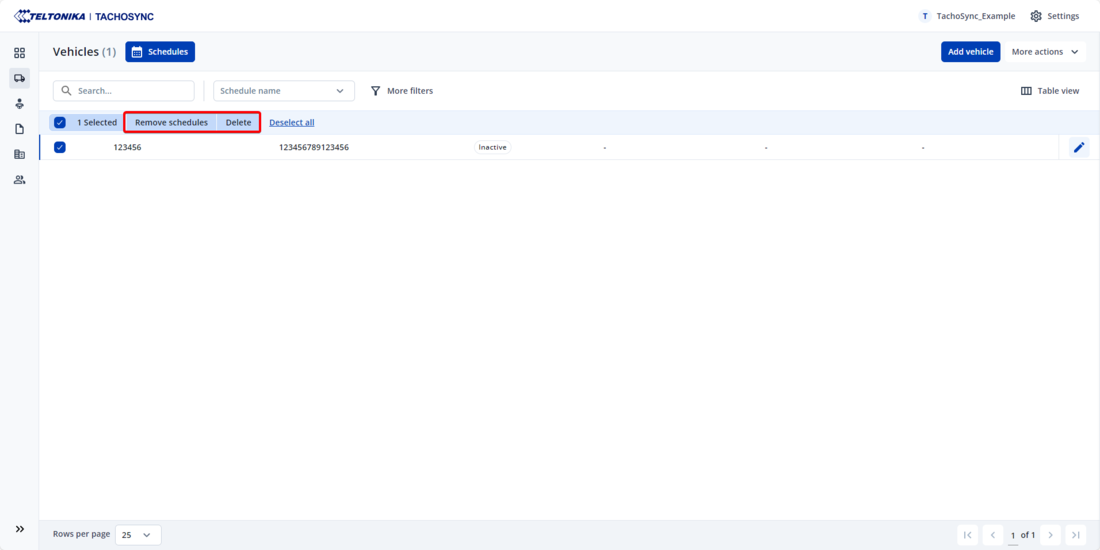
Deleting vehicles and removing schedules
Select vehicles that you wish to delete or remove schedule of and press corresponding option.
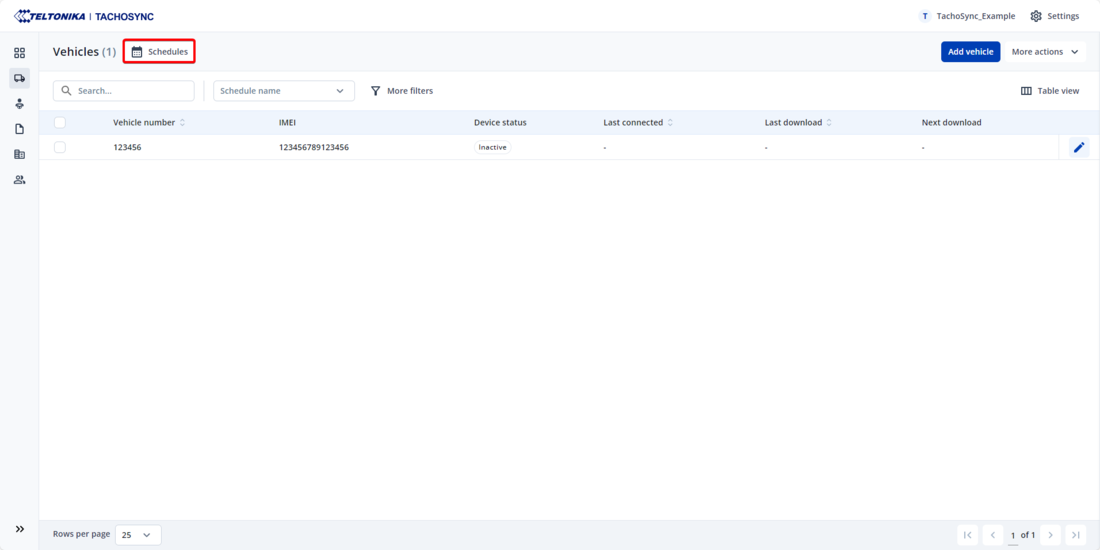
Creating schedule
Press Schedules button for creating schedule group shown in Figure below.
In pop-up window shown in Figure below select Create new schedule.
Creating schedule for selected vehicle
To create a schedule for the selected vehicle, press on Schedule in Figure below:
[[Category:TacoSync
File:Vehicles main page
vehicles main page
]]
