Template:FMB96X First start card: Difference between revisions
Appearance
No edit summary |
No edit summary |
||
| Line 37: | Line 37: | ||
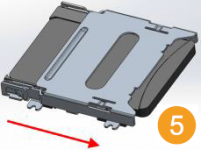
[[Image:Sd_card_1.png|x150px]] [[Image:Sd_card_2.png|x150px]] [[Image:Sd_card_3.png|x150px]] [[Image:Sd_card_4.png|x150px]] [[Image:Sd_card_5.png|x150px]] | [[Image:Sd_card_1.png|x150px]] [[Image:Sd_card_2.png|x150px]] [[Image:Sd_card_3.png|x150px]] [[Image:Sd_card_4.png|x150px]] [[Image:Sd_card_5.png|x150px]] | ||
=='''Pinout'''== | |||
{| class="wikitable" | |||
|+ | |||
! style="width:10%; border: 1px solid white; border-bottom: 2px solid #0054A6; background: white; color: #0054A6; text-align: left;"| PIN NUMBER | |||
! style="width:15%; border: 1px solid white; border-bottom: 2px solid #0054A6; background: white; color: #0054A6; text-align: left;"| PIN NAME | |||
! style="width:25%; border: 1px solid white; border-bottom: 2px solid #0054A6; background: white; color: #0054A6; text-align: left;"| | |||
DESCRIPTION | |||
|- | |||
| style="border: 1px solid white; border-bottom: 2px solid #E8E8E8; text-align: left; vertical-align: center; background: white;" | 1 | |||
| style="border: 1px solid white; border-bottom: 2px solid #E8E8E8; text-align: left; vertical-align: center; background: white;" | <span style=color:#FF0000>'''VCC'''</span> (6-30)V DC (+) | |||
| style="border: 1px solid white; border-bottom: 2px solid #E8E8E8; text-align: left; vertical-align: center; background: white;" | Power supply (6-30) V DC (+). | |||
|- | |||
| style="border: 1px solid white; border-bottom: 2px solid #E8E8E8; text-align: left; vertical-align: center; background: white;" | 2 | |||
| style="border: 1px solid white; border-bottom: 2px solid #E8E8E8; text-align: left; vertical-align: center; background: white;" | <span style=color:#000000>'''GND''' </span>(-) | |||
| style="border: 1px solid white; border-bottom: 2px solid #E8E8E8; text-align: left; vertical-align: center; background: white;" | Ground. | |||
|- | |||
| style="border: 1px solid white; border-bottom: 2px solid #E8E8E8; text-align: left; vertical-align: center; background: white;" | 3 | |||
| style="border: 1px solid white; border-bottom: 2px solid #E8E8E8; text-align: left; vertical-align: center; background: white;" | <span style=color:#D8D800>'''DIN 1'''</span> | |||
| style="border: 1px solid white; border-bottom: 2px solid #E8E8E8; text-align: left; vertical-align: center; background: white;" | Digital input, channel 1. DEDICATED FOR IGNITION INPUT | |||
|- | |||
| style="border: 1px solid white; border-bottom: 2px solid #E8E8E8; text-align: left; vertical-align: center; background: white;" | 4 | |||
| style="border: 1px solid white; border-bottom: 2px solid #E8E8E8; text-align: left; vertical-align: center; background: white;" | <span style=color:#3B3B3B>'''AIN 1'''</span> | |||
| style="border: 1px solid white; border-bottom: 2px solid #E8E8E8; text-align: left; vertical-align: center; background: white;" | Analog input, channel 1. Input range: 0-30 V DC. | |||
|- | |||
| style="border: 1px solid white; border-bottom: 2px solid #E8E8E8; text-align: left; vertical-align: center; background: white;" | 5 | |||
| style="border: 1px solid white; border-bottom: 2px solid #E8E8E8; text-align: left; vertical-align: center; background: white;" | <span style=color:#E0E0E0>'''DOUT 1'''</span> | |||
| style="border: 1px solid white; border-bottom: 2px solid #E8E8E8; text-align: left; vertical-align: center; background: white;" | Digital output. Open collector output. Max. 3,3 A DC. | |||
|- | |||
|} | |||
Revision as of 15:18, 21 December 2018

Special and smart tracker with wide power supply range and high capacity internal Ni-MH battery
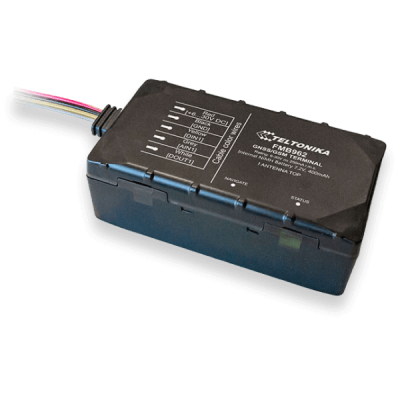
How to insert Micro-SIM card
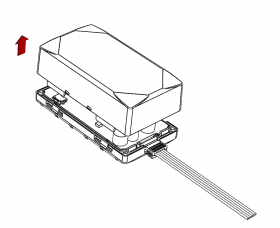
- Gently remove FMB96X cover using plastic pry tool from both sides.
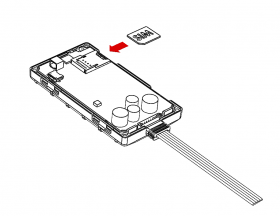
- Insert Micro-SIM card as shown with PIN request disabled or read Security info how to enter it later in Configurator. Make sure that Micro-SIM card cut-off corner is pointing forward to slot.
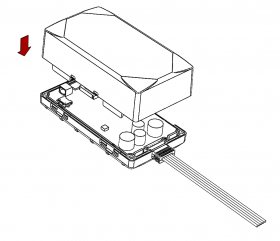
- Attach device cover back.
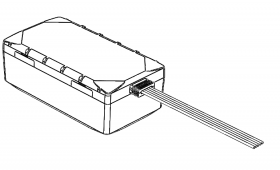
- Device is ready to be connected.
 |
Note: Micro-SIM card insertion/removal must be performed when device is powered off – external voltage and battery are disconnected. Otherwise Micro-SIM card might be damaged or device will not detect it. |
How to insert microSD card
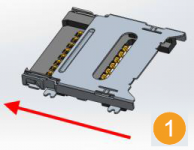
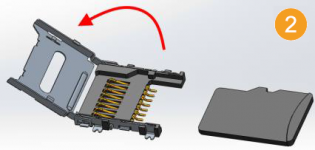
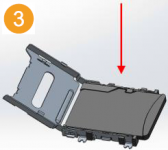
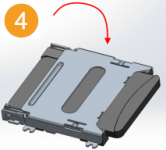
- Push microSD card lock case.
- Open microSD card locker.
- Correctly insert microSD card into slot.
- Close microSD card locker.
- Push microSD card lock case to locked position.
Pinout
| PIN NUMBER | PIN NAME |
DESCRIPTION |
|---|---|---|
| 1 | VCC (6-30)V DC (+) | Power supply (6-30) V DC (+). |
| 2 | GND (-) | Ground. |
| 3 | DIN 1 | Digital input, channel 1. DEDICATED FOR IGNITION INPUT |
| 4 | AIN 1 | Analog input, channel 1. Input range: 0-30 V DC. |
| 5 | DOUT 1 | Digital output. Open collector output. Max. 3,3 A DC. |

