Difference between revisions of "Template:FMB630 AutoCAN"
m (Text formatting) |
m (Text formatting) |
||
| Line 16: | Line 16: | ||
* Value – shows scanned value of parameter; | * Value – shows scanned value of parameter; | ||
* Send data to server – allows to choose the type of data when it‘s generated: | * Send data to server – allows to choose the type of data when it‘s generated: | ||
| − | + | ○ Disabled – Data will not be collected;<br> | |
| − | + | ○ On low priority – records will be generated as low priority events; <br> | |
| − | + | ○ On high priority – records will be generated as high priority events and immediately sent to server via GPRS (if GPRS is available);<br> | |
| − | + | ○ On panic - records will be generated as panic priority events and immediately sent to server via GPRS, if GPRS is not available records will be sent via SMS messages;<br> | |
* Data acquisition type – allows to choose when records are generated: | * Data acquisition type – allows to choose when records are generated: | ||
| − | + | ○ Monitoring – monitors data;<br> | |
| − | + | ○ On change – record is generated when parameter value is changed;<br> | |
| − | + | ○ Hysteresis – record is generated when increasing parameter value becomes higher than High value, and decreasing becomes less than Low value;<br> | |
| − | + | ○ Event on exit – record is generated when parameter value becomes higher than High value or lower than Low value;<br> | |
| − | + | ○ Event on entrance – record is generated when parameter value becomes between High and Low values;<br> | |
| − | + | ○ Event on both – record is generated when parameter value crosses High or Low values;<br> | |
* Low – allows to choose low value for Data acquisition; | * Low – allows to choose low value for Data acquisition; | ||
* High – allows to choose High level for Data acquisition; | * High – allows to choose High level for Data acquisition; | ||
Latest revision as of 16:45, 11 July 2019
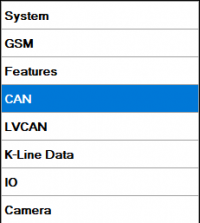
AutoCAN function allows user to automatically scan for available messages on CAN bus and configure CAN data sending to server. In order to configure AutoCAN connect FMB630 to computer with Port ½ cable. Launch FMB630 configurator version 1.1.1.7 or higher. Push “Connect“ button, then „CAN“ button. CAN configuration menu will be opened.
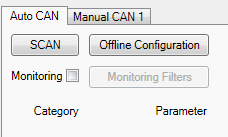
- SCAN - scans once for available messages on CAN bus;
- Monitoring – toggles scanning of messages on CAN bus every 3 seconds;
- Offline Configuration – enables CAN configuration when FMB630 is not connected to CAN bus;
- Auto CAN tab – configure CAN by selecting available messages from CAN bus;
- Manual CAN tab – Configure CAN by manually entering CAN message ID and data mask;
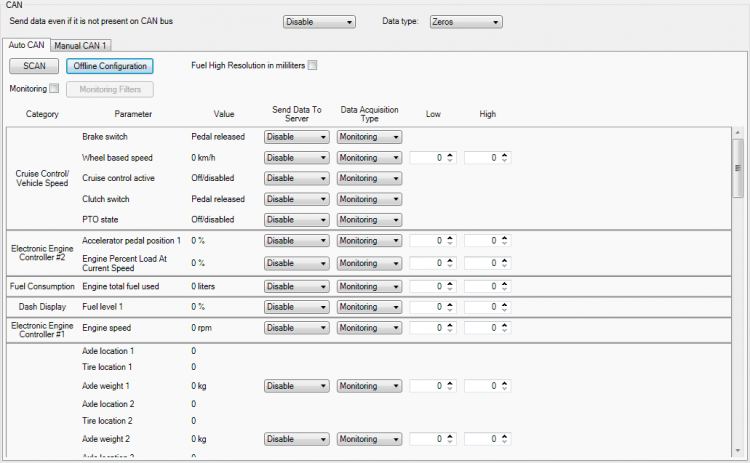
To start CAN configuration push “SCAN“ button. A table of all available CAN messages will appear. Description of columns:
- Category – shows CAN message;
- Parameter – shows configurable parameter name;
- Value – shows scanned value of parameter;
- Send data to server – allows to choose the type of data when it‘s generated:
○ Disabled – Data will not be collected;
○ On low priority – records will be generated as low priority events;
○ On high priority – records will be generated as high priority events and immediately sent to server via GPRS (if GPRS is available);
○ On panic - records will be generated as panic priority events and immediately sent to server via GPRS, if GPRS is not available records will be sent via SMS messages;
- Data acquisition type – allows to choose when records are generated:
○ Monitoring – monitors data;
○ On change – record is generated when parameter value is changed;
○ Hysteresis – record is generated when increasing parameter value becomes higher than High value, and decreasing becomes less than Low value;
○ Event on exit – record is generated when parameter value becomes higher than High value or lower than Low value;
○ Event on entrance – record is generated when parameter value becomes between High and Low values;
○ Event on both – record is generated when parameter value crosses High or Low values;
- Low – allows to choose low value for Data acquisition;
- High – allows to choose High level for Data acquisition;
CAN monitoring
To start CAN bus monitoring mark Monitoring check box. Table of available CAN messages will appear. Data from CAN bus will be updated every 3 seconds. In order to see only desired data open “Monitoring filters” menu.
Monitoring filters
Monitoring filters menu allows choosing which data will be shown in configuration menu. To enable/disable particular data monitoring use checkbox next to data name. To enable all data monitoring click Select all, to disable all data monitoring click Select none.
Note: CAN monitoring is FMB630 configurator function; it does not enable data sending to server. In order to configure data sending to server refer to Configuration section.


