Difference between revisions of "Teltonika Configuration Tool Installation manual"
| Line 2: | Line 2: | ||
== Introduction == | == Introduction == | ||
| − | To start using the Telematics Configuration Tool (TCT), you must meet the minimum system requirements | + | To start using the Telematics Configuration Tool (TCT), you must meet the minimum system requirements to install the software on your computer. |
| − | The process | + | The installation process is straightforward and does not differ from other desktop software. |
| − | == Minimum System Requirements == | + | == Minimum System Requirements== |
'''OS:''' Windows 7; Windows 10; Windows 11 | '''OS:''' Windows 7; Windows 10; Windows 11 | ||
| Line 19: | Line 19: | ||
'''Internet:''' Ethernet port or Wi-Fi w/ network access for auto-update | '''Internet:''' Ethernet port or Wi-Fi w/ network access for auto-update | ||
| − | == Telematics Configuration Tool Download Link == | + | ==Telematics Configuration Tool Download Link== |
To download the Teltonika Configurator Tool please click [https://wiki.teltonika-gps.com/view/Main_Page here]. | To download the Teltonika Configurator Tool please click [https://wiki.teltonika-gps.com/view/Main_Page here]. | ||
| − | == Telematics Configuration Tool Installation == | + | ==Telematics Configuration Tool Installation== |
| − | # Run the '''TelematicsConfigurationTool.Setup.exe''' with admin privileges' to begin the installation. | + | #Run the '''TelematicsConfigurationTool.Setup.exe''' with admin privileges' to begin the installation. |
| − | # Accept the license agreement to install the | + | #Accept the license agreement to install the TCT. |
| − | # Once you accept the license agreement, you can choose if the TCT software will be available for all users or only to you (currently login user). | + | #Once you accept the license agreement, you can choose if the TCT software will be available for all users or only to you (currently login user). |
| Line 33: | Line 33: | ||
<li style="display: inline-block;"> [[File:TCT_Installation.gif|alt=|900x900px|Caption 1]] </li> | <li style="display: inline-block;"> [[File:TCT_Installation.gif|alt=|900x900px|Caption 1]] </li> | ||
| − | # Select the location from where you want to install the TCT, by default, It is installed the program files, but you can install it in any location you preferred. | + | #Select the location from where you want to install the TCT, by default, It is installed the program files, but you can install it in any location you preferred. |
| − | # | + | #The progress bar will start until the installation is completed. |
| − | # Click Finish to complete the installation. | + | #Click Finish to complete the installation. |
[[File:Installation_TCT.gif|alt=|550x550px|Caption 1]] | [[File:Installation_TCT.gif|alt=|550x550px|Caption 1]] | ||
| − | == Virtual-COM Port Drivers Installation == | + | ==Virtual-COM Port Drivers Installation== |
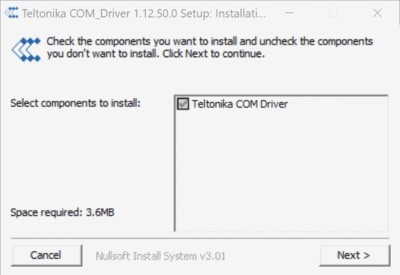
Virtual-COM Port Driver is a serial communication port driver for Teltonika Telematics device, It is one of the requirements for the TCT to work properly, without this driver the TCT will not detect your FM device. | Virtual-COM Port Driver is a serial communication port driver for Teltonika Telematics device, It is one of the requirements for the TCT to work properly, without this driver the TCT will not detect your FM device. | ||
| + | * To download the Virtual-COM Port Driver please click [https://wiki.teltonika-gps.com/images/d/d0/TeltonikaCOMDriver.zip here] | ||
[[File:Teltonika_ComDriver_installation.gif|alt=|400x400px]] | [[File:Teltonika_ComDriver_installation.gif|alt=|400x400px]] | ||
| + | * To Install the Virtual-COM Port Driver please follow the steps below: | ||
| + | #Run the '''Virtual-COM Port Driver''' with admin privileges' to begin the installation. | ||
| + | #Click the checkbox for '''Teltonika COM Driver''' | ||
| + | #Click next and modify/configure the destination folder for installation. | ||
| + | #Click '''Install'''. wait for the progress bar to be completed. | ||
| + | #And finally click '''close''' to exit the installation. | ||
| + | |||
| + | '''IMPORTANT NOTES''' | ||
| − | + | *During the installation the ''' Windows SmartScreen''' might pop up. | |
| − | |||
| − | |||
| − | |||
| − | |||
| − | |||
| − | * During the installation | ||
[[File:ImageSmartScreen1.png|alt=|451x451px]] | [[File:ImageSmartScreen1.png|alt=|451x451px]] | ||
| − | * If the ''' Windows SmartScreen ''' pop up, you must click on ''' More info''' | + | *If the ''' Windows SmartScreen ''' pop up, you must click on ''' More info'''. |
| + | * Additional information about the application will display: | ||
[[File:ImageSmartScreen2.png|alt=|453x453px]] | [[File:ImageSmartScreen2.png|alt=|453x453px]] | ||
| − | * Take note that the application name should be '''TelematicsConfigurationTool.Setup.x.x.xx.exe'''. | + | *Take note that the application name should be '''TelematicsConfigurationTool.Setup.x.x.xx.exe'''. |
| − | * x represents the version of the setup (.exe file), so it can differ according to the installer version that you have. | + | *x represents the version of the setup (.exe file), so it can differ according to the installer version that you have. |
| − | * You must confirm that the publisher is indeed from '''TELTONIKA TELEMATICS'''. | + | *You must confirm that the publisher is indeed from '''TELTONIKA TELEMATICS'''. |
| − | * If everything is correct, please click ''' Run anyway''' | + | *If everything is correct, please click ''' Run anyway''' |
| − | * After confirmation the installation setup start will immediately. | + | *After confirmation the installation setup start will immediately. |
| − | + | ==Offline Configuration File== | |
| − | == | ||
| − | |||
| − | |||
| − | |||
| − | |||
*To create a new configuration file, choose/search for the device you want from the list. | *To create a new configuration file, choose/search for the device you want from the list. | ||
| − | * Click the | + | *Click the '''Configure''' button. |
*This will then take you to the configuration screen. | *This will then take you to the configuration screen. | ||
| Line 79: | Line 78: | ||
| − | == | + | ==Online Configuration File== |
| − | *To start configuring a connected device, click the | + | *To start configuring a connected device, click the '''Configure''' under Discovered devices. |
[[Image:Configure_Connected_Device.gif|center]] | [[Image:Configure_Connected_Device.gif|center]] | ||
| + | ==Offline vs Online Configuration== | ||
| + | |||
| + | Offline Configuration refers to creating configuration without any device connected, you can save this Configuration File and then load it to the device remotely or when there is an available device connected. On the other hand, Online Configuration refers to creating a configuration with a device connected whereas you can directly save the changes on the device. | ||
| − | ==Opening An Existing Configuration File == | + | ==Opening An Existing Configuration File== |
| − | *To open an existing configuration file, click on the three dots and click | + | *To open an existing configuration file, click on the three dots and click '''Open'''. |
| − | * | + | *Locate your configuration file (.cfg file ) and click '''Open'''. |
| − | *TCT will load the configuration file | + | *TCT will load the configuration file where you will be able to edit and save your any changes that you made. |
[[Image:Open_Configuration_TCT.gif|center]] | [[Image:Open_Configuration_TCT.gif|center]] | ||
Revision as of 13:28, 17 March 2023
Introduction
To start using the Telematics Configuration Tool (TCT), you must meet the minimum system requirements to install the software on your computer. The installation process is straightforward and does not differ from other desktop software.
Minimum System Requirements
OS: Windows 7; Windows 10; Windows 11
CPU: Intel or AMD processor with 64-bit support
Disk Storage: 500 MB of free disk space
Memory: 500 MB of free RAM
Graphics: DirectX 9 or later with WDDM 1.0 driver
Internet: Ethernet port or Wi-Fi w/ network access for auto-update
Telematics Configuration Tool Download Link
To download the Teltonika Configurator Tool please click here.
Telematics Configuration Tool Installation
- Run the TelematicsConfigurationTool.Setup.exe with admin privileges' to begin the installation.
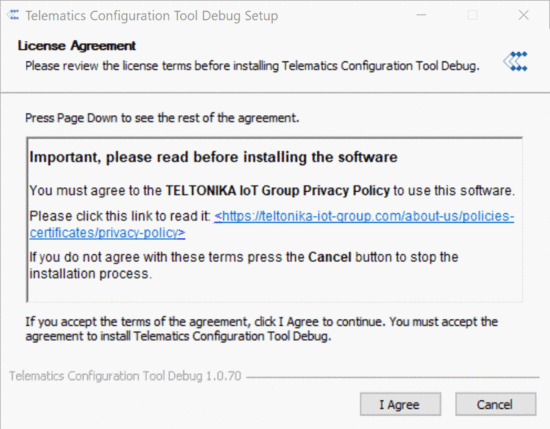
- Accept the license agreement to install the TCT.
- Once you accept the license agreement, you can choose if the TCT software will be available for all users or only to you (currently login user).
-

- Select the location from where you want to install the TCT, by default, It is installed the program files, but you can install it in any location you preferred.
- The progress bar will start until the installation is completed.
- Click Finish to complete the installation.
- To download the Virtual-COM Port Driver please click here
- To Install the Virtual-COM Port Driver please follow the steps below:
- Run the Virtual-COM Port Driver with admin privileges' to begin the installation.
- Click the checkbox for Teltonika COM Driver
- Click next and modify/configure the destination folder for installation.
- Click Install. wait for the progress bar to be completed.
- And finally click close to exit the installation.
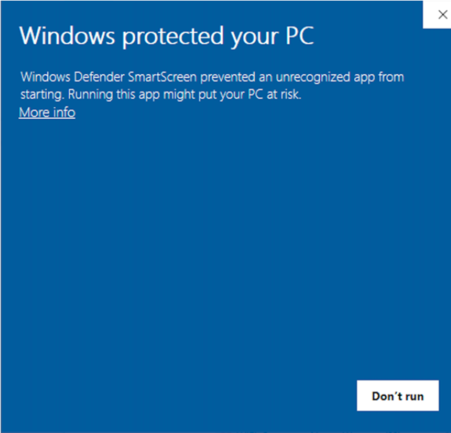
- During the installation the Windows SmartScreen might pop up.
- If the Windows SmartScreen pop up, you must click on More info.
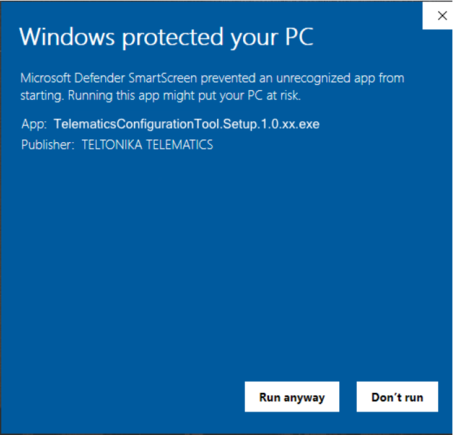
- Additional information about the application will display:
- Take note that the application name should be TelematicsConfigurationTool.Setup.x.x.xx.exe.
- x represents the version of the setup (.exe file), so it can differ according to the installer version that you have.
- You must confirm that the publisher is indeed from TELTONIKA TELEMATICS.
- If everything is correct, please click Run anyway
- After confirmation the installation setup start will immediately.
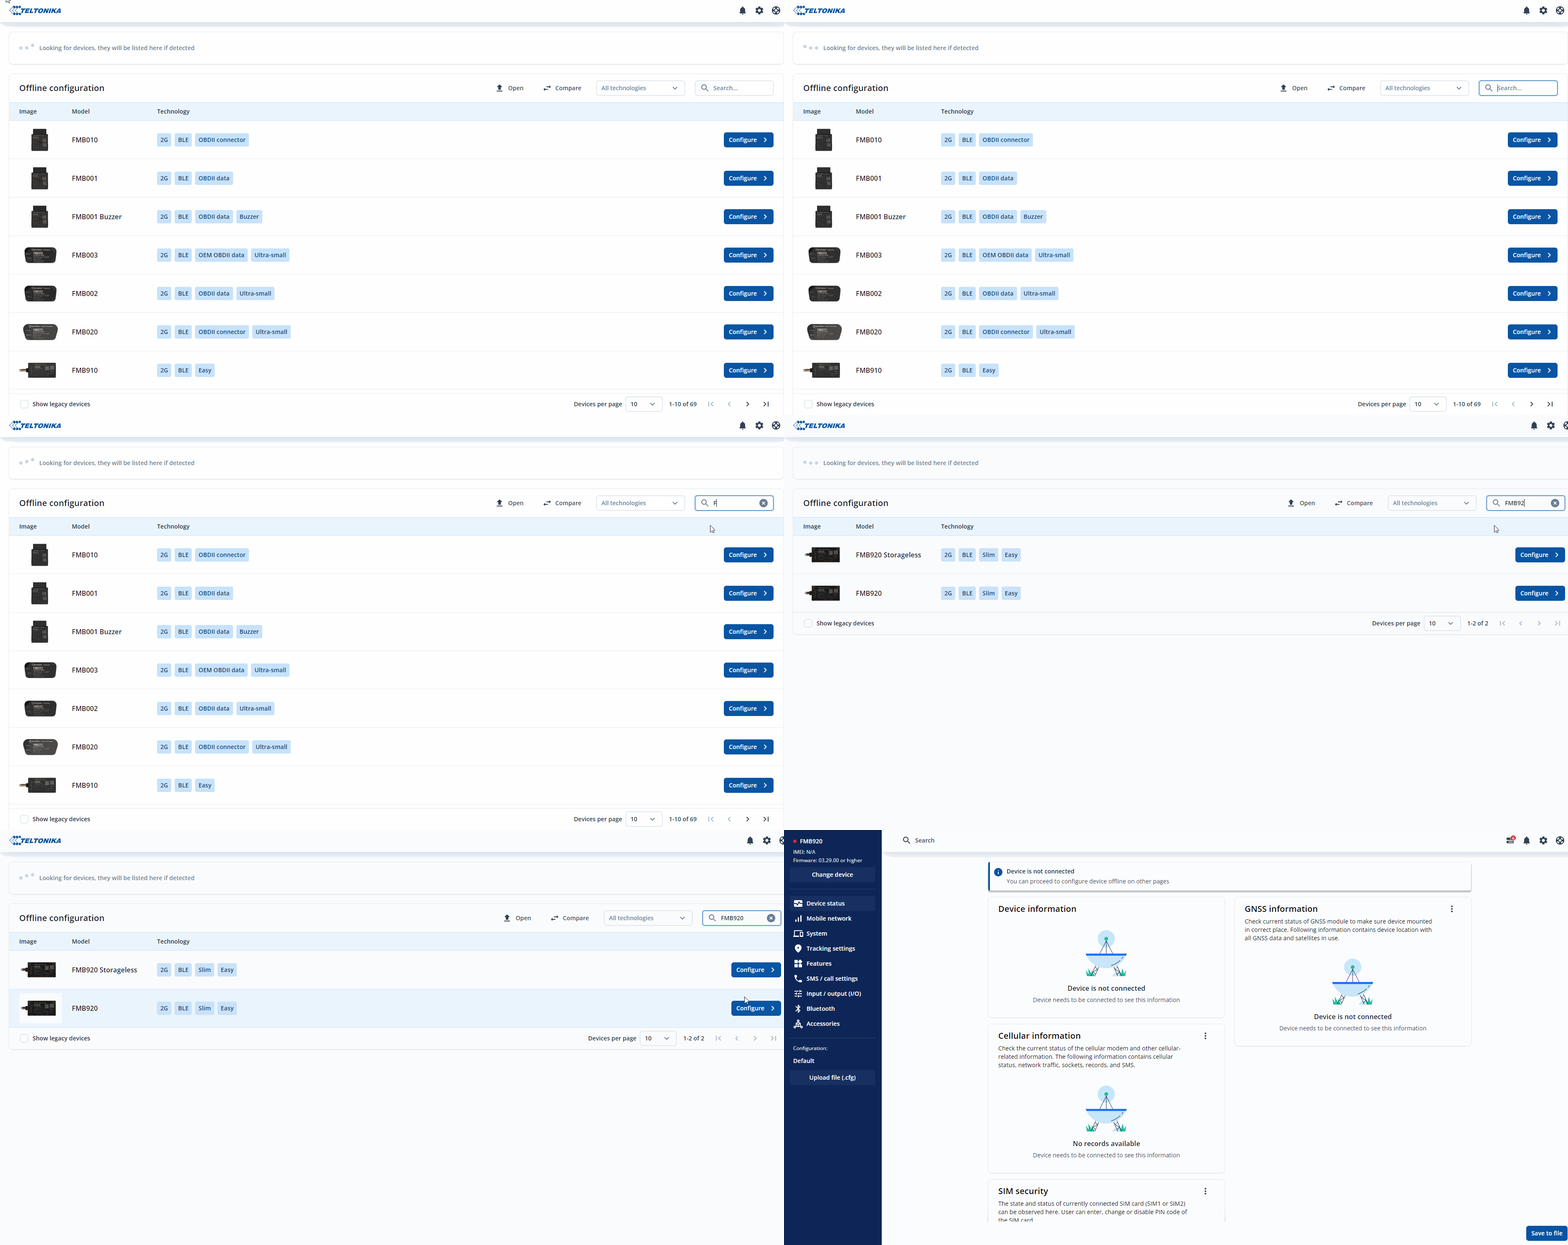
- To create a new configuration file, choose/search for the device you want from the list.
- Click the Configure button.
- This will then take you to the configuration screen.
- To start configuring a connected device, click the Configure under Discovered devices.
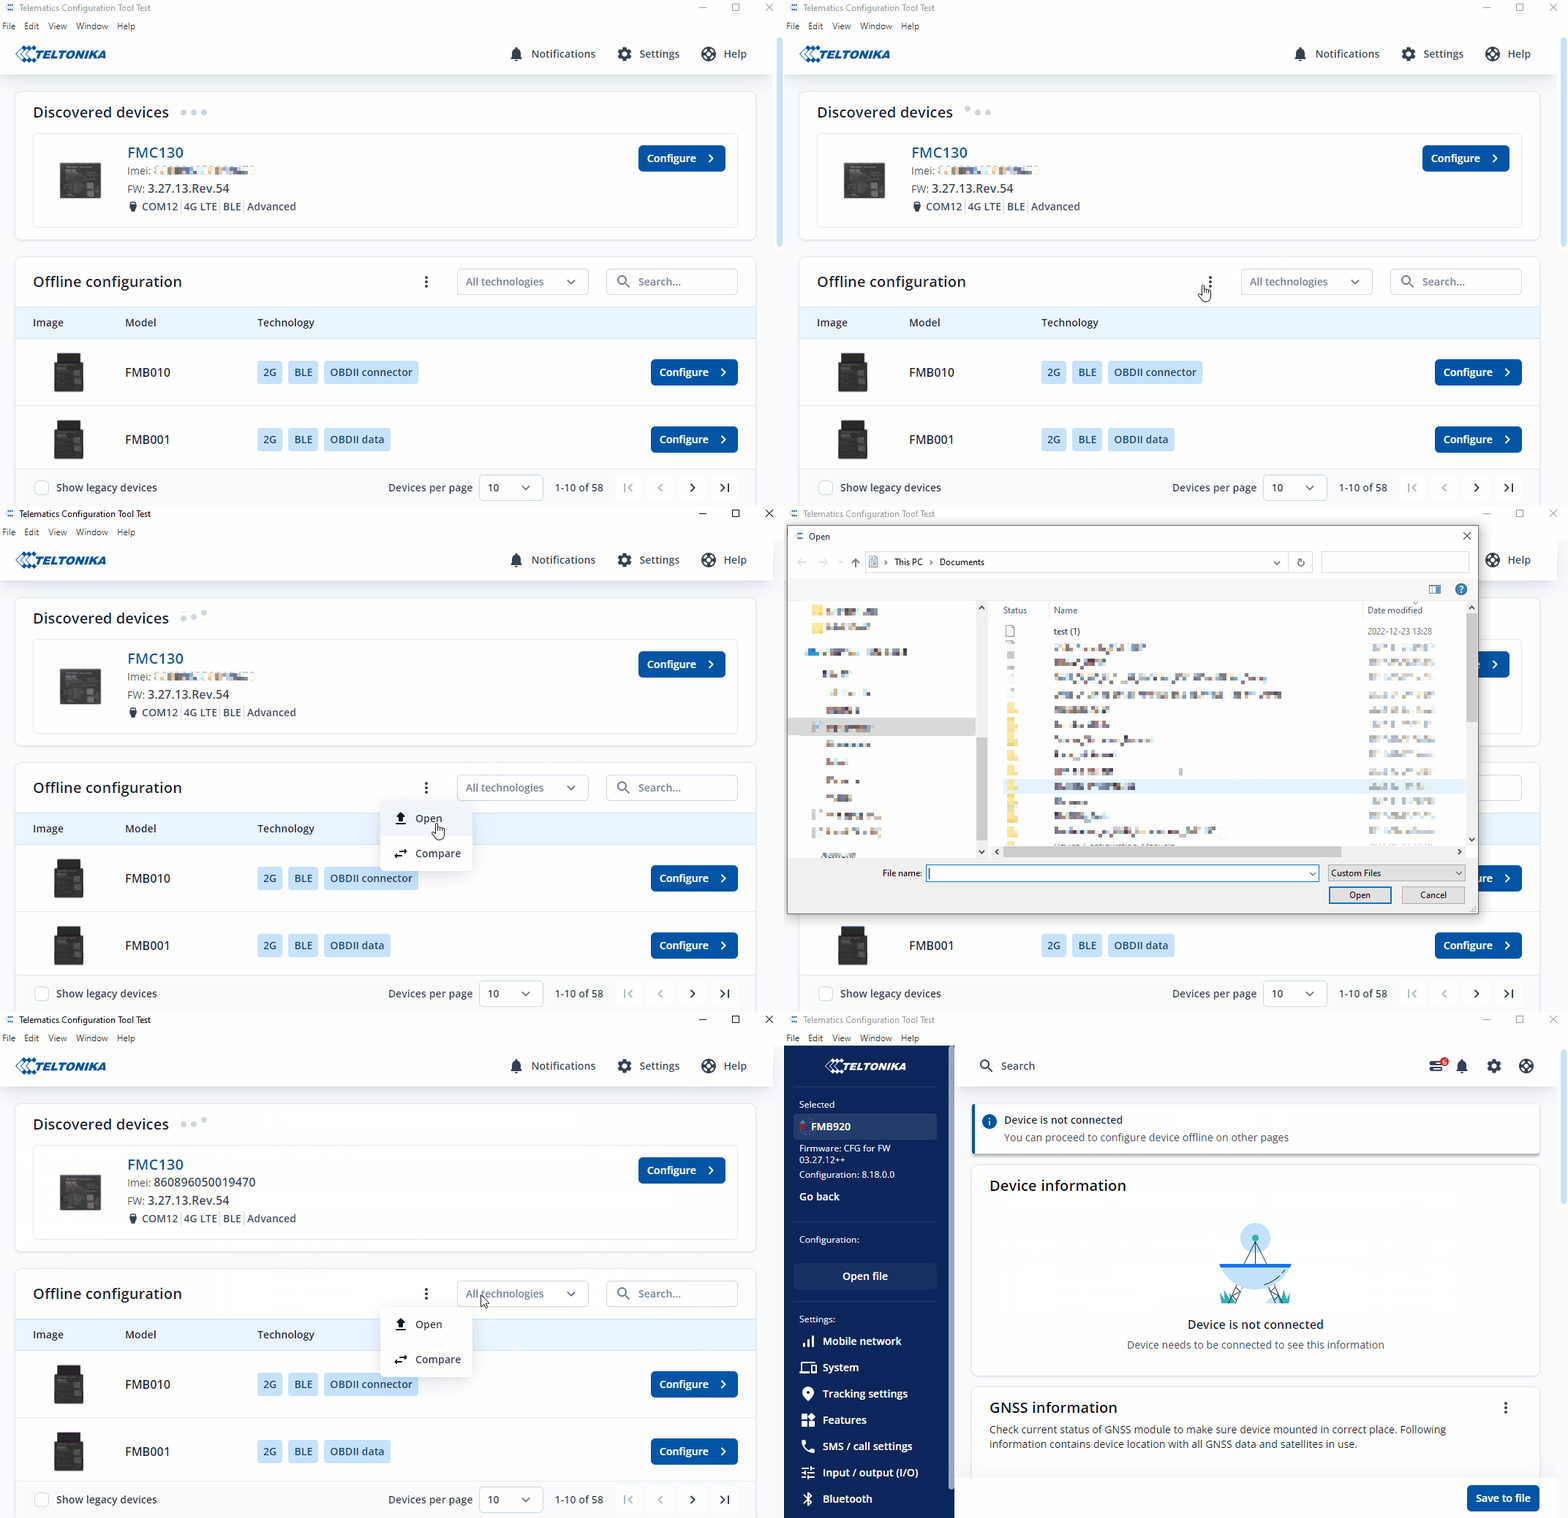
- To open an existing configuration file, click on the three dots and click Open.
- Locate your configuration file (.cfg file ) and click Open.
- TCT will load the configuration file where you will be able to edit and save your any changes that you made.
Virtual-COM Port Drivers Installation
Virtual-COM Port Driver is a serial communication port driver for Teltonika Telematics device, It is one of the requirements for the TCT to work properly, without this driver the TCT will not detect your FM device.
IMPORTANT NOTES
Offline Configuration File
Online Configuration File
Offline vs Online Configuration
Offline Configuration refers to creating configuration without any device connected, you can save this Configuration File and then load it to the device remotely or when there is an available device connected. On the other hand, Online Configuration refers to creating a configuration with a device connected whereas you can directly save the changes on the device.
