Difference between revisions of "Wialon+DSM solution"
m |
(+changing rs232 to dsm) |
||
| Line 2: | Line 2: | ||
__TOC__ | __TOC__ | ||
| − | == | + | == DSM on Wialon platform == |
For monitoring our device we have a lot of third-party platforms but only one at the moment which supports the [https://wiki.teltonika-gps.com/view/DSM DSM] solution is Wialon. | For monitoring our device we have a lot of third-party platforms but only one at the moment which supports the [https://wiki.teltonika-gps.com/view/DSM DSM] solution is Wialon. | ||
In this chapter, we will show you how to configure the device and also how to configure the Wialon platform for receiving information from DSM. | In this chapter, we will show you how to configure the device and also how to configure the Wialon platform for receiving information from DSM. | ||
| Line 15: | Line 15: | ||
'''Step 2''' | '''Step 2''' | ||
| + | |||
| + | Enable DSM RS-232 working mode via RS232/RS485 configuration tab. | ||
| + | |||
| + | [[File:Dsm_rs232.gif|alt=|frameless]] | ||
| + | |||
| + | '''Step 3''' | ||
Configure IP and Port for the device to send AVL data to the Wialo and configure IP and port for photo transmission from the DSM. <br> | Configure IP and Port for the device to send AVL data to the Wialo and configure IP and port for photo transmission from the DSM. <br> | ||
| Line 22: | Line 28: | ||
| − | '''Step | + | '''Step 4''' |
Wialon supports both periodical and trigger-based photo reception; therefore "File upload settings" can be configured as it is required for Your use case. | Wialon supports both periodical and trigger-based photo reception; therefore "File upload settings" can be configured as it is required for Your use case. | ||
| − | [[File:DSM_n_W_4.jpg|alt=|frameless | + | [[File:DSM_n_W_4.jpg|alt=|frameless]] |
| − | '''Step | + | '''Step 5''' |
Wialon has implemented manual photo requests. To request the photo manually, please create a command with the type "query_photo_dsm". | Wialon has implemented manual photo requests. To request the photo manually, please create a command with the type "query_photo_dsm". | ||
| − | [[File:DSM_n_W_5.jpg|alt=|frameless | + | [[File:DSM_n_W_5.jpg|alt=|frameless]] |
| − | '''Step | + | '''Step 6''' |
After executing the command, the following response should be received: "Current snapshot request added to queue". | After executing the command, the following response should be received: "Current snapshot request added to queue". | ||
| Line 40: | Line 46: | ||
[[File:DSM_n_W_6.jpg|alt=|frameless]] | [[File:DSM_n_W_6.jpg|alt=|frameless]] | ||
| − | '''Step | + | '''Step 7''' |
After receiving the photo in the bottom-right corner notification will appear, after clicking on it, the received photo will pop-up. | After receiving the photo in the bottom-right corner notification will appear, after clicking on it, the received photo will pop-up. | ||
[[File:DSM_n_W_7.jpg|alt=|frameless]] | [[File:DSM_n_W_7.jpg|alt=|frameless]] | ||
Revision as of 09:14, 11 April 2023
DSM on Wialon platform
For monitoring our device we have a lot of third-party platforms but only one at the moment which supports the DSM solution is Wialon. In this chapter, we will show you how to configure the device and also how to configure the Wialon platform for receiving information from DSM.
Device configuration
Step 1
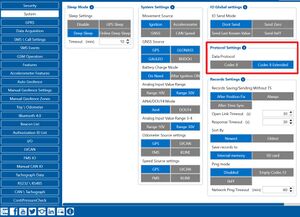
Enable Codec 8 Extended.
Step 2
Enable DSM RS-232 working mode via RS232/RS485 configuration tab.
Step 3
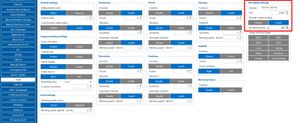
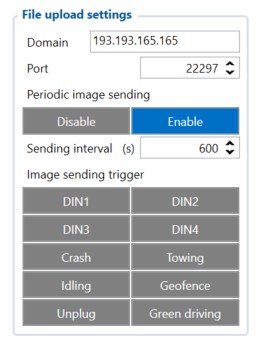
Configure IP and Port for the device to send AVL data to the Wialo and configure IP and port for photo transmission from the DSM.
Please note, that the photos transmission port is 22297.
Step 4
Wialon supports both periodical and trigger-based photo reception; therefore "File upload settings" can be configured as it is required for Your use case.
Step 5
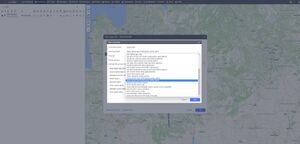
Wialon has implemented manual photo requests. To request the photo manually, please create a command with the type "query_photo_dsm".
Step 6
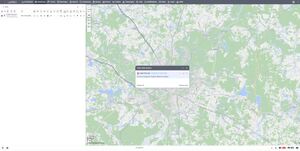
After executing the command, the following response should be received: "Current snapshot request added to queue".
Step 7
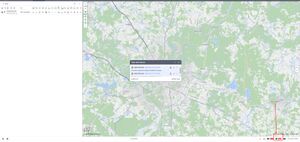
After receiving the photo in the bottom-right corner notification will appear, after clicking on it, the received photo will pop-up.
