Java Parser First Start Guide: Difference between revisions
No edit summary |
mNo edit summary |
||
| Line 26: | Line 26: | ||
[[File:Java5new2.jpg|frameless|508x508px]] | [[File:Java5new2.jpg|frameless|508x508px]] | ||
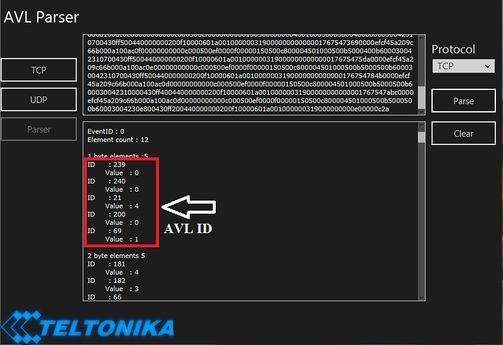
'''Step 7:''' AVL ID are shown in photo below, to find the required AVL ID please visit: [[ | '''Step 7:''' AVL ID are shown in photo below, to find the required AVL ID please visit AVL ID list for the specific FM device (for example: [[FMB120 Teltonika Data Sending Parameters ID|FMB120]] | ||
[[File:Javanenene2.jpg|frameless|503x503px]] | [[File:Javanenene2.jpg|frameless|503x503px]] | ||
Revision as of 13:42, 14 May 2021
Step 1: To open parser Software you will need to install: Java
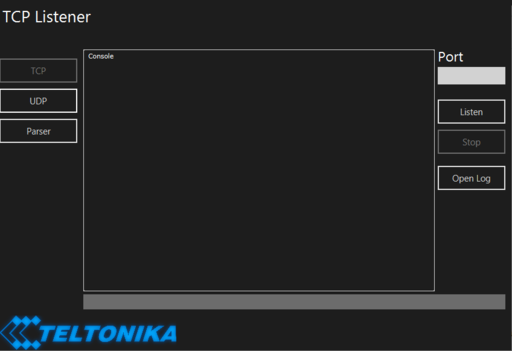
Step 2: Open parser Software. If you want to get a download link to this software, please contact your sales manager specifying this page link.
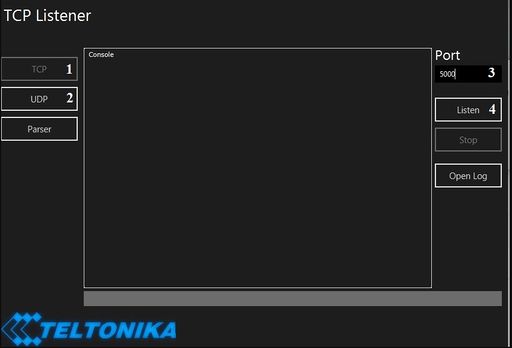
Step 3: Once opened, select TCP (1) or UDP (2) depending on the configuration done on the device. Type in the port number (3) that you have opened on the router in the "Port" section. After adding the port, press the "Listen" button (4).
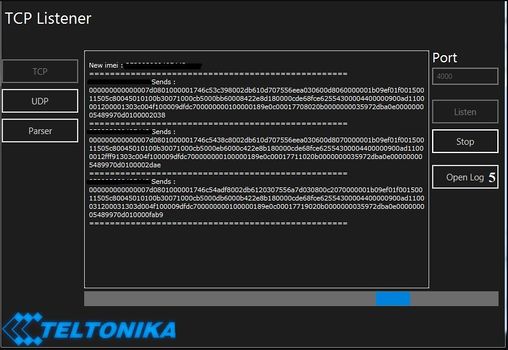
Step 4: Once button “Listen” is selected, the software will start accepting data sent by the devices. Data received is stored in the session LOG files, which are found by clicking "Open Log" button (5).
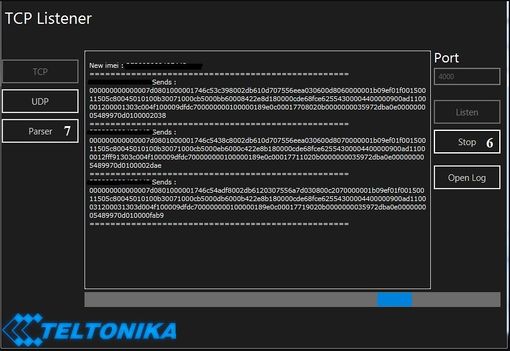
Step 5: Once you received data from the device, you can push the "Stop" button (6) and copy data that you want to decode and go to "Parser" (7).
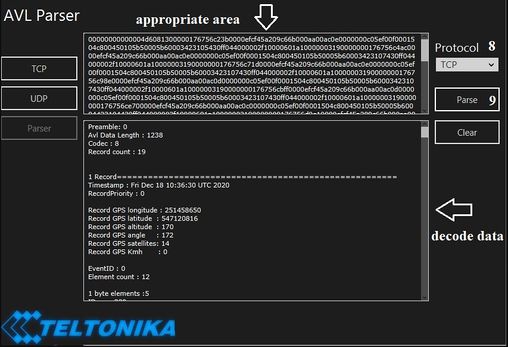
Step 6: Paste your data in an appropriate area and select which data protocol (8) and push the "Parse" button (9). You will receive decode data.
Step 7: AVL ID are shown in photo below, to find the required AVL ID please visit AVL ID list for the specific FM device (for example: FMB120

