Configuring EYE sensors
Configuring EYE sensors
Devices work constantly and are ready to perform out of the box. Default basic Sensor settings are set to:
- Transmitting at 2 dBm power;
- Data advertising at 1 second intervals;
- Eddystone and Sensors protocol.
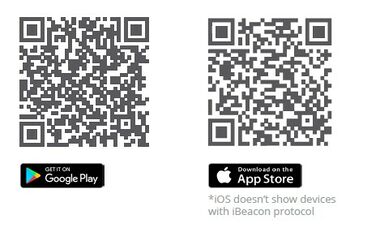
If you would like to change these settings you will need to download and install EYE APP - Teltonika application to change sensor settings.
 |
EYE App Overview
With the application you will be able to scan for visible Teltonika EYE devices, check their statuses or connect for configuration or firmware update.
 |
 |
 |
 |
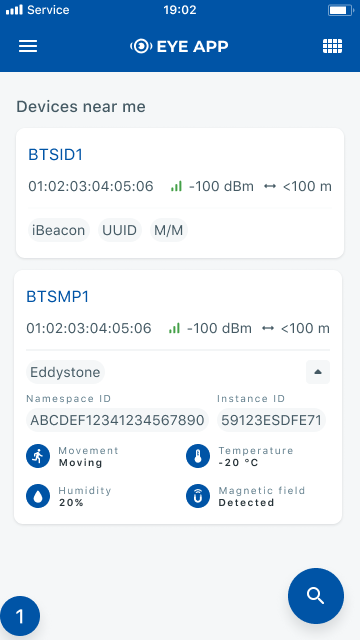
 Devices in view
In this window you will see all visible devices. You have options to see devices in Short list ![]() or in default list. When looking at devices in default list you will be able to open Detailed view
or in default list. When looking at devices in default list you will be able to open Detailed view ![]() of devices and check transmitted data statuses. Additionaly if you are looking for specific devices you will be able to use Search
of devices and check transmitted data statuses. Additionaly if you are looking for specific devices you will be able to use Search ![]() function to filter search options. When in this window select a device of your choice to connect and after passing pin code (default pin code is 123456) you will go to device overview window.
function to filter search options. When in this window select a device of your choice to connect and after passing pin code (default pin code is 123456) you will go to device overview window.
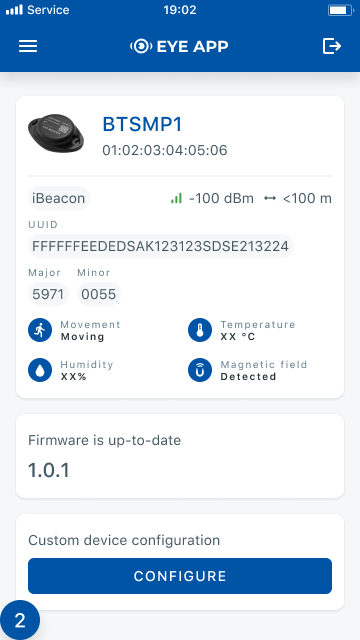
 Overview window
In overview window you can see device details, check firmware version and update if available , go to device configuration settings. If you select to Configure device new window will open with Basic and Advanced settings.
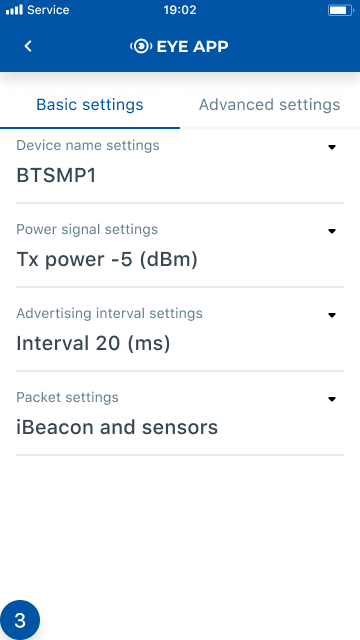
 Configure window
In this window you can check and change device configuration settings. In main tab Basic Settings you can change main settings. Change Device name, Power signal strength, Advertising interval and Packet transmission type*. For more settings go to Advanced settings tab to enable various events.
Advanced configuration: Beacon Settings
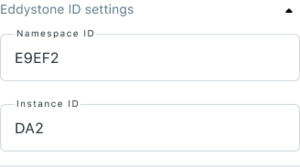 |
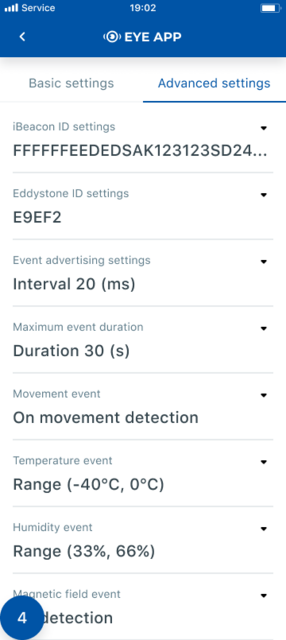
In Advanced settings tab you can configure EYE beacon sensor parameters: Beacon information (iBeacon ID*, Eddystone ID). UUID/MINOR/MAJOR parameter can be changed for iBeacon ID*. Namespace ID/Instance ID can be changed for Eddystone ID. If you scroll down you will be able to adjust Sensor reading interval and event settings of the EYE Sensor Note: iOS doesn't show devices with iBeacon protocol
Advanced configuration: Magnetic field event
 |
 |
Magnetic field event - adjust if the device generates events based on detection or exit (loss) of the magnet. |
Maximum event duration - how long will one event be advertised |
Advanced configuration: Humidity event
 |
 |
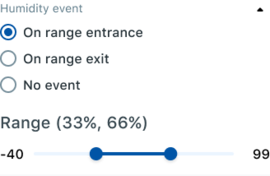
Humidity event - adjust if the device generates events based on entrance or exit to selected humidity range |
Event advertising settings - advertising period after event detection |
Advanced configuration: Temperature event
 |
 |
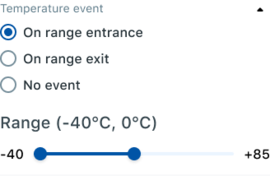
Temperature event - adjust if the device generates events based on entrance or exit to selected temperature range |
Sensor reading interval - how often values are updated by the device |
Advanced configuration: Movement event
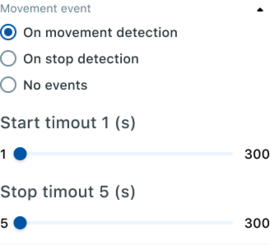 | |
Movement event - adjust movement/stop detection and timeouts it takes to register movement / stopping |
Configuring device with EYE sensors
Step 1: Check EYE App Settings:
- Make sure that name of the sensor is default length (10 symbols)
- Note what Packet settings you have set
Step 2: Configure device using Teltonika configurator:
- In System settings tab Enable Codec8 Extended;
- In GPRS settings tab Configure GPRS Settings and Server Settings
- In Bluetooth® settings tab Enable Bluetooth®, set this setting as either "Enable (hidden)" or "Enable (visible)", otherwise Bluetooth® will be disabled;
- In Bluetooth® 4.0 tab settings:
- set Non Stop Scan to "Disable", configure "Update Frequency" and "Scan duration" as 30 seconds. These settings will bring the best results for BLE scanning with our device;
- In Bluetooth® 4.0 tab settings Advanced Mode Settings Load EYE Sensor preset according to packet settings in EYE app(if you do not have preset you can download them from below table)
- Configure MAC address of the sensor
- To receive data to server enable corresponding IO elements in I/O settings tab
EYE sensor presets
Using premade EYE sensor presets
The configurator can include premade presets.

| NOTE! | In order to have sensor presets included in the configurator, every preset has to be recorded in the configuration, saved to a file and placed to Documents folder of your computer. |
| EYE Sensor Packet Setting: | 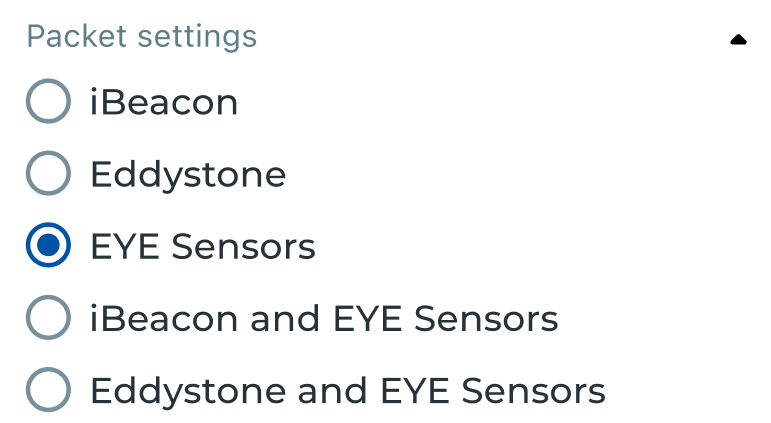
|
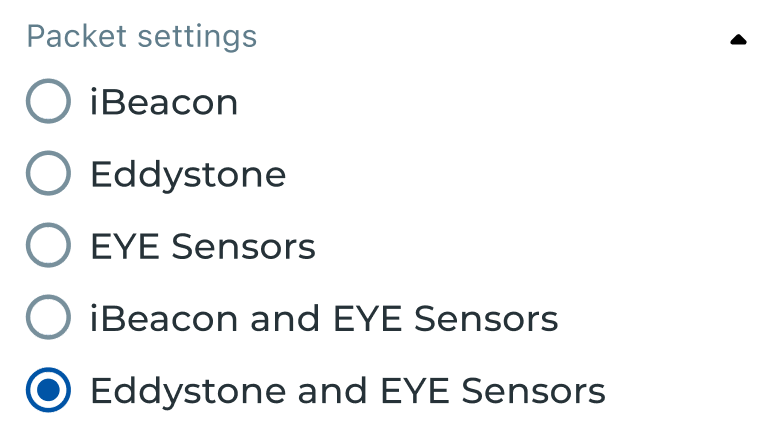
| |
| Preset you should use: | EYE Sensors | EYE iBeacon | EYE Eddystone |
| TAT100 Preset download link: | |||
| TMT250, GH5200, TFT100, TST100 Preset download link: |
Presets for TAT100 device
For the TAT100 there is only one preset for all Sensors modes (Sensors, iBeacon & Sensors and Eddystone & Sensors modes)
| Type | Data Offset | Data Size | Action | IO | Match | Endianess | Multiplier | Offset |
|---|---|---|---|---|---|---|---|---|
| FF | 0 | 2 | Match | None | 9A08 | Big Endian | 1 | 0 |
| FF | 4 | 2 | Save | Temperature | Little Endian | 1 | 0 | |
| FF | 6 | 1 | Save | Humidity | Little Endian | 10 | 0 | |
| FF | 7 | 2 | Save | Custom1 | Big Endian | 1 | 0 | |
| FF | 12 | 1 | Save | Battery | Little Endian | 1 | 0 |
Presets for TMT250, GH5200, TFT100 and TST100 devices
EYE SENSOR (Sensors)
EYE sensor (Sensors mode) configuration
| Type | Data Offset | Data Size | Action | IO | Match | Endianess | Multiplier | Offset |
|---|---|---|---|---|---|---|---|---|
| FE | 20 | 2 | Save | Temperature | Little Endian | 1 | 0 | |
| FE | 22 | 1 | Save | Humidity | Little Endian | 10 | 0 | |
| FE | 23 | 2 | Save | Custom1 | Big Endian | 1 | 0 | |
| FE | 28 | 1 | Save | Battery | Little Endian | 1 | 0 |
EYE SENSOR (iBeacon & Sensors)
EYE sensor (iBeacon & Sensors mode) configuration
| Type | Data Offset | Data Size | Action | IO | Match | Endianess | Multiplier | Offset |
|---|---|---|---|---|---|---|---|---|
| 09 | 15 | 2 | Save | Temperature | Little Endian | 1 | 0 | |
| 09 | 17 | 1 | Save | Humidity | Little Endian | 10 | 0 | |
| 09 | 18 | 2 | Save | Custom1 | Big Endian | 1 | 0 | |
| 09 | 23 | 1 | Save | Battery | Little Endian | 1 | 0 |
EYE SENSOR (Eddystone & EYE Sensors)
EYE sensor (Eddystone & EYE sensors mode) configuration
| Type | Data Offset | Data Size | Action | IO | Match | Endianess | Multiplier | Offset |
|---|---|---|---|---|---|---|---|---|
| FF | 4 | 2 | Save | Temperature | Little Endian | 1 | 0 | |
| FF | 6 | 1 | Save | Humidity | Little Endian | 10 | 0 | |
| FF | 7 | 2 | Save | Custom1 | Big Endian | 1 | 0 | |
| FF | 12 | 1 | Save | Battery | Little Endian | 1 | 0 |

