Azure IoT Hub (Draft)
NOTE
| MQTT protocol is only implemented in base 28 and above FW and Configurators. This guide will not work with earlier versions of FW and CONFIGURATOR. |
Setup your Azure account
Refer to the online Azure documentation. Follow the steps outlined in the sections below to create your IoT hub and get started:
NOTE – The examples in this document are intended only for dev environments. All devices in your production fleet must have credentials with privileges that authorize only intended actions on specific resources. The specific permission policies can vary for your use case. Identify the permission policies that best meet your business and security requirements.
Create Resources in Azure IoT
Refer to the online Microsoft Azure documentation. Follow the steps outlined in these sections to provision resources for your device:
NOTE – The examples in this document are intended only for dev environments. All devices in your production fleet must have credentials with privileges that authorize only intended actions on specific resources. The specific permission policies can vary for your use case. Identify the permission policies that best meet your business and security requirements.
Guide in PDF
The full Azure IoT guide can be downloaded in PDF format [here]
Azure IoT hub Creation
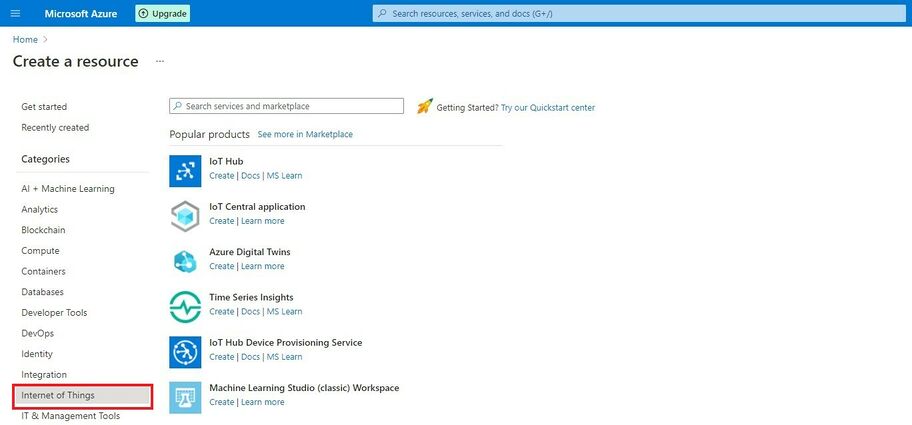
When logged in the Azure console, Pressand select – create new resource.
Select Internet of things in the Categories on the left.
Press Create near theicon.
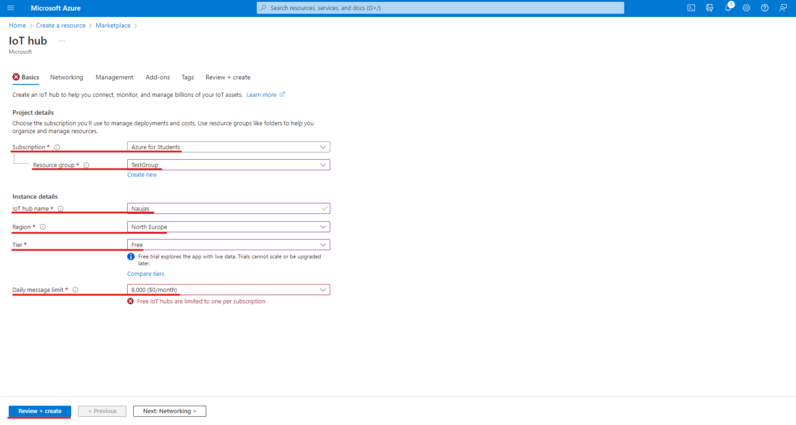
Basics tab
1. In the Basics tab choose your subscription. Create a new Resource group. Enter IoT hub name (Can be any created name). Select Region that is closest to you (North Europe for Lithuania).
2. Choose the wanted Tier, Free tier should be used for testing purpose, alternatively use standard. (You can find all the necessary information about tiers when you click Comapare tiers below option box).
3. Then choose your Daily message limit according to your needs (8000 for Free plan) (You can find all the necessary information about Daily message limit when you click See all options below option box).
4. Press: Review + create
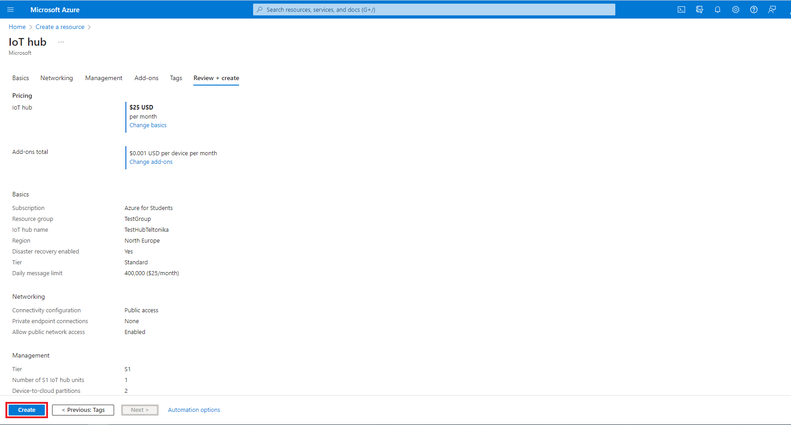
Check if all the parameters are as you intended and click Create.
Add device to IoT hub
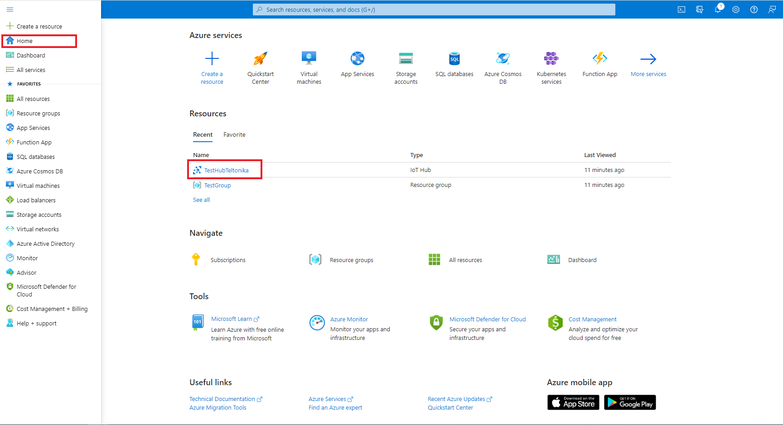
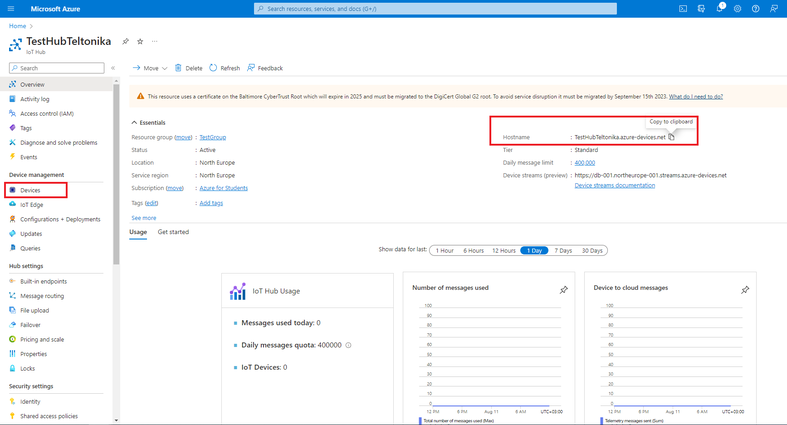
Press, Home and click on your created IoT Hub.
Copy hostname and press devices In the left menu.
| If you see a warning: | |
Go to: Migrate to DigiCert Global G2 at the bottom of this tutorial. |
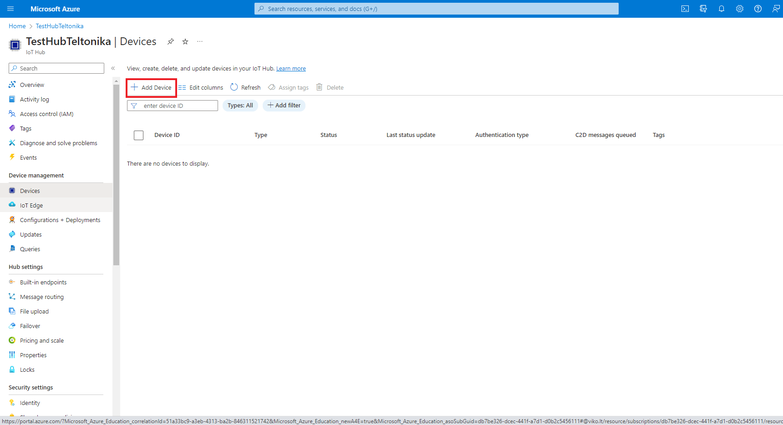
Select Add Device in Devices tab.
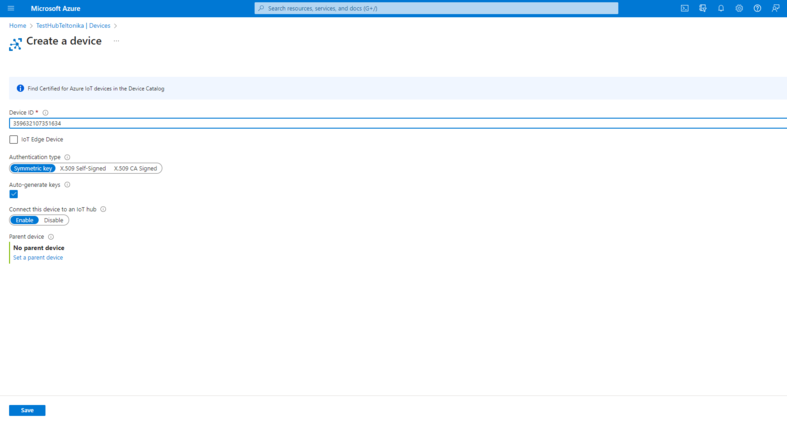
Once you are inside Create a device tab:
1. Enter your device IMEI in the device ID field.
2. Other fields here should be left default
3. Authentication type: Symmetric key Connection this device to an Iot Hub: Enabled
4. Press save.
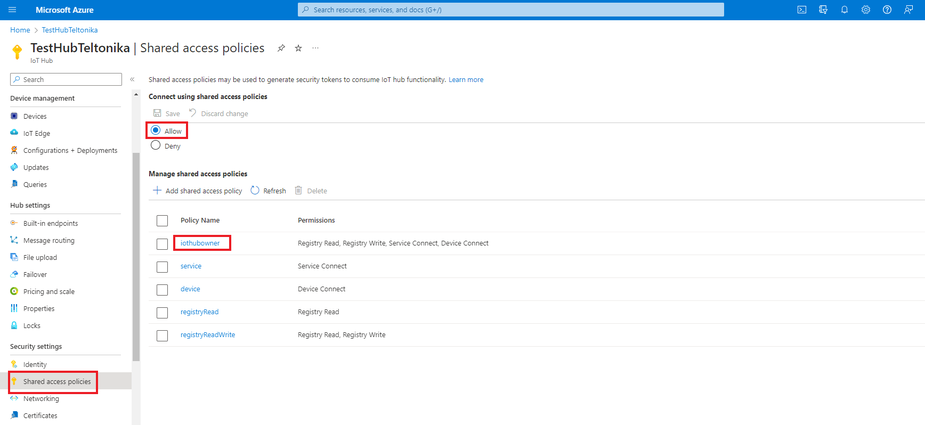
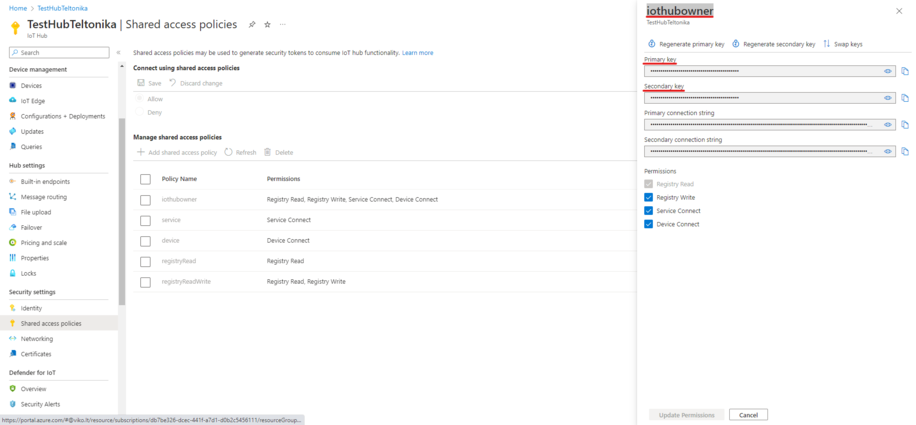
To get your primary and secondary keys go to Shared access policies, change Connect using shared access policies to Allow and click on iothubowner.
An iothubowner tab will pop out on the right (These files will be used in configuration).

Copy:
1.Primary key
2.Secondary key
3.“iothubowner”
Configuration
| Please note: Configurator > System > Data protocol: Codec 8 or JSON protocol can be used. |
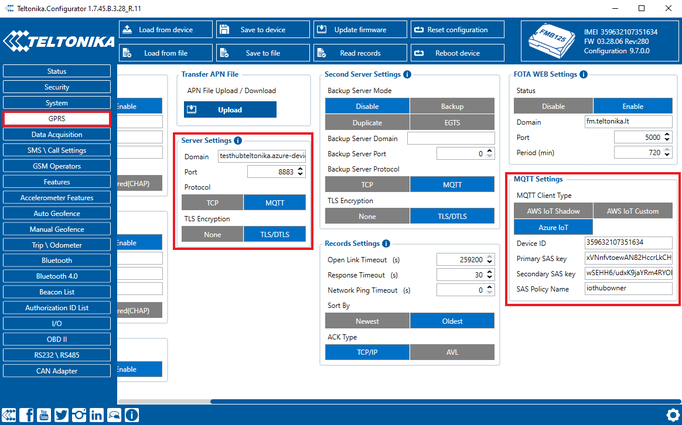
In the GPRS tab, under Server Settings select:

1.Domain – Hostname (copy here the host name from your Iot Hub overview window in Azure)
2.Port: 8883
3.Protocol – MQTT
4.TLS Encryption – TLS/DTLS

In the GPRS tab, under MQTT Settings select:

1.MQTT Client type – Azure IoT
2.Device ID: IMEI
3.Primary SAS key – Primary key from ‘iothubowner’ shared access policy
4.Secondary SAS key – Secondary key from ‘iothubowner’ shared access policy
5.SAS Policy Name – iothubowner
Certificate creation and upload
Download DigiCert Global Root G2 certificate and put it inside a new folder: Download DER/CRT
Converting certificate to .pem format
Follow the tutorial to convert certificate here
| Please note: Configurator only accepts PEM FILE format. You can use any method to convert .crt file to .pem format. |
Upload certificate to device
Upload the file you have created to the device using configurator > Security > Certificate > upload
Data sending
Trigger a high priority event so that device would start to send data to the server.
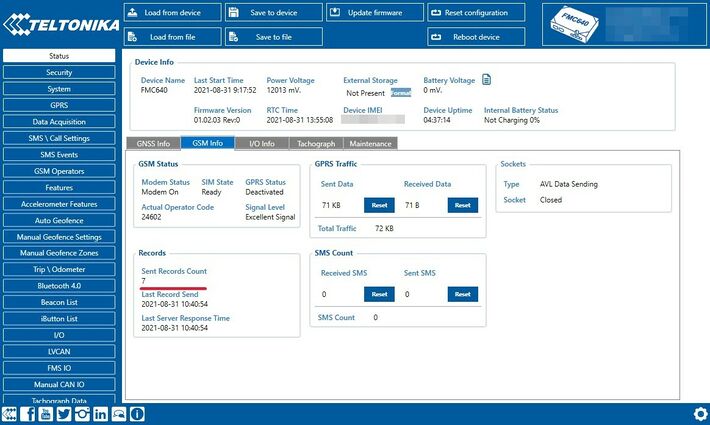
In the device configurator screen check for the Status > GSM Info > Records Sent records count.
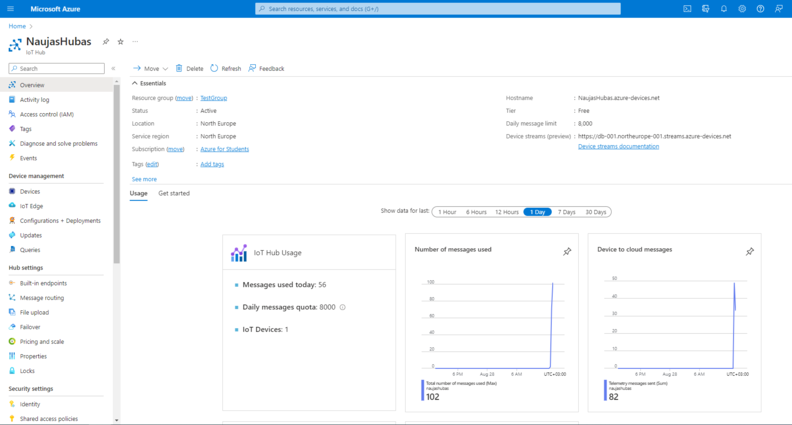
On the Azure service > IOT hub > Overview there is a Device to cloud chart that will show the records received.
| Please note: This window has noticeable delay. |
c
Downloading and installing Azure IoT Explorer
Data sent from device can be found in the Azure IoT Explorer

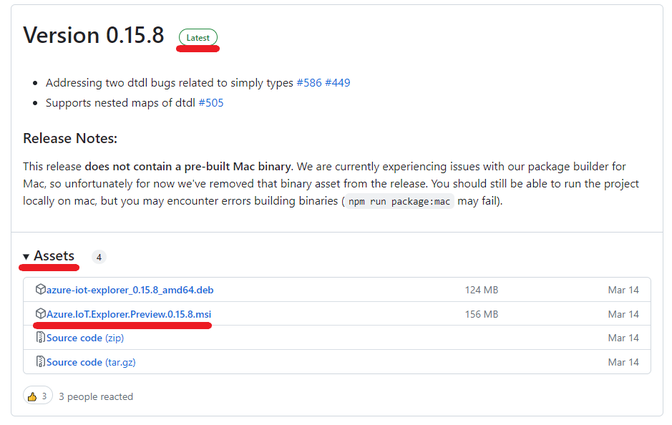
Go to: Azure IoT Explorer releases
Find the latest version and download the file with .msi header:
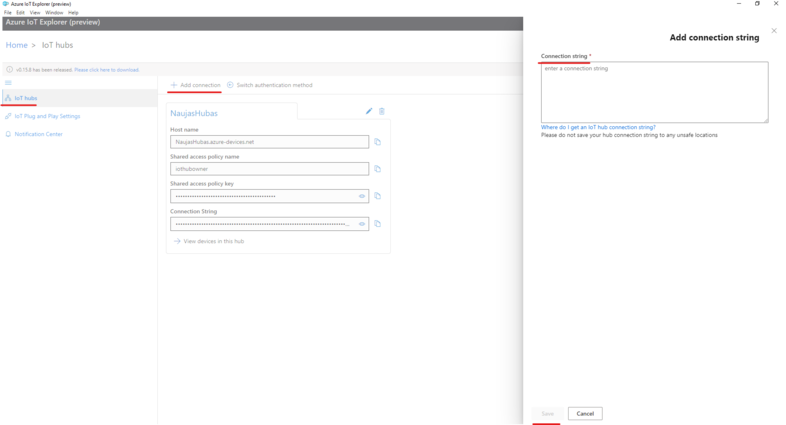
After opening Azure explorer click:

1. IoThubs
2. Add connection

In the pop-up bar enter primary connection string which you can get from Shared access policies which was explored in section Shared access policies.

Click save after completion.
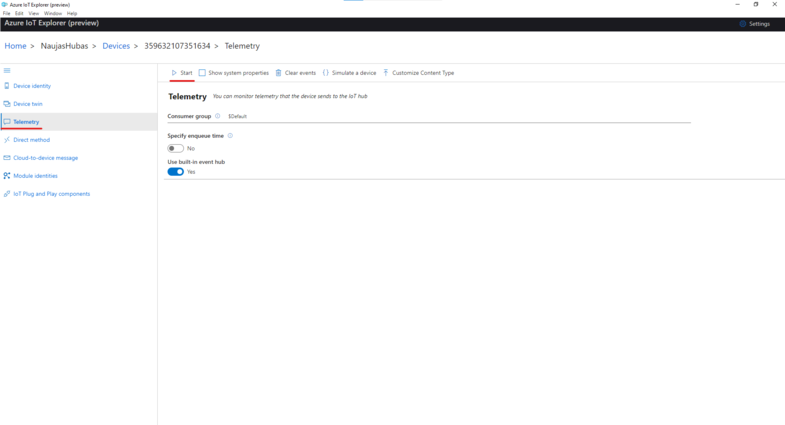
Click ib the Name of your hub which will be in blue color.

Select the device that you want to explore by clicking on it’s IMEI.

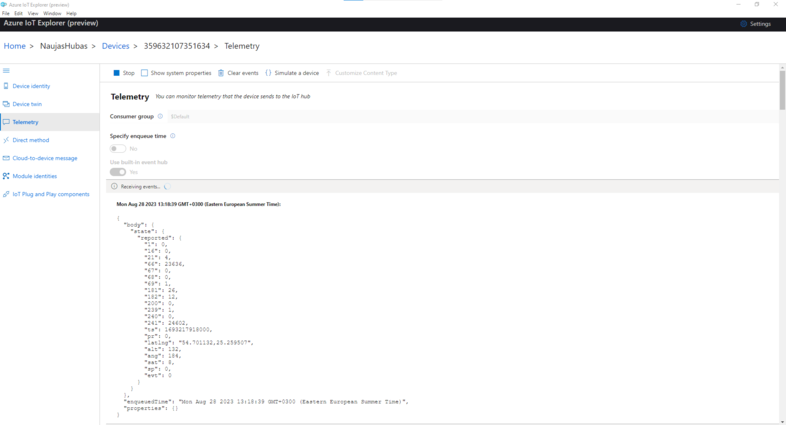
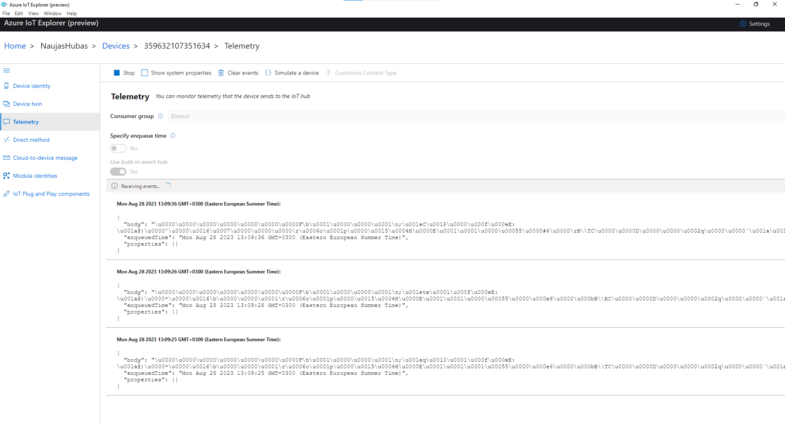
On the following window click Telemetry and the Start.
Example of data sent in JSON format:
Example of data sent in Codec 8 format:
Migrate to DigiCert Global G2
In overview window click on the red error message
In the following window click Migrate to DigiCert Global G2
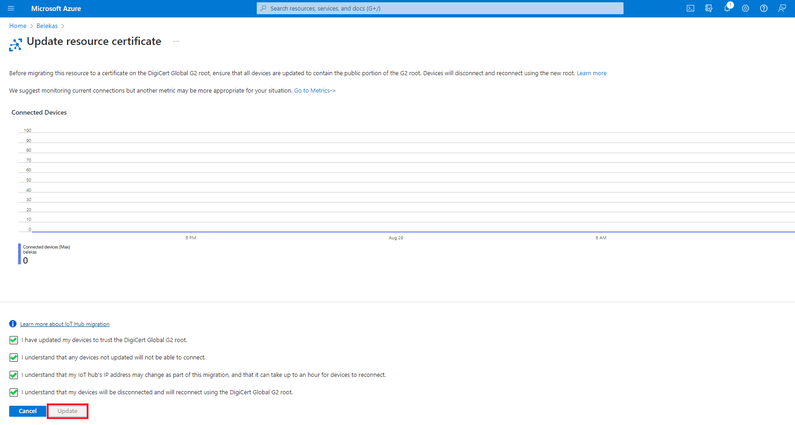
On the next window check all the boxes and click Update
Migration may take up to a minute. You can now continue with the instructions from where you left off.

