Template:FMB First start config
PC Connection (Windows)
- Power-up TST100 with DC voltage (9 – 50 V) power supply using supplied power cable. LED’s should start blinking, see “LED behaviour description”.
- Connect device to computer using Micro-USB cable
- Using Micro-USB cable
- You will need to install USB drivers, see "How to install USB drivers (Windows)"
- Using Micro-USB cable
- You are now ready to use the device on your computer.
How to install USB drivers (Windows)
- Please download COM port drivers from Teltonika here.
- Extract and run TeltonikaCOMDriver.exe.
- Click Next in driver installation window.
- In the following window click Install button.
- Setup will continue installing the driver and eventually the confirmation window will appear. Click Finish to complete the setup.
Quick SMS configuration
Default configuration has optimal parameters present to ensure best performance of track quality and data usage.
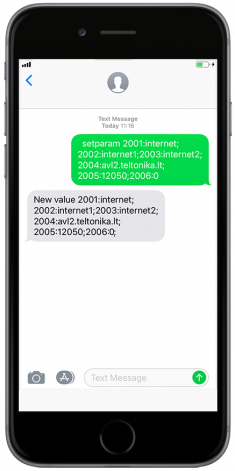
Quickly set up your device by sending this SMS command to it:
" setparam 2001:APN;2002:APN_username;2003:APN_password;2004:Domain;2005:Port;2006;0"
GPRS settings:
- 2001 – APN
- 2002 – APN username (if there are no APN username, empty field should be left)
- 2003 – APN password (if there are no APN password, empty field should be left)
Server settings:
- 2004 – Domain
- 2005 – Port
- 2006 – Data sending protocol (0 – TCP, 1 – UDP)
Note: Before SMS text, two space symbols should be inserted.
After successful SMS configuration, FMB1YX device will synchronize time and update records to configured server. Time intervals and default I/O elements can be changed by using Teltonika Configurator or SMS parameters.


