Police Fleet Management
Introduction
Society’s safety and security to a large extent rests on the efficiency of police work. Meanwhile, speed, coordination of actions and reliability of information are the key factors that ensure police officers are performing their duties properly. In most cases, time is very valuable and police have to be at the needed location as fast as possible to prevent theft or other crimes that can lead to even more tragic consequences.
Solution description
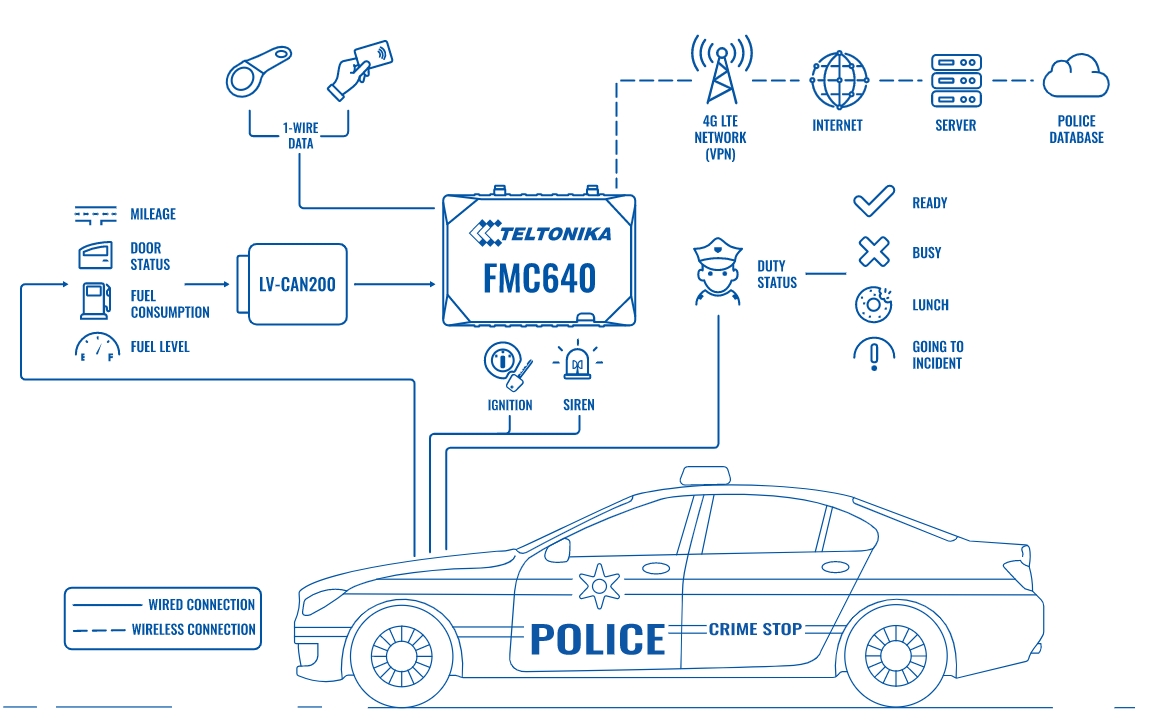
Teltonika offers integrators a solution to the above-mentioned challenges. Professional tracker FMC640 with 4G (LTE Cat 1) network coverage (including fallback to 2G (GSM) and 3G (UMTS) networks) can be set to determine location automatically and that will help to coordinate police fleets more effectively. All data will be transferred via VPN.
By getting information on the present police duty status, an operator can in a few seconds communicate with the available police officers and inform on the reported incident. Thus, trackers can significantly save time in assigning incidents. Also, setting reminders for maintenance based on vehicle mileage helps to avoid accidents on the roads.
Teltonika tracker can be used with a third part device that simulates different values. Connected via analog input, tracker can detect duty status (Ready, Busy, Lunch, or Going to incident) by differentiating voltage, e.g., 5 volts can be set for duty status ‘Ready’. This way, operators can observe duty status online. Police siren can be monitored with a professional tracker as well.
Additionally, it is very important for police to know vehicle door status, especially when the arrested persons are seated in the back. By connecting LV-CAN200 to tracker FMC640, police can get door status and much more – such data as mileage, fuel consumption, fuel level, RPM, engine temperature, and accelerator pedal position. These features of GPS tracker will maximize fleet efficiency.
For safety procedures, driver identification can be enabled, so that only the authorized person can ride a vehicle. There are a few ways to identify driver – by RFID card, iButton or BLE ID beacon.
What you need for a solution?
- The SIM card in order to get data to your server
- FOTA WEB to remotely send the configuration to the device.
- LV-CAN200. - Light vehicle CAN adapter.
Installation
When installing FMC640 in a vehicle, follow the mounting recommendations. When connecting to the CAN bus, you must use the diagrams provided by our technical support engineers. The diagrams indicate in detail and clearly the connection points in the vehicle wiring and the required program number. FMC640 has the function of working with wireless BLE beacons and iButton reader via 1-wire.
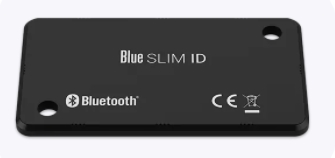
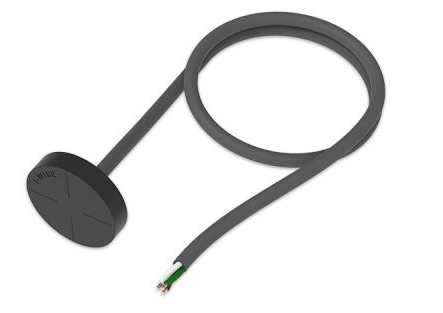
To identify the driver and passengers, it is enough to have a BLE beacon or an RFID plastic card with you. In this case, it is possible both to simply identify those in the vehicle interior and to prevent unauthorized starting of the car engine. Also, FMC640 has several digital inputs and outputs, which makes it possible to implement such scenarios as a panic button, a button for transferring to rest or patrol mode, connecting various signaling devices.
Configuration
1. Prerequisites:
1.1. Read through start guide
1.2. Understanding of possible Sleep modes.
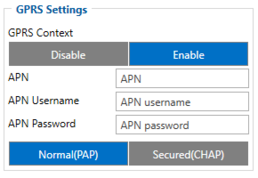
Parameter ID – Parameter name GPRS settings:
- 2001 – APN
- 2002 – APN username (if there are no APN username, empty field should be left)
- 2003 – APN password (if there are no APN password, empty field should be left)
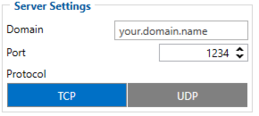
Server settings:
- 2004 – Domain
- 2005 – Port
- 2006 – Data sending protocol (0 – TCP, 1 – UDP)
After successful GPRS/SERVER settings configuration, FMB140 device will synchronize time and update records to the configured server. Time intervals and default I/O elements can be changed by using Teltonika Configurator or SMS parameters.

Data protocol settings:
- 113 – Data protocol (0 – Codec8, 1 – Codec8Extended)
Note: To get OEM parameters, you need to use Codec8Extended.
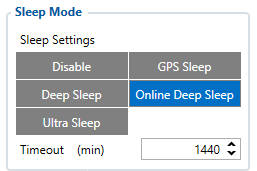
Sleep settings:
- 102 – Sleep settings (0 – Disable, 1 – Gps sleep, 2 – Deep sleep, 3 – Online Deep sleep, 4 – Ultra sleep)
Note: This scenario will not work with Deep Sleep and Ultra Sleep modes, since they disable the device's GSM module to save power.

CAN Adapter setting:
- 45002 – The program number that is indicated in the wiring diagram.
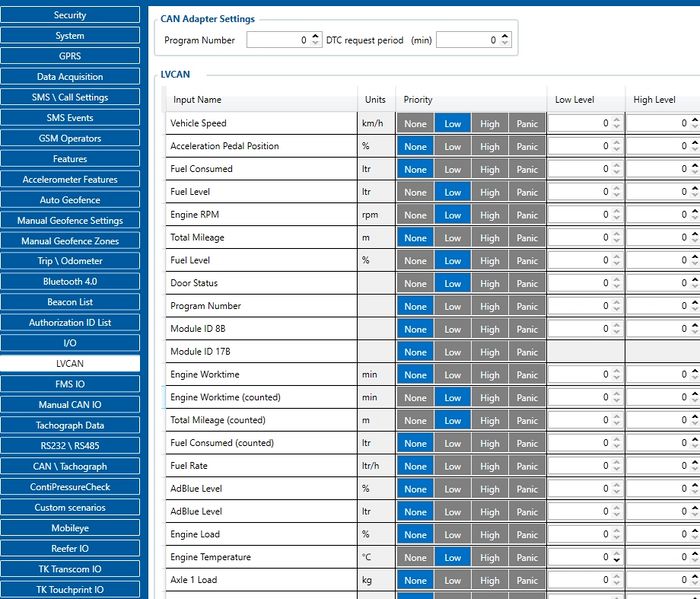
- 45100 – Vehicle speed, Priority "Low" (0 – Disabled, 1 – Low, 2 – High, 3 – Panic )
- 45130 – Fuel level in ltr*10 , Priority "Low" (0 – Disabled, 1 – Low, 2 – High, 3 – Panic )
- 45140 – Engine RPM, Priority "Low" (0 – Disabled, 1 – Low, 2 – High, 3 – Panic )
- 45160 – Fuel level in %, Priority "Low" (0 – Disabled, 1 – Low, 2 – High, 3 – Panic )
- 45170 – Door Status, Priority "Low" (0 – Disabled, 1 – Low, 2 – High, 3 – Panic )
- 45210 – Engine Worktime (counted), Priority "Low" (0 – Disabled, 1 – Low, 2 – High, 3 – Panic )
- 45220 – Total Mileage (counted), Priority "Low" (0 – Disabled, 1 – Low, 2 – High, 3 – Panic )
- 45280 – Engine Temperature, Priority "Low" (0 – Disabled, 1 – Low, 2 – High, 3 – Panic )
Immobilizer and iBeacon srttings:
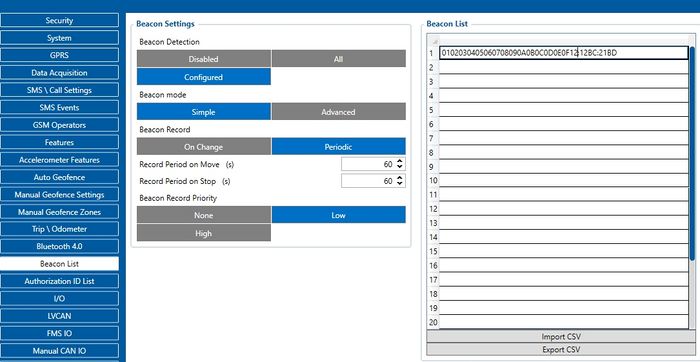
- 134 – Beacon Detected, "Configured" (0 – Disabled, 1 – All, 2 – Configured)
- 141 – Beacon Mode, "Simple" (0 – Simple, 1 – Advanced)
- 136 – Beacon Record, "Periodic" (0 – On Change, 1 – Periodic)
- 1600 – iBeacon, UUID:Major:Minor
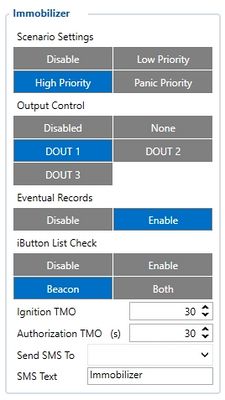
- 11700 – Scenario Settings, Priority "High" (0 – Disabled, 1 – Low, 2 – High, 3 – Panic )
- 11702 – Output Control, "DOUT1" (0 – Disabled, 1 – None, 2 – DOUT1, 3 – DOUT2, 4 – DOUT3)
- 11703 – iButton List Check, "Beacone" (0 – Disabled, 1 – Enable, 2 – Beacone, 3 – Both)
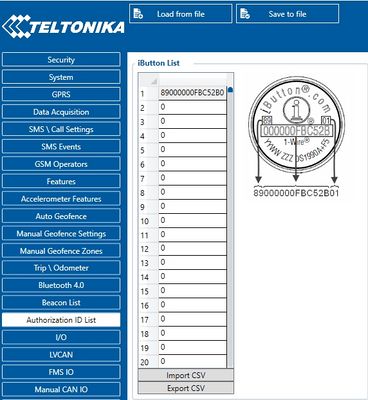
- 30000 – iButton list, iButton ID
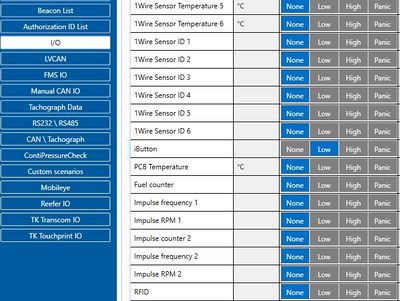
- 50390 – iButton, Priority "Low" (0 – Disabled, 1 – Low, 2 – High, 3 – Panic )
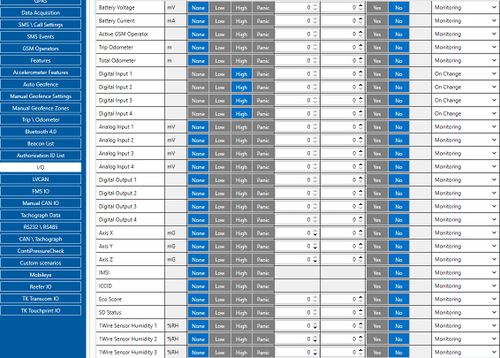
50170 – Digital Input 1, Priority "High" (0 – Disabled, 1 – Low, 2 – High, 3 – Panic )
50270 – Digital Input 2, Priority "High" (0 – Disabled, 1 – Low, 2 – High, 3 – Panic )
50280 – Digital Input 3, Priority "High" (0 – Disabled, 1 – Low, 2 – High, 3 – Panic )
50660 – Digital Input 4, Priority "High" (0 – Disabled, 1 – Low, 2 – High, 3 – Panic )
50171 – Operand Digital Input 1, "On Change" (0 – On Exit, 1 – On Entrance, 2 – On Both, 3 – Monitoring, 4 - On Hysteresis, 5 - On Change)
50271 – Operand Digital Input 2, "On Change" (0 – On Exit, 1 – On Entrance, 2 – On Both, 3 – Monitoring, 4 - On Hysteresis, 5 - On Change)
50281 – Operand Digital Input 3, "On Change" (0 – On Exit, 1 – On Entrance, 2 – On Both, 3 – Monitoring, 4 - On Hysteresis, 5 - On Change)
50661 – Operand Digital Input 4, "On Change" (0 – On Exit, 1 – On Entrance, 2 – On Both, 3 – Monitoring, 4 - On Hysteresis, 5 - On Change)
Quickstart: From default configuration to Police Fleet Management solution in one SMS:
" setparam 2001:APN;2002:APN_user;2003:APN_password;2004:Domain;2005:Port;2006:0;102:3;45002:Program number; 45100:1; 45130:1; 45140:1; 45160:1; 45170:1; 45210:1; 45220:1; 45280:1; 134:2; 136:1; 1600:"UUID:Major:Minor"; 11700:2; 11702:2; 11703:2; 30000:"iButton ID"; 50390:1; 50170:2; 50270:2; 50280:2; 50660:2; 50171:5; 50271:5; 50281:5; 50661:5"
This SMS will set up your device to report object location to the server and possibility for read Vehicle speed, Engine RPM, Fuel level in %, Fuel level in ltr*10 and Door Status, Engine Worktime (counted), Total Mileage (counted), Engine Temperature. Allows to set the BLE ID beacon and iButton key to the corresponding lists and activate the immobilizer mode for them. Allows to configure 4 digital inputs for sending data packets signaling various states of the patrol crew (for example: "task execution", "lunch", "patrolling", "following on a call")..
Note: Before SMS text, two space symbols should be inserted if no SMS username or password was set in SMS \ Call settings.
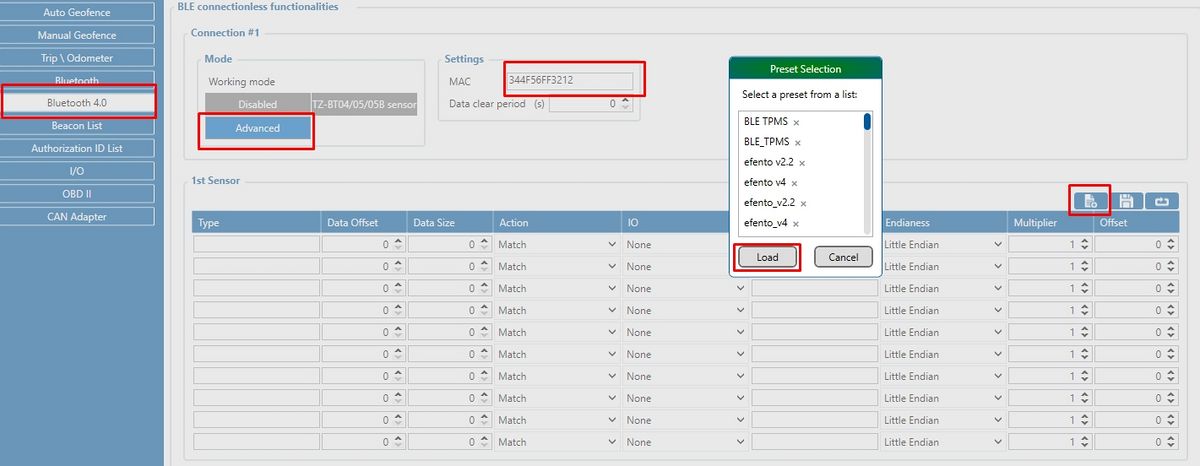
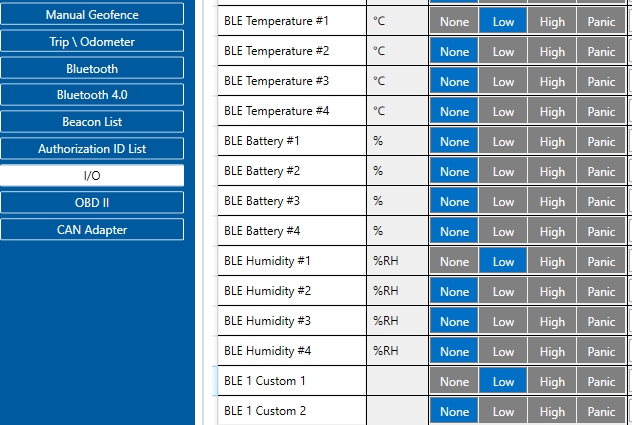
To use BLE sensors, use the configurator in online mode (tracker is connected) or offline (tracker is disabled). When using the configurator in offline mode, you can remotely download the configuration via FOTA WEB.
Parsing information
1.Prerequisites:
1.1. Open TCP/UDP port
1.2. Read Java parser first start guide
2. Parsing example:
| Unparsed received data in hexadecimal stream |
|---|
| 00000000000000848E010000017CE9B24190001105DA9DB20215EC20117010D0A0000000000F0006000100000200000300
000400001E00002500000602BD000002C50000002200000023000000190000008F00000002000F000000000010000000000001004F000000000000000000000100000647
|
| AVL Data Packet Part | HEX Code Part |
|---|---|
| Zero Bytes | 00 00 00 00 |
| Data Field Length | 00 00 00 84 |
| Codec ID | 8E (Codec 8 Extended) |
| Number of Data 1 (Number of Total Records) | 01 |
| Timestamp | 00 00 01 7C E9 B2 41 90 (04.11.2021 6:45:46) |
| Priority | 00 |
| Longitude | 11 05 DA 9D |
| Latitude | B2 02 15 EC |
| Altitude | 20 11 |
| Angle | 70 10 |
| Satellites | D0 |
| Speed | A0 00 |
| Event IO ID | 00 00 |
| N of Total ID | 00 0F |
| N1 of One Byte IO | 00 06 |
| 1’st IO ID | 00 01 (AVL ID: 1, Name: DIN1) |
| 1’st IO Value | 00 |
| 2’nd IO ID | 00 02 (AVL ID: 2, Name: DIN2) |
| 2’nd IO Value | 00 |
| 3’rd IO ID | 00 03 (AVL ID: 3, Name: DIN3) |
| 3’rd IO Value | 05 |
| 4'th IO ID | 00 04 (AVL ID: 4, Name: DIN4) |
| 4'th IO Value | 00 |
| 5'th IO ID | 00 1E (AVL ID: 30, Name: Vehicle Speed) |
| 5'th IO Value | 00 |
| 6'th IO ID | 00 25 (AVL ID: 37, Name: Fuel Level Percent) |
| 6'th IO Value | 00 |
| N2 of Two Byte IO | 00 06 |
| 1’st IO ID | 02 BD (AVL ID: 701, Name: BLE 1 temperature) |
| 1’st IO Value | 00 00 |
| 2’nd IO ID | 02 C5 (AVL ID: 709, Name: BLE 1 Humidity) |
| 2’nd IO Value | 00 00 |
| 3’rd IO ID | 00 22 (AVL ID: 34, Name: Fuel Level Liters) |
| 3’rd IO Value | 00 00 |
| 4'th IO ID | 00 23 (AVL ID: 35, Name: Engine RPM) |
| 4'th IO Value | 00 00 |
| 5'th IO ID | 00 19 (AVL ID: 25, Name: Engine Temperature) |
| 5'th IO Value | 00 00 |
| 6'th IO ID | 00 8F (AVL ID: 143, Name: Door Status) |
| 6'th IO Value | 00 00 |
| N4 of Four Byte IO | 00 02 |
| 1’st IO ID | 00 0F (AVL ID: 15, Name: Engine Worktime (Counted)) |
| 1’st IO Value | 00 00 00 00 |
| 2’nd IO ID | 00 10 (AVL ID: 16, Name: Total Odometer) |
| 2’nd IO Value | 00 00 00 00 |
| N8 of Eight Byte IO | 00 01 |
| 1’st IO ID | 00 4E (AVL ID: 78, Name: iButton) |
| 1’st IO Value | 00 00 00 00 00 00 00 00 |
| xb Element count | 00 00 |
| Number of Data 2 (Number of Total Records) | 01 |
| CRC-16 | 00 00 06 47 |
WIALON
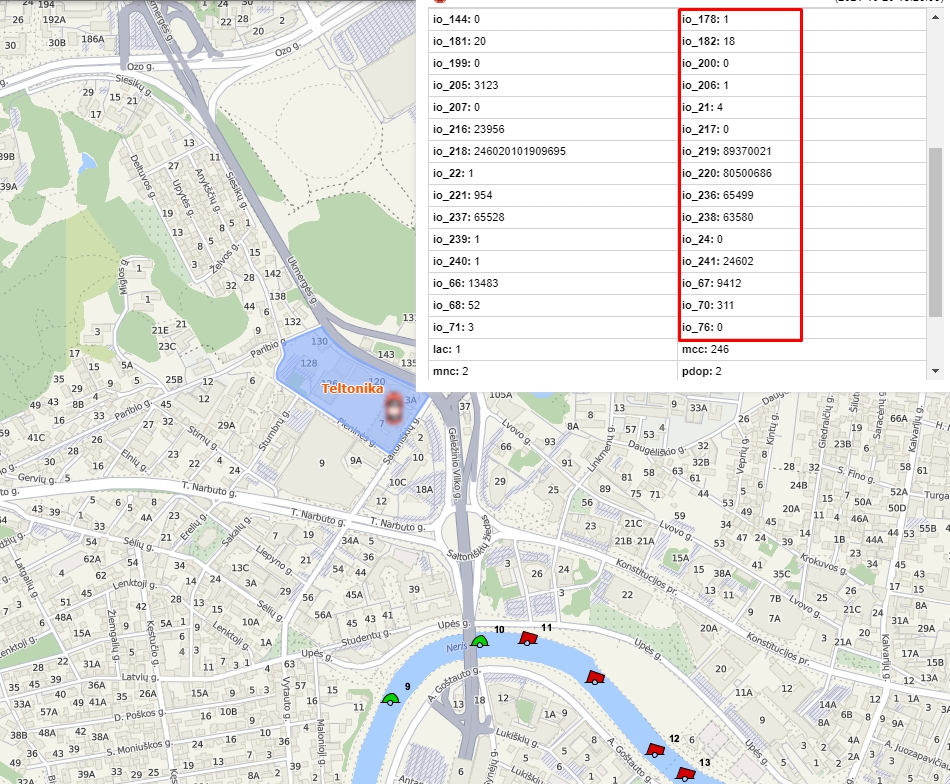
Open WIALON → Open Messages → Select your device → Select the date interval → Select Message (data messages) → Select execute and you will see all the information.
