FMB140 autoscan feature instructions
Autoscan is a feature that automatically finds the best program number for your vehicle. Here is a quick guide on how to use the Autoscan feature.
Step 1. Update FMB140 firmware to FMB.Ver.03.25.15.Rev.141 or later
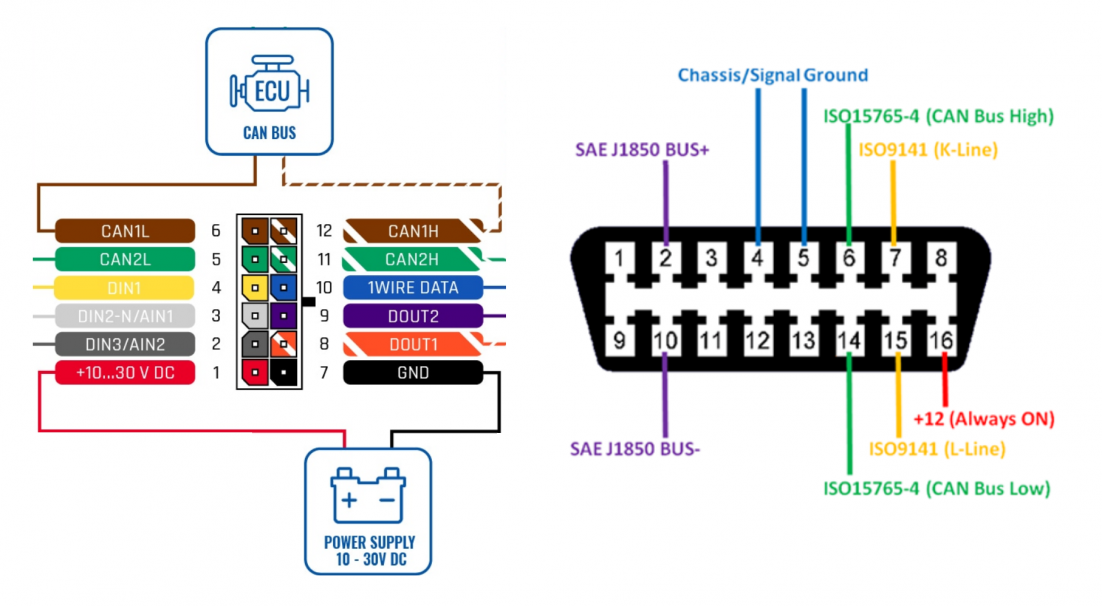
Step 2. Find the OBD-II port (diagnostic connector) in your vehicle. Connect the FMB140 CAN1L and CAN1H wires to OBD-II Connector PIN14 and PIN6 respectively.
Step 3. After the connection is done successfully, launch the configurator and navigate to the CAN Adapter tab.
Before clicking the Scan button, make sure that ignition is ON. FMB140 configured ignition source should be DIN1 or Power Voltage.
After pressing the scan button configurator will wait up to 60 seconds for device to send up to 9
program numbers. If timeout is reached configurator will display an error. If no CAN bus connection is detected, configurator will return an error after pressing the scan button.
After a successful scan, a list of compatible program numbers will be displayed. The first program number will be saved in device internal CAN chip and device configuration. You can try entering each of the scanned numbers into device configuration to see which parameters are available and which suggestion works best for the vehicle.

