Device and Flespi configuration
After you have installed the OpenSSL software and created the certificates and keys, the last step is to configure your FM device and your Flespi server, here you will find the full guide on how to do it.
Preparing and configuring your Flespi server for TLS implementation
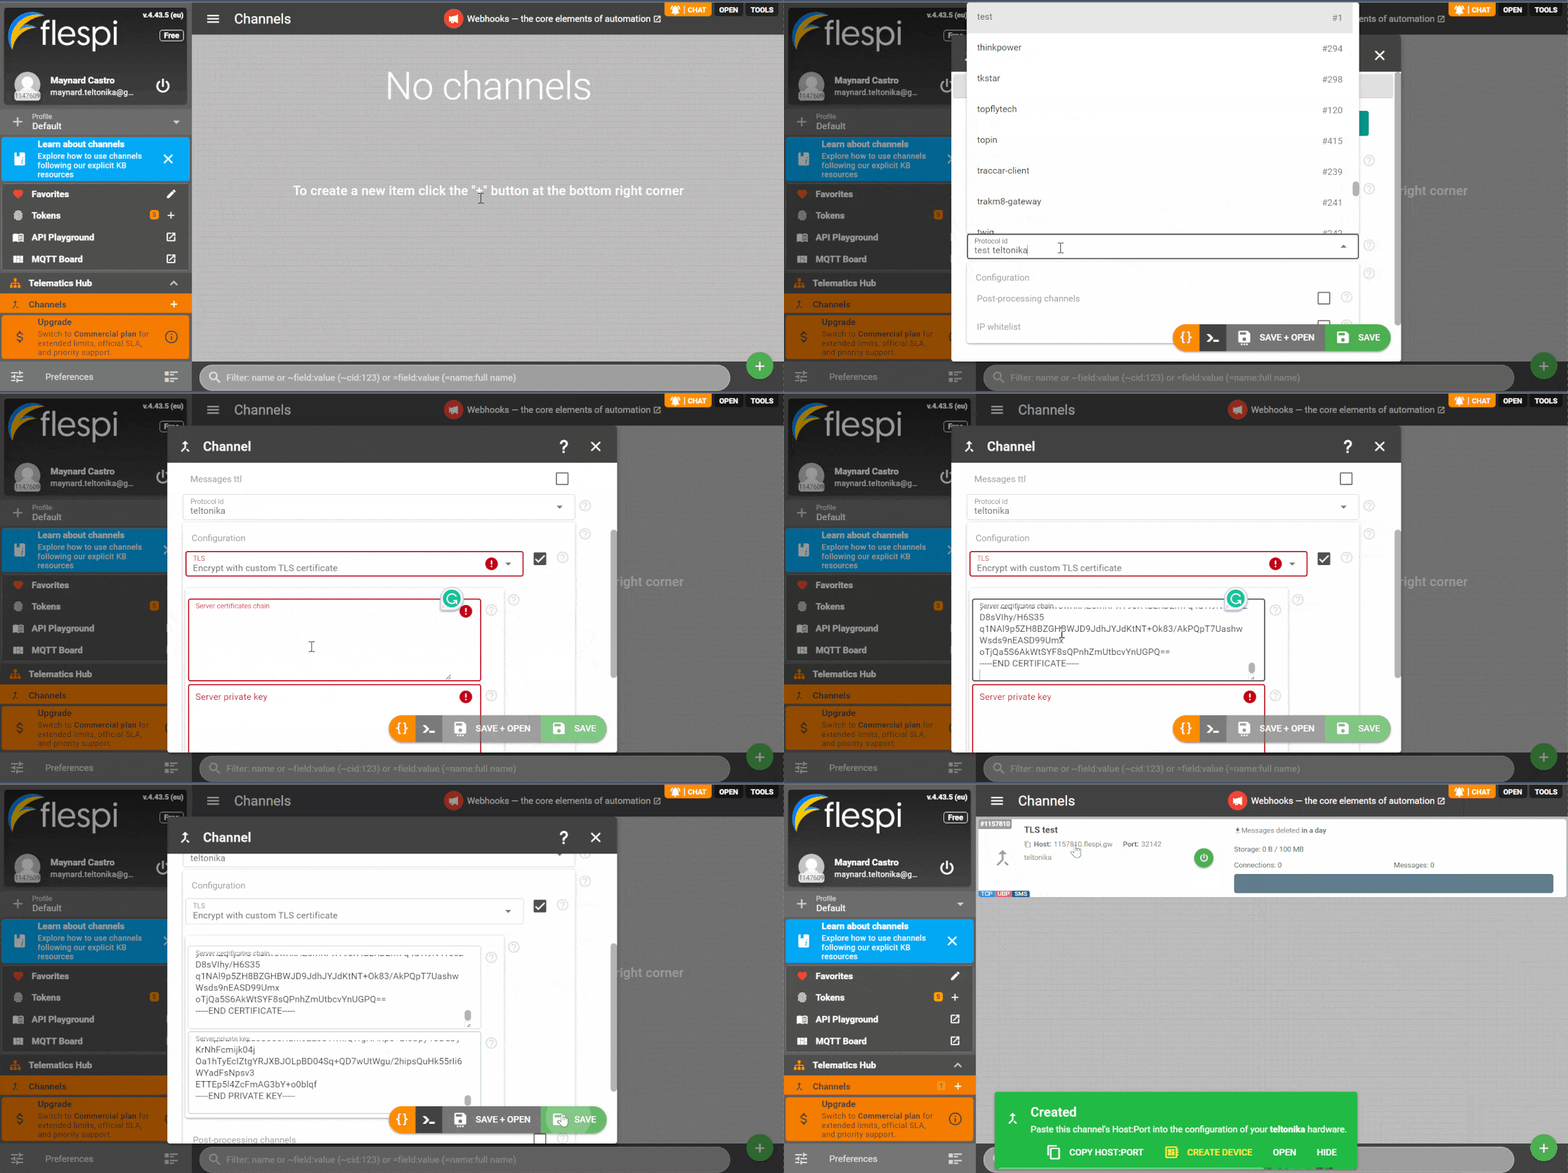
1. Create a new flespi channel with enabled TSL (SSL) encryption.
2. Open your flespi account.
3. Go to Channels.
4. Click the "+" sign to add the channel.
5. After adding the new channel, put the server’s name, for protocol select Teltonika, check the TLS box, and select encrypt with custom TLS certificate. Copy and paste the server.crt and server.key and lastly click save.
Note: The host will be your domain name/IP address, Port number, and protocol which is Teltonika, this channel supports TCP/UDP protocol and lastly TLS/SSL encryption via TCP.
Server.crt, Server. key and Root.pem
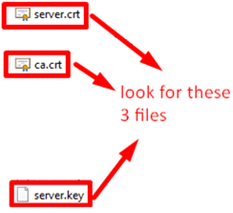
1. Finding your certificate and keys using windows explorer is easy to do, first is go to PC directory C:\Users\username.
Notes: username – this is the user account name of your pc.
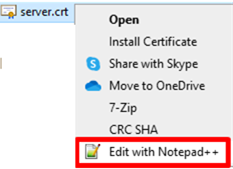
2. Open server.crt and server.key file using notepad or Notepad ++ to copy and paste the details to your server.
3.The ca.crt file needs to be renamed as root.pem after that upload it to the device.
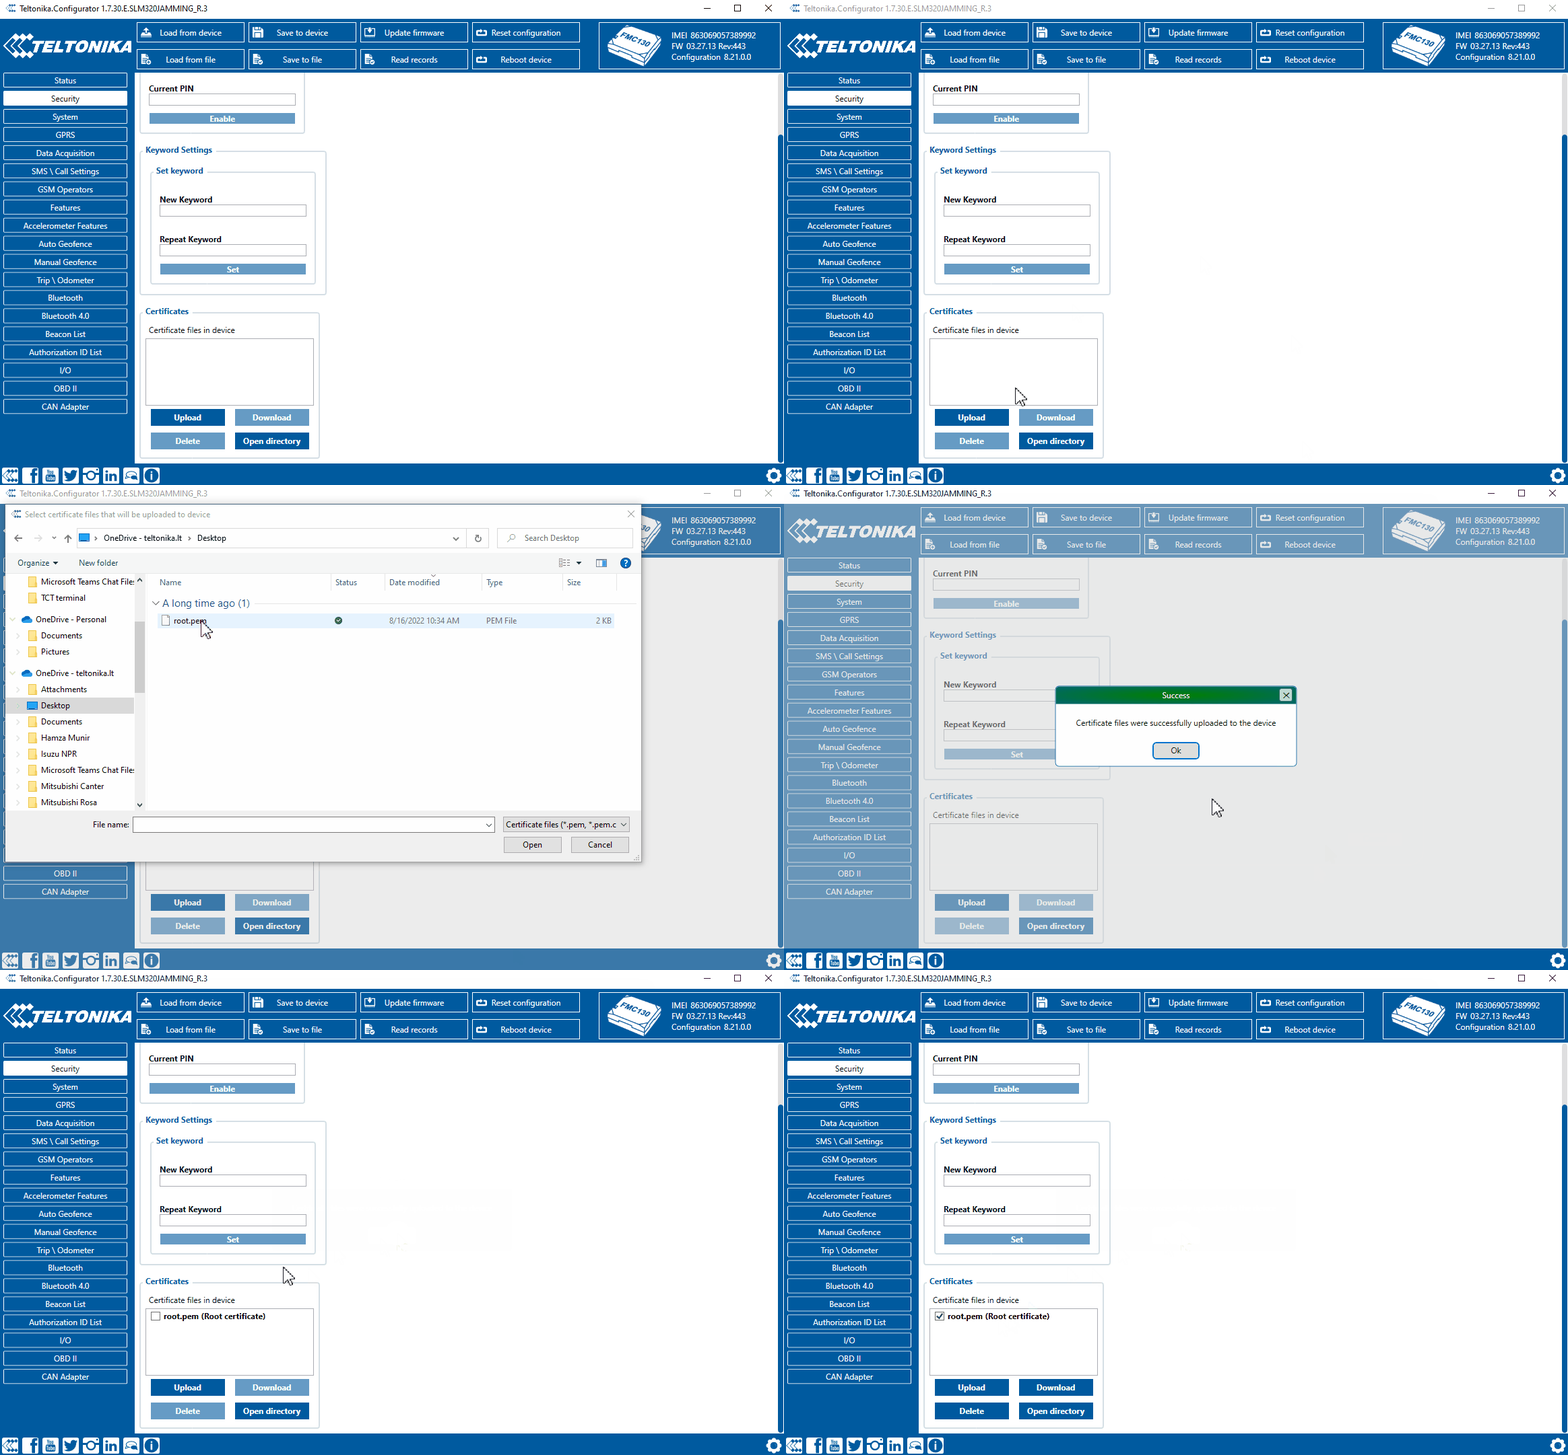
Uploading root.pem file to the device
1. Open the configurator.
2. Select your device.
3. Go to the security.
4. Select upload from the certificates tab.
5. Locate root.pem from your pc and upload it to your device.
Configuring TLS/DTLS server to Teltonika Device
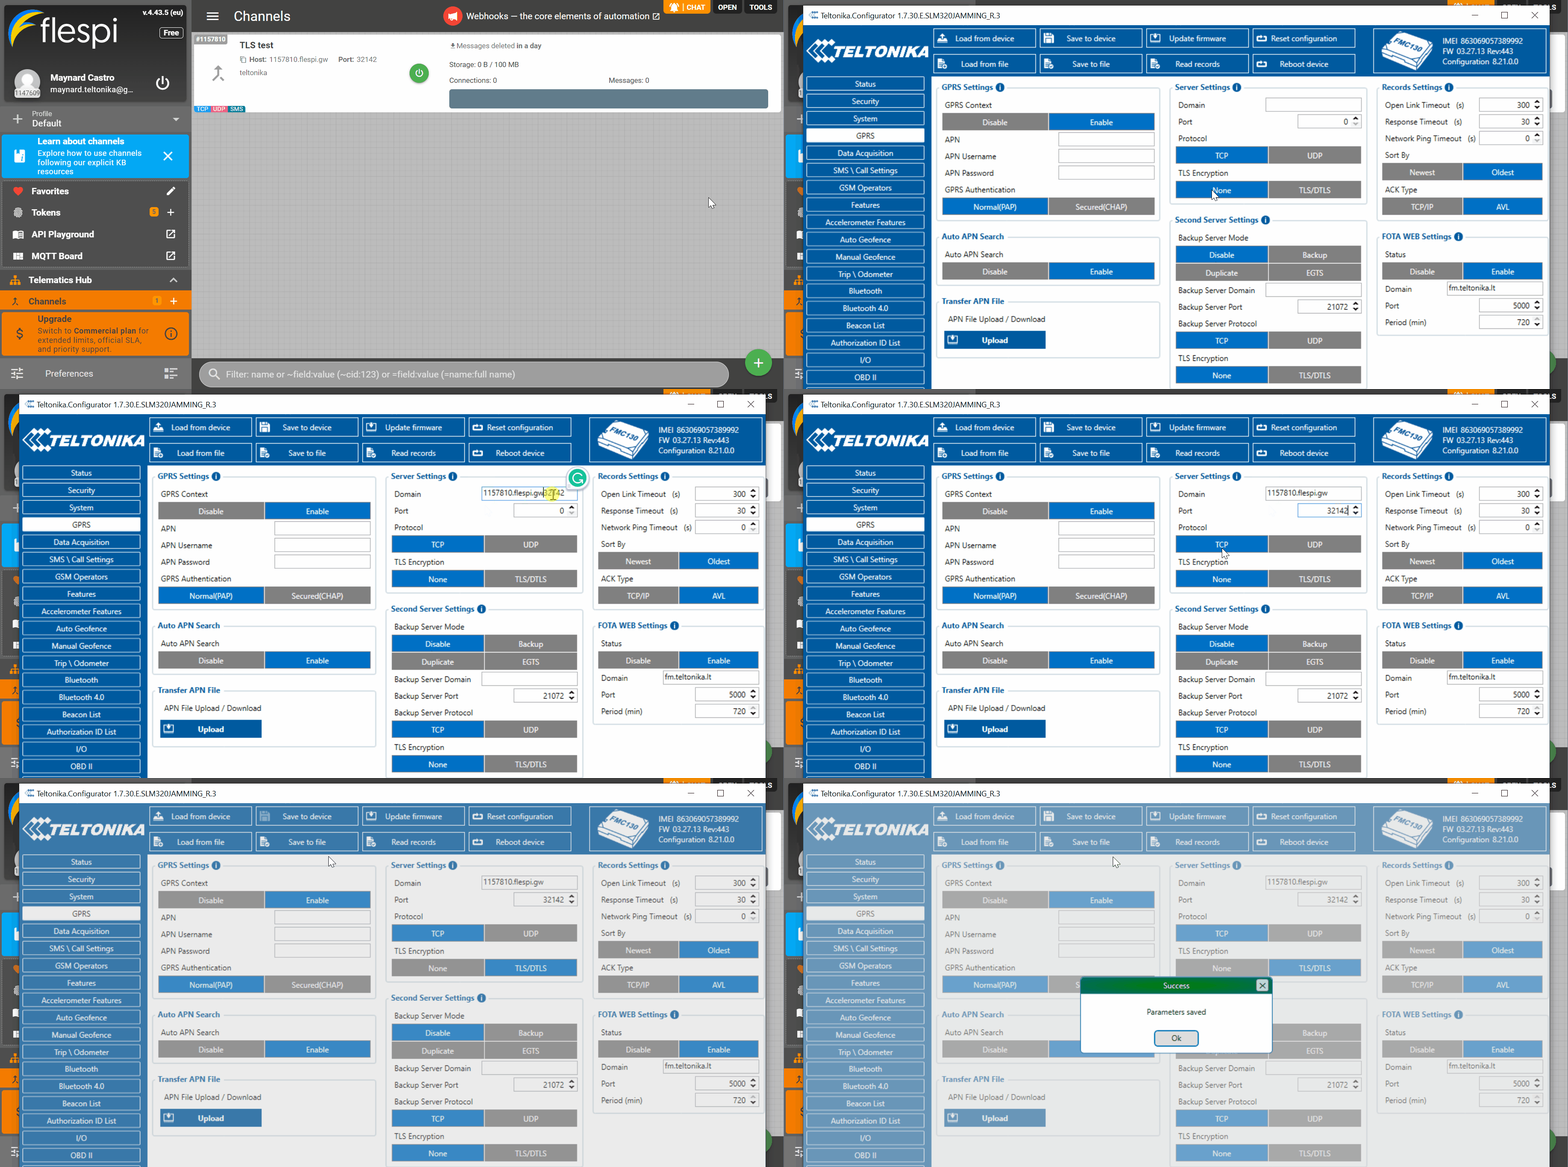
1. Open the configurator.
2. Go to GPRS.
3. Enter your server details, Domain, Port, Protocol type, and TLS Encryption type.
4. In our case we enable the TLS/SSL encryption in our server, so we should select TLS/DTLS and click save to device.
Adding Teltonika Device to your Flespi account
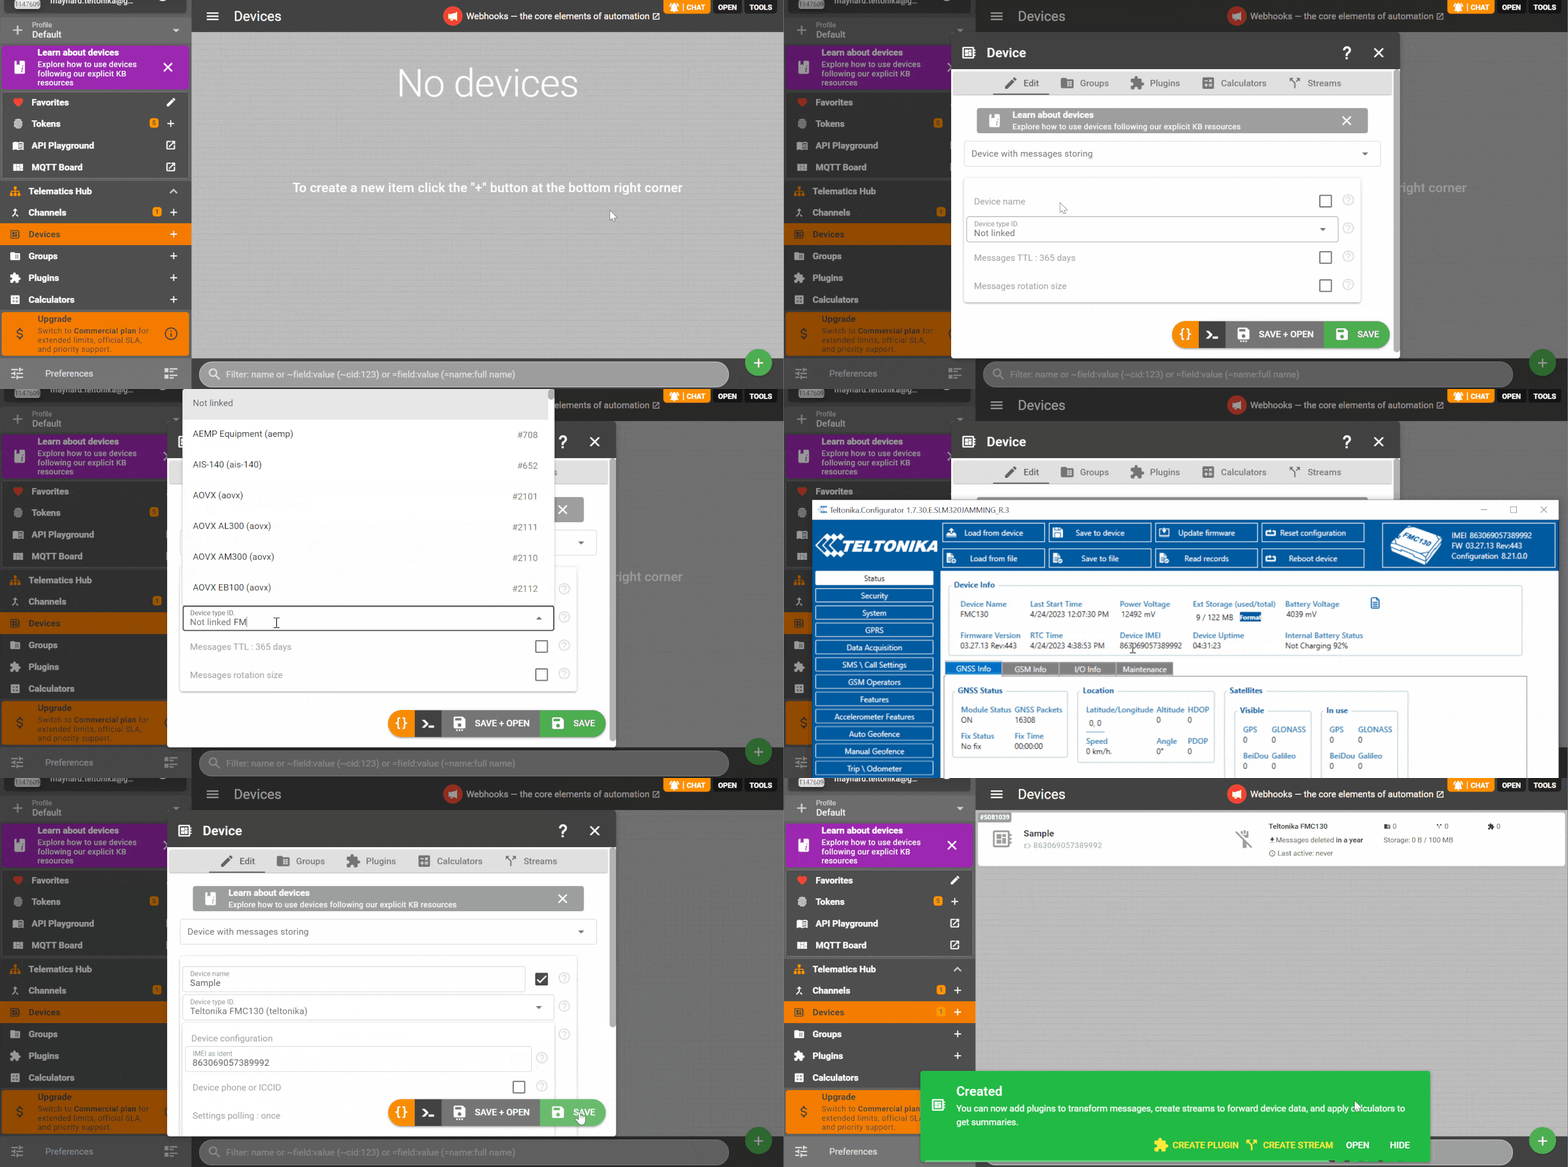
1. Add the device IMEI to the flespi server.
2. Go to the devices.
3. Click the "+" sign to add the device.
4. Fill in the following details device name, device type ID, IMEI, and click save.
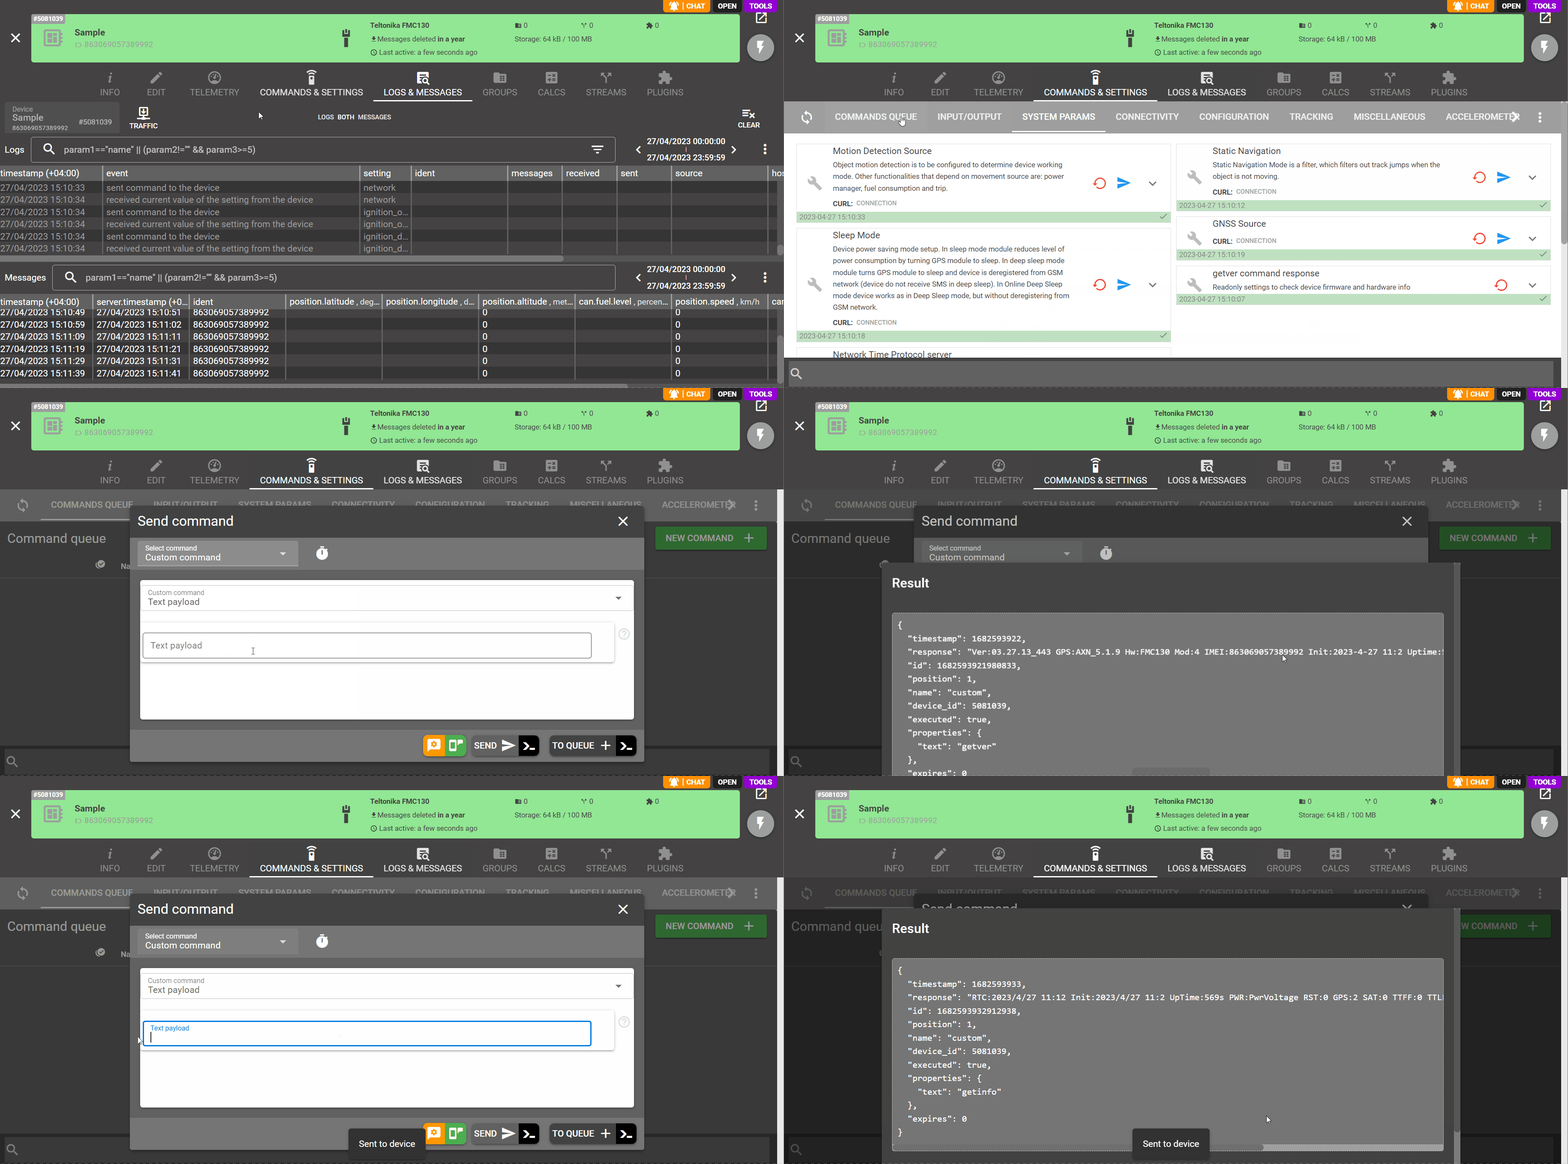
5. If the configuration is correct, you can verify if your device sending data to your server via the Teltonika configurator, go to the status tab and check the sockets, records, GSM Status, and GRPS traffic.
Note: You can also check the flespi platform to verify if the device is sending data to your sever, sending GPRS command to the device is the easiest way to test the connection between server to device and viceversa.
