Difference between revisions of "Blue ID"
m (Text replacement - "Bluetooth" to "Bluetooth®") |
|||
| (13 intermediate revisions by 3 users not shown) | |||
| Line 5: | Line 5: | ||
==Blue ID description== | ==Blue ID description== | ||
| − | The Blue ID works as a beacon, which can allow users to track and identify trucks, tippers and containers on industrial sites using | + | The Blue ID works as a beacon, which can allow users to track and identify trucks, tippers and containers on industrial sites using Bluetooth®. This BLE sensor constantly broadcasts its own ID, which can be detected by FMB devices that support Beacons. |
==Technical Data== | ==Technical Data== | ||
*'''Battery:''' Lifecycle up to 5 years | *'''Battery:''' Lifecycle up to 5 years | ||
| − | *''' | + | *'''Bluetooth®:''' 2,4 GHz - Bluetooth® Low Energy 4.0/4.2 |
*'''NFC:''' Supported | *'''NFC:''' Supported | ||
*'''Dimensions:''' ø 36 mm base - Thickness 10 mm - 2 mounting ø 3 mm holes, spaced of 32 mm | *'''Dimensions:''' ø 36 mm base - Thickness 10 mm - 2 mounting ø 3 mm holes, spaced of 32 mm | ||
| Line 28: | Line 28: | ||
==Using Blue ID with Teltonika FMB1 devices== | ==Using Blue ID with Teltonika FMB1 devices== | ||
| − | <p>1. Connect the device to the configurator and go to | + | ===Configuring Teltonika Device=== |
| − | + | <p>1. Connect the device to the configurator and go to Bluetooth® settings. Make sure that BT Radio is set to Enable (visible) or Enable (hidden) | |
| + | [[Image:BTRadio_Enable.png|300x200px|center|upright=0.35]] | ||
| − | < | + | <br>2. Go to Beacon List, set Beacon Detection to All or Configured. When using configured, the beacon information will have to be entered in order for the device to be able to detect the beacon. Beacon information should be entered in this format: |
| − | + | {| class="nd-othertables_2" style="width:30%;" | |
| + | |+ | ||
| + | ! rowspan="1" style="width:10%; border-bottom: 2px solid #0054A6; vertical-align: middle; text-align: center;" |iBeacon | ||
| + | ! rowspan="1" style="width:10%; border-bottom: 2px solid #0054A6; vertical-align: middle; text-align: center;" |Eddystone | ||
| + | |- | ||
| + | | style="vertical-align: middle; text-align: center;" |UUID:Major:Minor | ||
| + | | style="vertical-align: middle; text-align: center;" |Namespace:Instance ID | ||
| + | |- | ||
| + | |} | ||
| − | < | + | <br> An example can be seen in the figure below. |
| − | + | [[Image:BeaconList_Configured.png|center|800px]] | |
| − | # | + | <br><br>3. Enable [[Codec#Codec_8_Extended| Codec 8 Extended]] Data protocol by going to System -> Data Protocol. |
| + | [[Image:Configurator DataProtocol.png|center|800px]] | ||
| + | ===Configuring Blue ID Beacon=== | ||
| + | <p>1. In order for the Blue ID beacon to start transmitting data, it will have to be turned on. To enable your BLE sensors or BLE Beacons use the [https://play.google.com/store/apps/details?id=com.ela.mobileapp.elamobileapp&hl=en_US| Device Manager Mobile] application. Your phone or device that is used for configuring BLE Sensors or Beacons has to have NFC (configurations are written to a sensor or beacon through NFC). | ||
| + | |||
| + | <br><br>Below you can find on how to Enable and configure Coin ID or Puck ID to send in the iBeacon format: | ||
| + | |||
| + | [[Image:Blue_Configuration.png|center|400px]] | ||
| + | |||
| + | After configuring the settings, press Write tag and then attach the Beacon you are configuring. Once the tag is written successfully, the beacon will be enabled and will use the settings configured in the app. | ||
Latest revision as of 14:11, 6 December 2023
Blue ID description
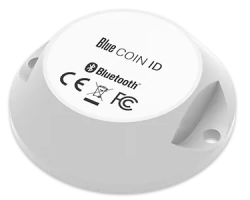
The Blue ID works as a beacon, which can allow users to track and identify trucks, tippers and containers on industrial sites using Bluetooth®. This BLE sensor constantly broadcasts its own ID, which can be detected by FMB devices that support Beacons.
Technical Data
- Battery: Lifecycle up to 5 years
- Bluetooth®: 2,4 GHz - Bluetooth® Low Energy 4.0/4.2
- NFC: Supported
- Dimensions: ø 36 mm base - Thickness 10 mm - 2 mounting ø 3 mm holes, spaced of 32 mm
- Weight: 11 g
- Operating temperature: -30°C to +70°C
- Ingress Protection Rating: IP68 (Waterproof)
- Transmission range: Up to 200 meters (open field)
- Transmission period: 0,1 to 10 second (programmable)
- Regulatory:
- CE (Europe)*: EN 300 328/ EN 301 489 & EN 55032 / EN 62368-1
- FCC (USA)*: FCC 15.247 / FCC PT 15B
- ISED/IC (Canada)*: RSS-247 / ICES-003
- RoHS certified
(*) Certification in progress
Using Blue ID with Teltonika FMB1 devices
Configuring Teltonika Device
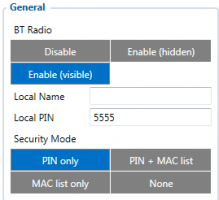
1. Connect the device to the configurator and go to Bluetooth® settings. Make sure that BT Radio is set to Enable (visible) or Enable (hidden)
2. Go to Beacon List, set Beacon Detection to All or Configured. When using configured, the beacon information will have to be entered in order for the device to be able to detect the beacon. Beacon information should be entered in this format:
| iBeacon | Eddystone |
|---|---|
| UUID:Major:Minor | Namespace:Instance ID |
An example can be seen in the figure below.
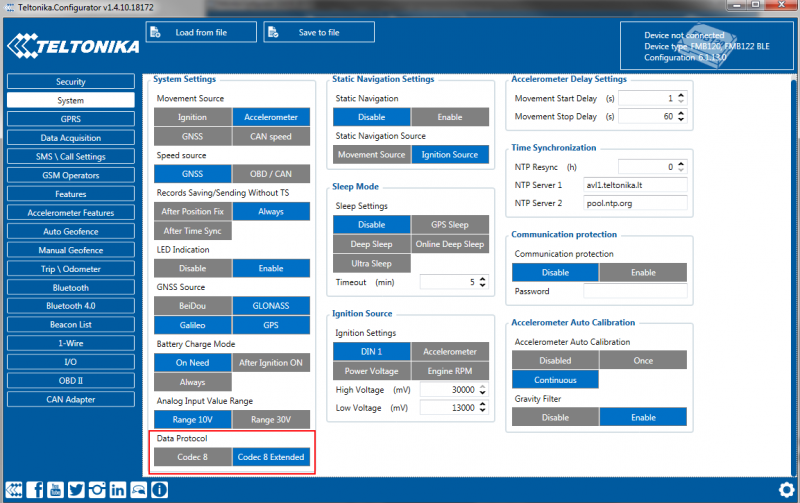
3. Enable Codec 8 Extended Data protocol by going to System -> Data Protocol.
Configuring Blue ID Beacon
1. In order for the Blue ID beacon to start transmitting data, it will have to be turned on. To enable your BLE sensors or BLE Beacons use the Device Manager Mobile application. Your phone or device that is used for configuring BLE Sensors or Beacons has to have NFC (configurations are written to a sensor or beacon through NFC).
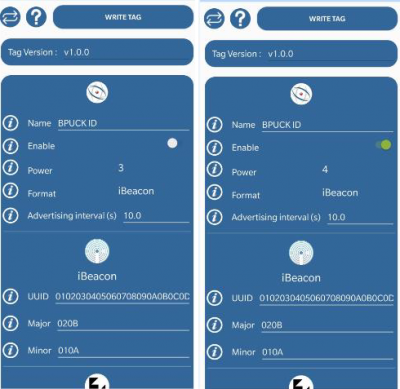
Below you can find on how to Enable and configure Coin ID or Puck ID to send in the iBeacon format:
After configuring the settings, press Write tag and then attach the Beacon you are configuring. Once the tag is written successfully, the beacon will be enabled and will use the settings configured in the app.


