Template:FMB2 First start card: Difference between revisions
Appearance
| Line 10: | Line 10: | ||
=='''How to insert | =='''How to insert Micro-SIM card'''== | ||
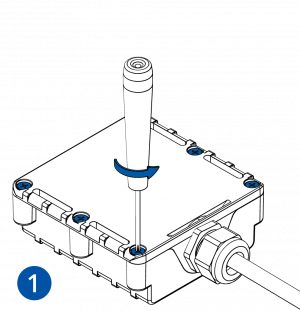
# Unscrew the '''screws'''. | |||
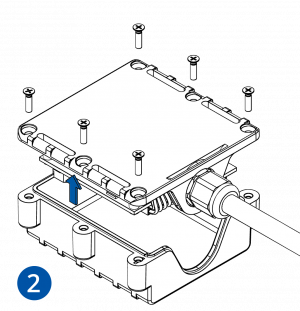
# Remove the '''cover'''. | |||
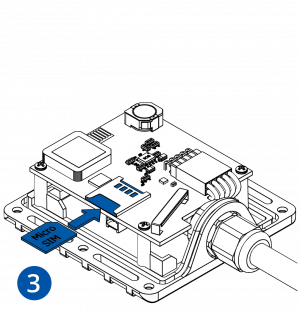
# Insert '''Micro-SIM''' card as shown with '''PIN request disabled''' or read '''{{{sim_pin|[[FMB202 Security info|Security info]]}}}''' how to enter it later in '''Configurator'''. Make sure that Micro-SIM card '''cut-off corner''' is pointing forward to slot. | |||
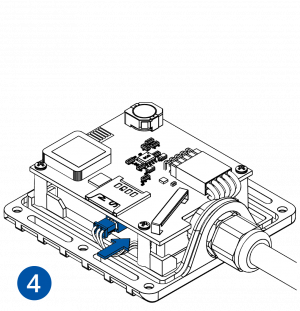
# Connect battery as shown to device. Position the battery in place where it does '''not obstruct other components'''. | |||
# Attach device cover and put the screws back in. | |||
# Device is ready to be connected. | |||
[[Image:case7.png|300px]][[Image:case4.png|300px]][[Image:case2.png|300px]] | |||
[[Image:case5.png|300px]][[Image:case3.png|300px]][[Image:case6.png|300px]] | |||
{| | |||
|- | |||
| [[File:Alert.png|left|link=]] || <b>{{{sim_type|Micro-}}}SIM card insertion/removal must be performed when device is powered off – external voltage and battery are disconnected. Otherwise {{{sim_type|Micro-}}}SIM card might be damaged or device will not detect it.</b> | |||
|} | |||
=='''Cable colors'''== | =='''Cable colors'''== | ||
Revision as of 10:17, 25 October 2018

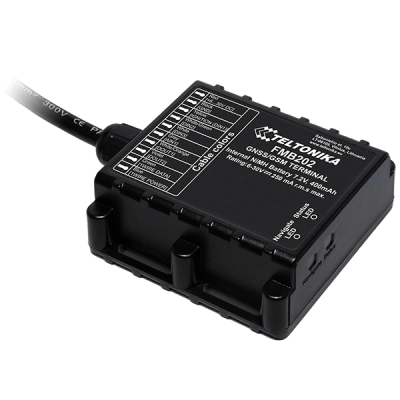
FMB20X Small and professional waterproof tracker with high gain internal GNSS/GSM antennas, Blue-tooth and high capacity internal Ni-MH battery
How to insert Micro-SIM card
- Unscrew the screws.
- Remove the cover.
- Insert Micro-SIM card as shown with PIN request disabled or read Security info how to enter it later in Configurator. Make sure that Micro-SIM card cut-off corner is pointing forward to slot.
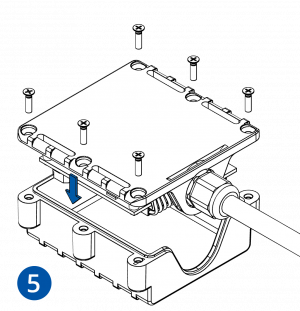
- Connect battery as shown to device. Position the battery in place where it does not obstruct other components.
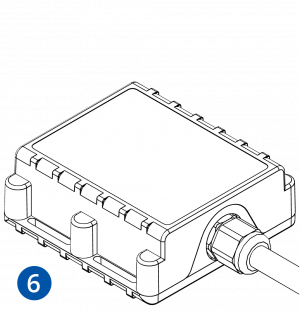
- Attach device cover and put the screws back in.
- Device is ready to be connected.
 |
Micro-SIM card insertion/removal must be performed when device is powered off – external voltage and battery are disconnected. Otherwise Micro-SIM card might be damaged or device will not detect it. |
Cable colors
| Wire color | Pin name | Description |
|---|---|---|
| Red | VCC (6-30)V DC (+) | Power supply (+6...30 V DC). |
| Black | GND (-) | Ground. |
| Yellow | DIN 1 | Digital input, channel 1. |
| White/Green | DIN 2 | Digital input, channel 2. |
| White | DIN 3 | Digital input, channel 3. |
| Grey | AIN 1 | Analog input, channel 1. Input range: 0-30 V DC. |
| White/Orange | DOUT 1 | Digital output, channel 1. Open collector output. Max. 3,3 A DC. |
| Violet | DOUT 2 | Digital output, channel 2. Open collector output. Max. 3,3 A DC. |
| Green | 1WIRE DATA | Data channel for 1–Wire devices. |
| Blue | 1WIRE POWER | +3,8 V output for 1–Wire devices. |

