Template:FMB002 First start card: Difference between revisions
Appearance
Kudalevas.da (talk | contribs) Created page with "centre <b>{{{description|Advanced Plug and Track real-time tracking terminal with GNSS, GSM and Blue-tooth connectivity}}}</b>{{{pic|Ima..." |
No edit summary |
||
| Line 2: | Line 2: | ||
<b>{{{description|Advanced Plug and Track real-time tracking terminal with GNSS, GSM and | <b>{{{description|Advanced Plug and Track real-time tracking terminal with GNSS, GSM and Bluetooth connectivity}}}</b>{{{pic|[[Image:FMB002 600x600 1.png|400px|right]]}}} | ||
Revision as of 13:32, 11 September 2019

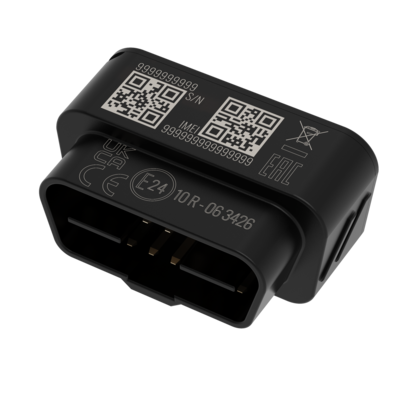
Advanced Plug and Track real-time tracking terminal with GNSS, GSM and Bluetooth connectivity
How to insert Micro-SIM card and connect battery
- Insert the SIM tray removal tool into the hole on the SIM card tray, and then push until the tray pops out.
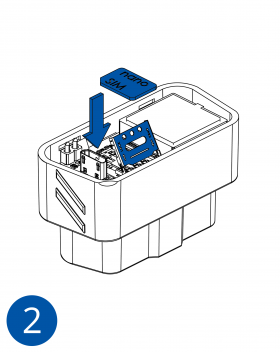
- Insert Nano-SIM card as shown with PIN request disabled or read our Wiki how to enter it later in Teltonika Configurator. Make sure that Nano-SIM card is fitted properly into the tray.
- Attach the SIM card tray back.
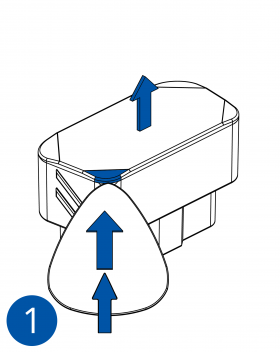
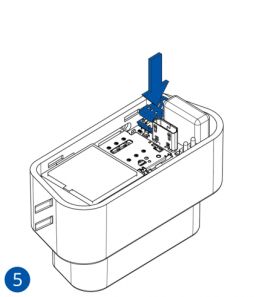
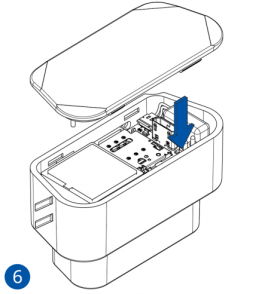
- Open device top cover to access battery connector. Cover is opened by unclipping it at the recessed corner
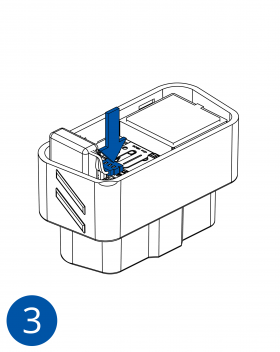
- Connect the battery as shown to device.
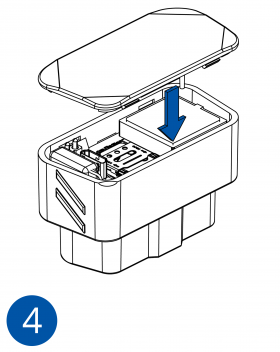
- After configuration, see “PC Connection (Windows)”, attach device cover back.
Device is ready to be mounted.
 |
Micro-SIM card insertion/removal must be performed when device is powered off – external voltage and battery are disconnected. Otherwise Micro-SIM card might be damaged or device will not detect it. |

