TELEMATICS FOR AGRICULTURE AND FARMING INDUSTRY
Introduction
To satisfy the growing demand for farming produce and tackle many challenges affecting the agriculture industry, present-day farmers have to be more innovative, efficient, competitive, but save resources at the same time. As a result, comprehensive, affordable, and customisable agricultural machinery tracking solutions combined with process monitoring and automation are becoming not only an attractive option but rather a necessity.
Solution description
Thanks to the fast-developing IoT technologies, agriculture-specific equipment, farming implements, and/or accessories tracking and management can be successfully achieved by combining GPS devices, CAN Bus data adaptors, and Bluetooth Low Energy 4.X (BLE) ID beacons. The ultimate choice for this matter - Teltonika ADVANCED category GPS tracker FMB140 with built-in CAN data reading feature and advanced software version supporting agriculture type vehicles (aka ALL-CAN300 option).
What you need for a solution?
- FMB140 device.
- The SIM card in order to get data to your server
- FOTA WEB to remotely send the configuration to the device.
- BLE ID beacons and sensors.
Installation
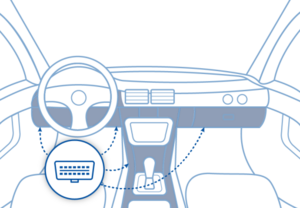
Installing the device is easy, but don't forget about mounting recommendations as well. If the location of the OBDll interface is in a hard-to-reach place, then you can always use a special cable to install the device in a convenient place. OBDII connection extension cable
Although devices have high gain antennas it’s important to mount devices with stickers on top and in metal-free space. The device should be firmly fixed to the surface or cables. Please make sure, that device is not fixed to heat emitting or moving parts.
During installation please follow recommendations in order to avoid damaging device and vehicle:
- The device uses SELV limited power source. The nominal voltage is +12 V DC. The allowed voltage range is +10..+30V DC.
- To avoid mechanical damage, it is advised to transport the device in an impact-proof package. Before usage, the device should be placed so that its LED indicators are visible. They show the status of device operation.
- Before unmounting the device from the vehicle, ignition MUST be OFF.
How to check available OBDII data?
Please follow this tutorial to check what OBD data is available from the vehicle
How to check available OBDII data?
List of AVL id OBDll parameters you can find at Wiki page.
Configuration
1. Prerequisites:
1.1. Read through start guide
1.2. Understanding of possible Sleep modes.
2. OBD GPS trackers:
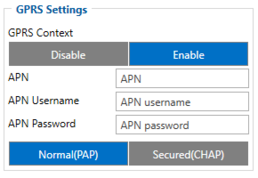
Parameter ID – Parameter name GPRS settings:
- 2001 – APN
- 2002 – APN username (if there are no APN username, empty field should be left)
- 2003 – APN password (if there are no APN password, empty field should be left)
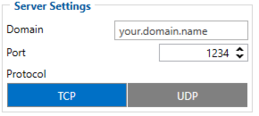
Server settings:
- 2004 – Domain
- 2005 – Port
- 2006 – Data sending protocol (0 – TCP, 1 – UDP)
After successful GPRS/SERVER settings configuration, FMB003 device will synchronize time and update records to the configured server. Time intervals and default I/O elements can be changed by using Teltonika Configurator or SMS parameters.

Data protocol settings:
- 113 – Data protocol (0 – Codec8, 1 – Codec8Extended)
Note: To get OEM parameters, you need to use Codec8Extended.
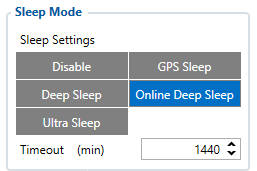
Sleep settings:
- 102 – Sleep settings (0 – Disable, 1 – Gps sleep, 2 – Deep sleep, 3 – Online Deep sleep, 4 – Ultra sleep)
Note: This scenario will not work with Deep Sleep and Ultra Sleep modes, since they disable the device's GSM module to save power.

OBDll settings:
- 40000 – OBDll data activation, enabled by default (0 – Disable 1 - Enable)

- 40005 – VIN read mode, Auto by default (0 – Auto 1 – Manual)
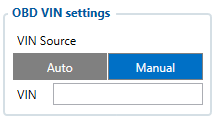
- 40003 – Manual VIN number entry

- 40440 – OEM Fuel level, Priority "Low" (0 – Disabled 1 – Low 2 – High 3 – Panic )
- 40430 – OEM Total milage (Counted), Priority "Low" (0 – Disabled 1 – Low 2 – High 3 – Panic )
- 40410 – VIN, Priority "Low" (0 – Disabled 1 – Low 2 – High 3 – Panic )

- 40160 – Engine RPM, Priority "Low" (0 – Disabled 1 – Low 2 – High 3 – Panic )
Quickstart: From default configuration to Car sharing solution in one SMS:
" setparam 2001:APN;2002:APN_user;2003:APN_password;2004:Domain;2005:Port;2006:0;102:3;40000: 1;40005:0; 40410:1; 40160:1; 40430:1; 40440:1; 113:1"
This SMS will set up your device to report object location to the server and possibility for read Engine RPM, VIN and OEM parameters.
Note: Before SMS text, two space symbols should be inserted if no SMS username or password was set in SMS \ Call settings.
Parsing information
1.Prerequisites:
1.1. Open TCP/UDP port
1.2. Read Java parser first start guide
2. Parsing example:
| Unparsed received data in hexadecimal stream |
|---|
| 000000000000005E08010000017716AE03D8010F0F22D720982E9C007E00120A002FFD1609E
F01F00150011505C80045010101FD03FE230BB5000BB60006423A0018002F430F8A4400000 901301100161200EC13FBD90F038402C7000003BD1003066802000100005F75 |
| AVL Data Packet Part | HEX Code Part |
|---|---|
| Zero Bytes | 00 00 00 00 |
| Data Field Length | 00 00 00 5E |
| Codec ID | 08 (Codec 8) |
| Number of Data 1 (Number of Total Records) | 01 |
| Timestamp | 00 00 01 77 16 AE 03 D8 (Mon Jan 18 18:07:19 UTC 2021) |
| Priority | 01 |
| Longitude | 0F 0F 22 D7 |
| Latitude | 20 98 2E 9C |
| Altitude | 00 7E |
| Angle | 00 12 |
| Satellites | 0A |
| Speed | 00 2F |
| Event IO ID | FD (AVL ID: 253, Name: Green driving type) |
| N of Total ID | 16 |
| N1 of One Byte IO | 09 |
| 1’st IO ID | EF (AVL ID: 239, Name: Ignition) |
| 1’st IO Value | 01 |
| 2’nd IO ID | F0 (AVL ID: 240, Name: Movement) |
| 2’nd IO Value | 01 |
| 3’rd IO ID | 15 (AVL ID: 21, Name: GSM Signal) |
| 3’rd IO Value | 05 |
| 4'th IO ID | 50 (AVL ID: 80, Name: Data mode) |
| 4'th IO Value | 01 |
| 5'th IO ID | C8 (AVL ID: 200, Name: Sleep Mode) |
| 5'th IO Value | 00 |
| 6'th IO ID | 45 (AVL ID: 69, Name: GNSS Status) |
| 6'th IO Value | 01 |
| 7'th IO ID | 01 (AVL ID: 1, Name: Digital Input 1) |
| 7'th IO Value | 01 |
| 8'th IO ID | FD (AVL ID: 253, Name: Green driving type) |
| 8'th IO Value | 03 (01 - harsh acceleration, 02 - harsh braking, 03 - harsh cornering) |
| 9'th IO ID | FE (AVL ID: 254, Name: Green Driving Value) |
| 9'th IO Value | 23 ( Depending on green driving type: if harsh acceleration or braking - g*100 (value 123 ->1,23g). If Green driving source is "GPS" - harsh cornering value is rad/s*100. If source is "Accelerometer" - g*100. |
| N2 of Two Byte IO | 0B |
| 1’st IO ID | B5 (AVL ID: 181, Name: GNSS PDOP) |
| 1’st IO Value | 00 0B |
| 2’nd IO ID | B6 (AVL ID: 182, Name: GNSS HDOP) |
| 2’nd IO Value | 00 06 |
| 3’rd IO ID | 42 (AVL ID: 66, Name: External Voltage) |
| 3’rd IO Value | 3A 00 |
| 4'th IO ID | 18 (AVL ID: 24, Name: Speed) |
| 4'th IO Value | 00 2F |
| 5'th IO ID | 43 (AVL ID: 67,Name: Battery Voltage) |
| 5'th IO Value | 0F 8A |
| 6'th IO ID | 44 (AVL ID: 68, Name: Battery Current) |
| 6'th IO Value | 00 00 |
| 7'th IO ID | 09 (AVL ID: 9, Analog input 1 |
| 7'th IO Value | 01 30 |
| 8'th IO ID | 11 (AVL ID:17, Name: Axis X) |
| 8’th IO Value | 00 16 |
| 9'th IO ID | 12 (AVL ID:18, Name: Axis Y) |
| 9’th IO Value | 00 EC |
| 10'th IO ID | 13 (AVL ID:19, Name: Axis Z) |
| 10'th IO Value | FB D9 |
| 11'th IO ID | 0F (AVL ID: 15, Name: Eco score) |
| 11'th IO Value | 03 84 |
| N4 of Four Byte IO | 02 |
| 1'st IO ID | 02 C7(AVL ID: 199, Name: Trip Odometer) |
| 1’st IO Value | 00 00 03 BD |
| 2’nd IO ID | 10 03(AVL ID: 16, Name: Total Odometer) |
| 2’nd IO Value | 06 68 80 20 |
| Number of Data 2 (Number of Total Records) | 01 |
| CRC-16 | 00 00 5F 75 |
Demonstration in platform
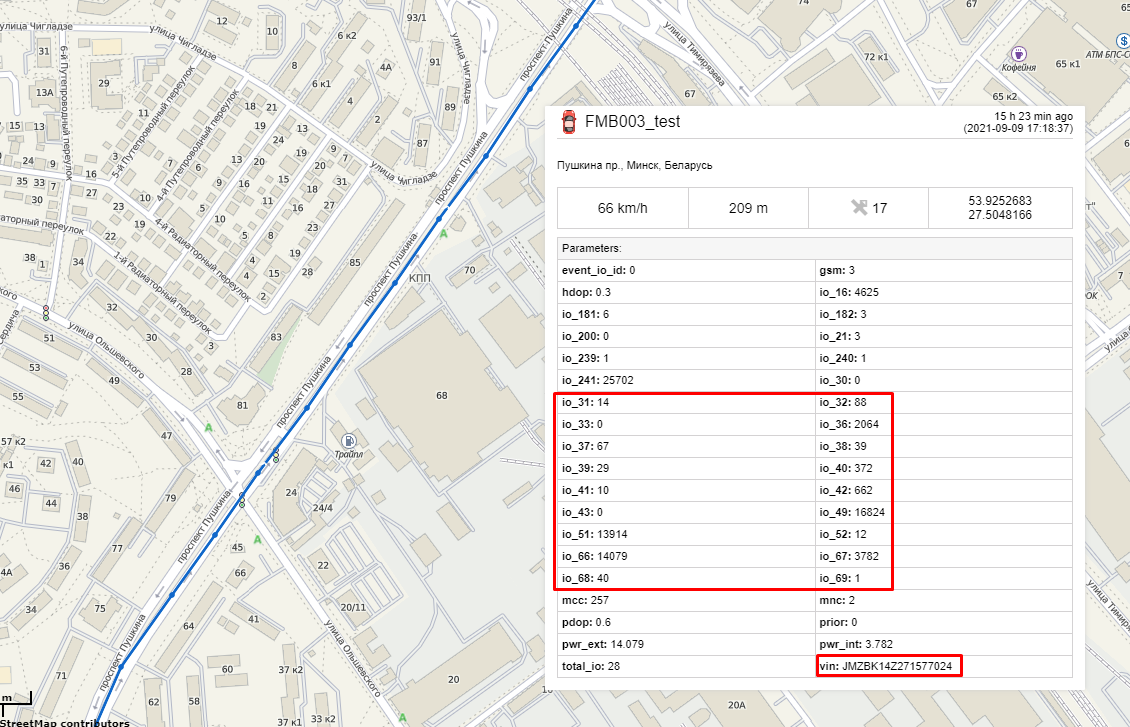
FMBT : OBDll info
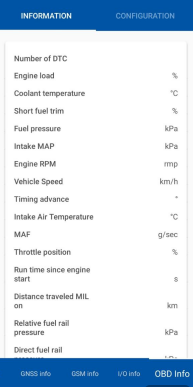
Bluetooth's connection to monitor OBDll parameters. Real time OBDll data, events notifications about harsh acceleration, braking, cornering, overspeeding, idling, RPM etc.
- You must connect to the device by clicking Bluetooth icon, and selecting your device.
- Next, you need to select the OBDll info tab, where information about the car in real time will be displayed.
WIALON: Open WIALON → Open Messages → Select your device → Select the date interval → Select Message (data messages) → Select execute and you will see all the information.
