Difference between revisions of "EYE SENSOR / BTSMP1"
| Line 35: | Line 35: | ||
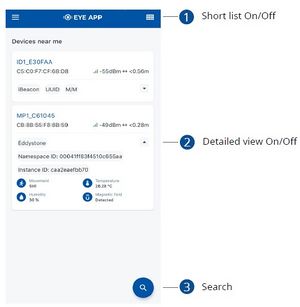
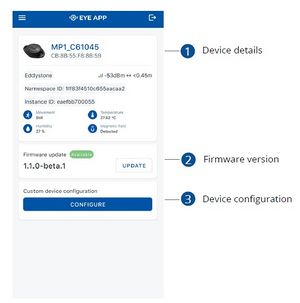
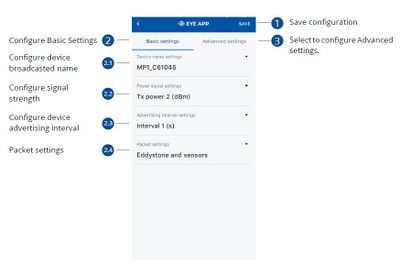
|'''Devices in view''': In this window you will see all visible devices. You have options to see devices in Short list (1) or in default list. When looking at devices in default list you will be able to open Detailed view (2) of devices and check transmitted data statuses. Additionaly if you are looking for specific devices you will be able to use Search (3) function to filter search options. When in this window select a device of your choice to connect and after passing pin code you will go to device overview window.||'''Overview window''': In overview window you can see device details (1), check firmware version and update if available (2), go to device configuration settings. If you select to Configure (3) device new window will open with Basic and Advanced settings.||'''Configure window''': In this window you can check and change device configuration settings. In main tab Basic Settings (1) you can change main settings. Change Device name (2.1), Power signal strength (2.2), Advertising interval (2.3) and Packet (2.4) transmition type. For more settings go to Advanced settings (3) tab to enable various events. | |'''Devices in view''': In this window you will see all visible devices. You have options to see devices in Short list (1) or in default list. When looking at devices in default list you will be able to open Detailed view (2) of devices and check transmitted data statuses. Additionaly if you are looking for specific devices you will be able to use Search (3) function to filter search options. When in this window select a device of your choice to connect and after passing pin code you will go to device overview window.||'''Overview window''': In overview window you can see device details (1), check firmware version and update if available (2), go to device configuration settings. If you select to Configure (3) device new window will open with Basic and Advanced settings.||'''Configure window''': In this window you can check and change device configuration settings. In main tab Basic Settings (1) you can change main settings. Change Device name (2.1), Power signal strength (2.2), Advertising interval (2.3) and Packet (2.4) transmition type. For more settings go to Advanced settings (3) tab to enable various events. | ||
|} | |} | ||
| + | |||
| + | ==Product information== | ||
| + | {| class="wikitable" | ||
| + | |+ | ||
| + | ! style="width:10%; border: 1px solid white; border-bottom: 2px solid #0054A6; background: white; color: #0054A6; text-align: left;" |Functionalities | ||
| + | |- | ||
| + | | style="border: 1px solid white; border-bottom: 2px solid #E8E8E8; text-align: left; vertical-align: center; background: white;" |Beacon ID, LED, Temperature, Humidity, Accelerometer, Magnet detection | ||
| + | |} | ||
| + | {| class="wikitable" | ||
| + | |+ | ||
| + | ! style="width:10%; border: 1px solid white; border-bottom: 2px solid #0054A6; background: white; color: #0054A6; text-align: left;" |Dimensions and weight | ||
| + | |- | ||
| + | | style="border: 1px solid white; border-bottom: 2px solid #E8E8E8; text-align: left; vertical-align: center; background: white;" |Dimensions 56,6 mm x 38 mm x 13 mm | ||
| + | |- | ||
| + | | style="border: 1px solid white; border-bottom: 2px solid #E8E8E8; text-align: left; vertical-align: center; background: white;" |Weight 19 g | ||
| + | |} | ||
| + | |||
| + | ==Safety information== | ||
| + | This message contains information on how to operate BTSID1 safely. By following these requirements and recommendations, you will avoid dangerous situations. You must read these instructions carefully and follow them strictly before operating the device! | ||
| + | |||
| + | 1. To avoid mechanical damage, it is advised to transport the device in an impact-proof package. | ||
| + | |||
| + | 2. In case of malfunction contact yours Teltonika account manager or write to technical support team over VIP helpdesk.<br> | ||
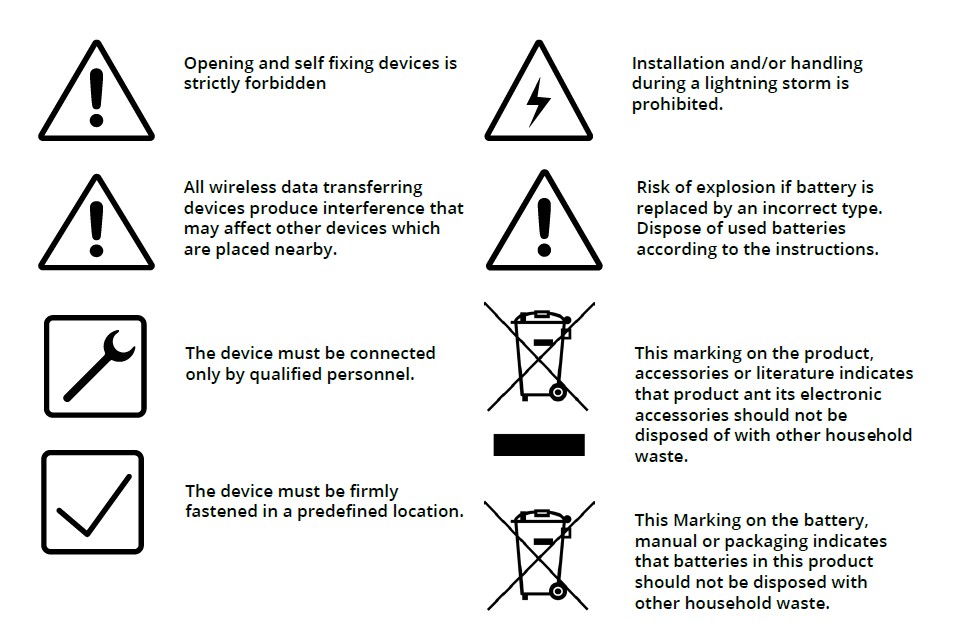
| + | [[File:Safety.jpg]] | ||
Revision as of 16:52, 24 July 2021
Main Page > Sensors > EYE SENSOR / BTSMP1Introduction
This document provides short instruction how to configure BTSMP1 Senor and FM tracker. During the use if you will have any questions or suggestions for improvement please feel free to contact yours Teltonika account manager or write to technical support team over VIP helpdesk. Wireless solutions open up new horizons for your business and help to keep an eye on your assets. Discover our brand-new and certified Bluetooth Low Energy ID beacon and sensor models from Teltonika with robust waterproof casing and a long-lifetime battery. The models designed for a low-cost fast and easy configuration and integration to save precious time, resources, and ensure accountability.
About BTSMP1
Perfect for traceability use cases, delivery tracking, monitoring of various movable objects in logistics (trailers, containers), agriculture (tractor attachments), and constructions (tools and inventory). Sensors data makes it especially suitable for cold chain refrigerator use cases. The built-in accelerometer can detect item movement or fall events. Magnet detection can be used for wireless open/close detection and notifications such as trailer door events, etc. EYE sensor supports iBeacon and Eddystone protocols. The device is fully compatible with the Teltonika firmware platform which provides extended functionality.
Configurating beacon device
Devices work constantly and are ready to perform out of the box. Default basic Sensor settings are set to:
• Transmitting at 2 dBm power.
• Data advertising at 3 second intervals.
• Eddystone protocol
If you would like to change these settings you will need to:
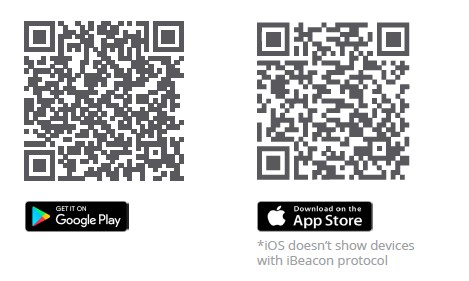
1) Download and install EYE APP - Teltonika application to change sensor settings.
Product information
| Functionalities |
|---|
| Beacon ID, LED, Temperature, Humidity, Accelerometer, Magnet detection |
| Dimensions and weight |
|---|
| Dimensions 56,6 mm x 38 mm x 13 mm |
| Weight 19 g |
Safety information
This message contains information on how to operate BTSID1 safely. By following these requirements and recommendations, you will avoid dangerous situations. You must read these instructions carefully and follow them strictly before operating the device!
1. To avoid mechanical damage, it is advised to transport the device in an impact-proof package.
2. In case of malfunction contact yours Teltonika account manager or write to technical support team over VIP helpdesk.
