ADAS Integration on platfroms: Difference between revisions
MindaugasK (talk | contribs) Created page with " __TOC__ == ADAS on Wialon platform == Our devices are supported by many third-party platforms however, currently only one platform, Wialon supports our advanced driver safet..." |
No edit summary |
||
| Line 7: | Line 7: | ||
In this chapter, we will show you how to configure the device and also how to configure the Wialon platform for receiving information from ADAS. | In this chapter, we will show you how to configure the device and also how to configure the Wialon platform for receiving information from ADAS. | ||
== Device configuration == | == Device configuration == | ||
Revision as of 11:46, 23 September 2022
Main Page > Video Solutions > Teltonika ADAS > ADAS Integration on platfromsADAS on Wialon platform
Our devices are supported by many third-party platforms however, currently only one platform, Wialon supports our advanced driver safety system ADAS.
In this chapter, we will show you how to configure the device and also how to configure the Wialon platform for receiving information from ADAS.
Device configuration
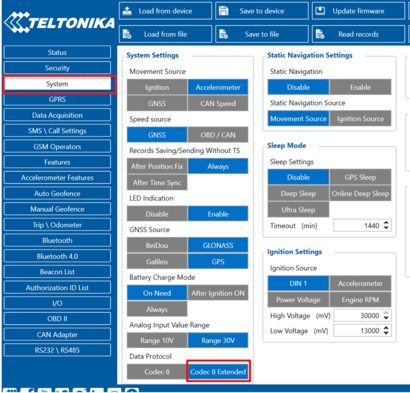
Step 1
Enable codec 8 extended.
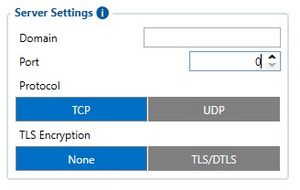
Step 2
Configure Domain and Port for the device to send data to the Wialon. This information you will find then you register the device in Wialon
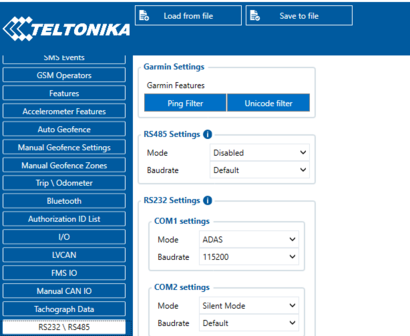
Step 3
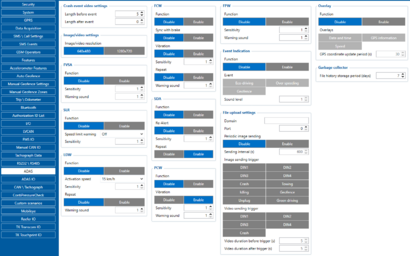
Go to RS232/RS485 and enable ADAS in order for the configurator to open additional settings.
Configure the ADAS image sending and camera settings for your needs in the ADAS window which opens after selecting ADAS in RS232 input.
Step 4
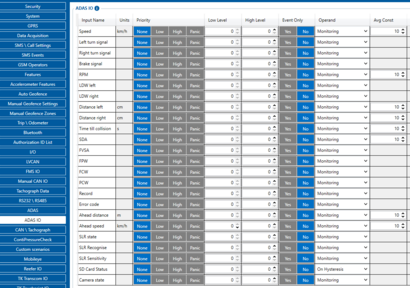
Go to I/O element and select required or desired parameter priority to Low.
Step 5
ADAS server settings will be different:
Domain: Will be the same as from Wialon for the device
Port: 22297
Wialon configuration
Step 1
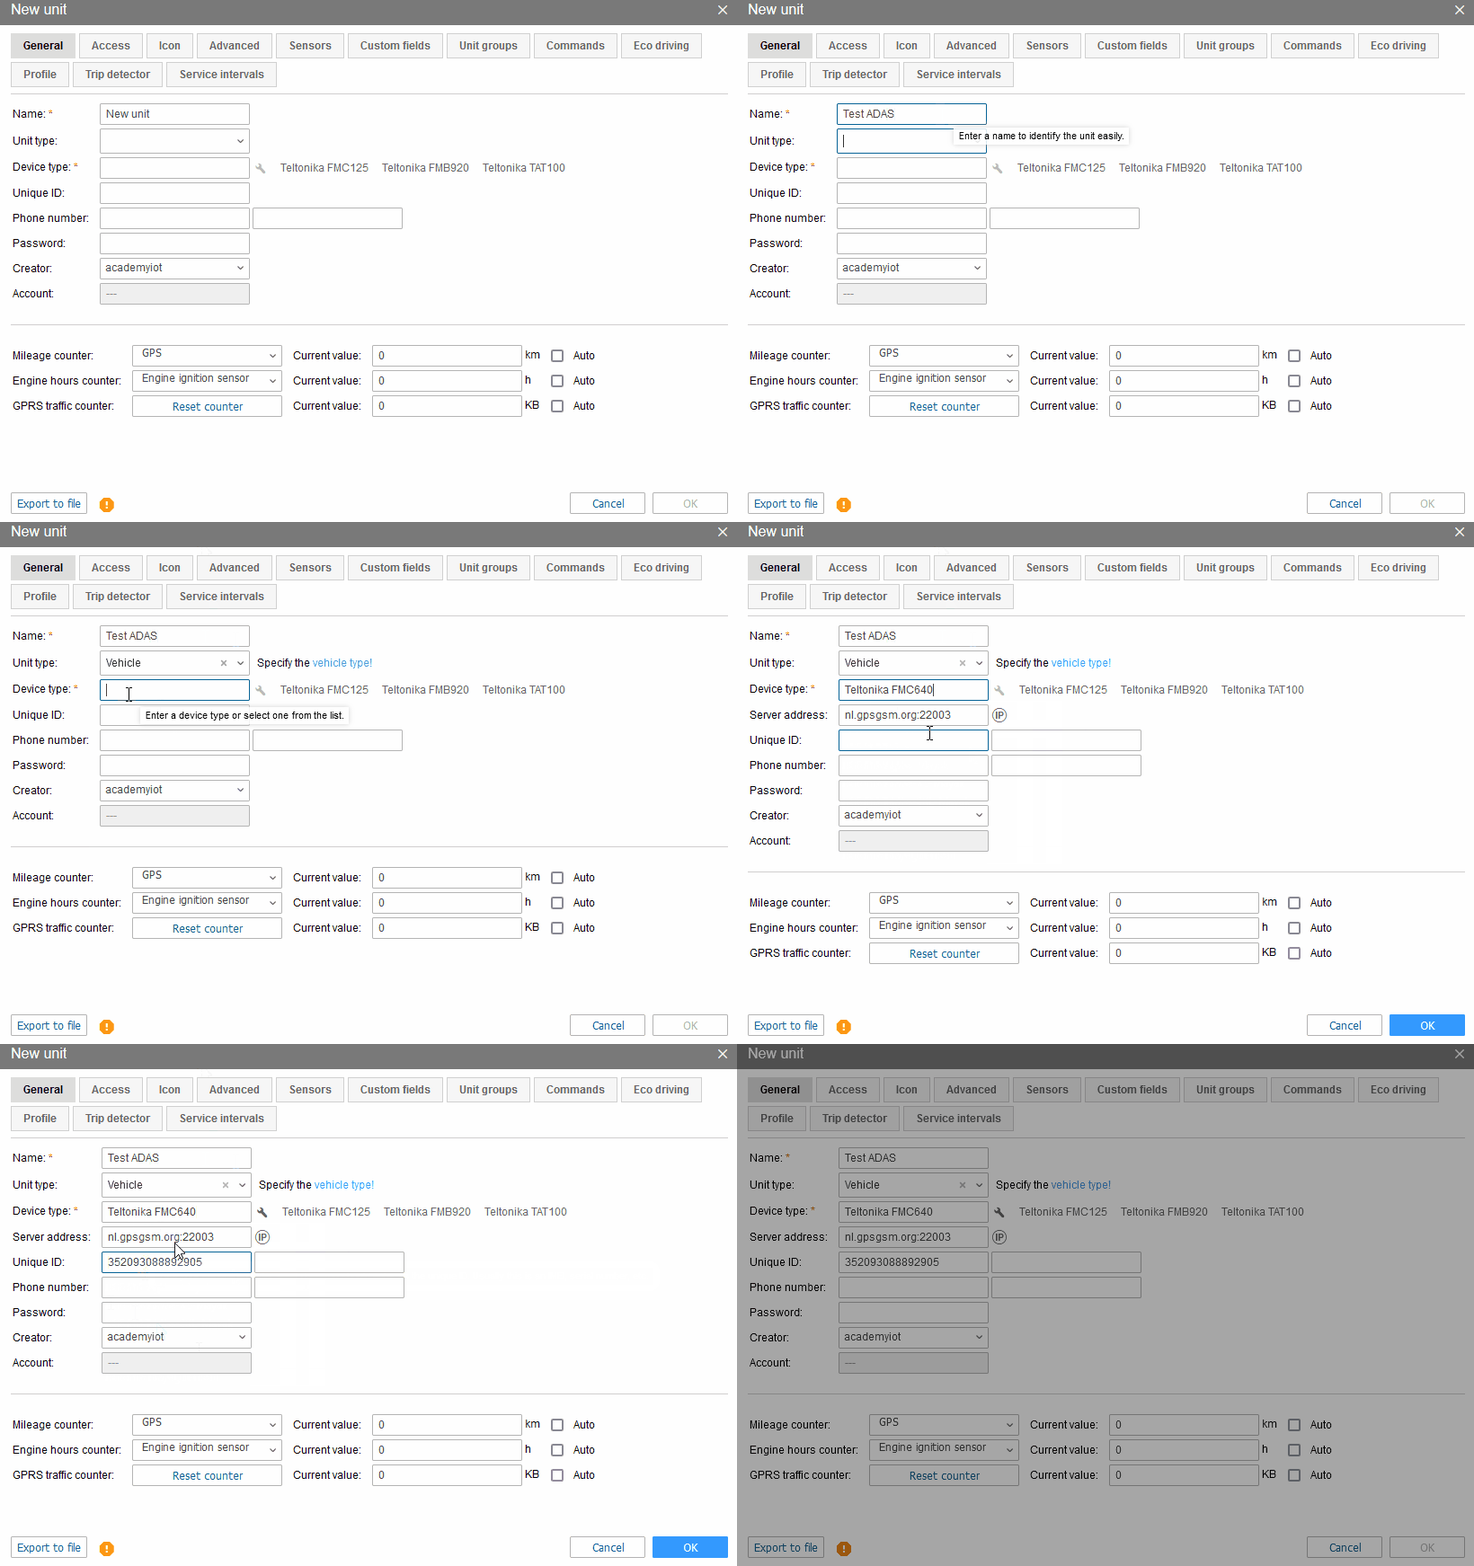
Login into Wialon and go to the Units and select New.
Configure the device and activate ADAS device according to the GIF.
Note: You must enter device IMEI in "Unique ID" to identify device in Wialon platform.
Step 2
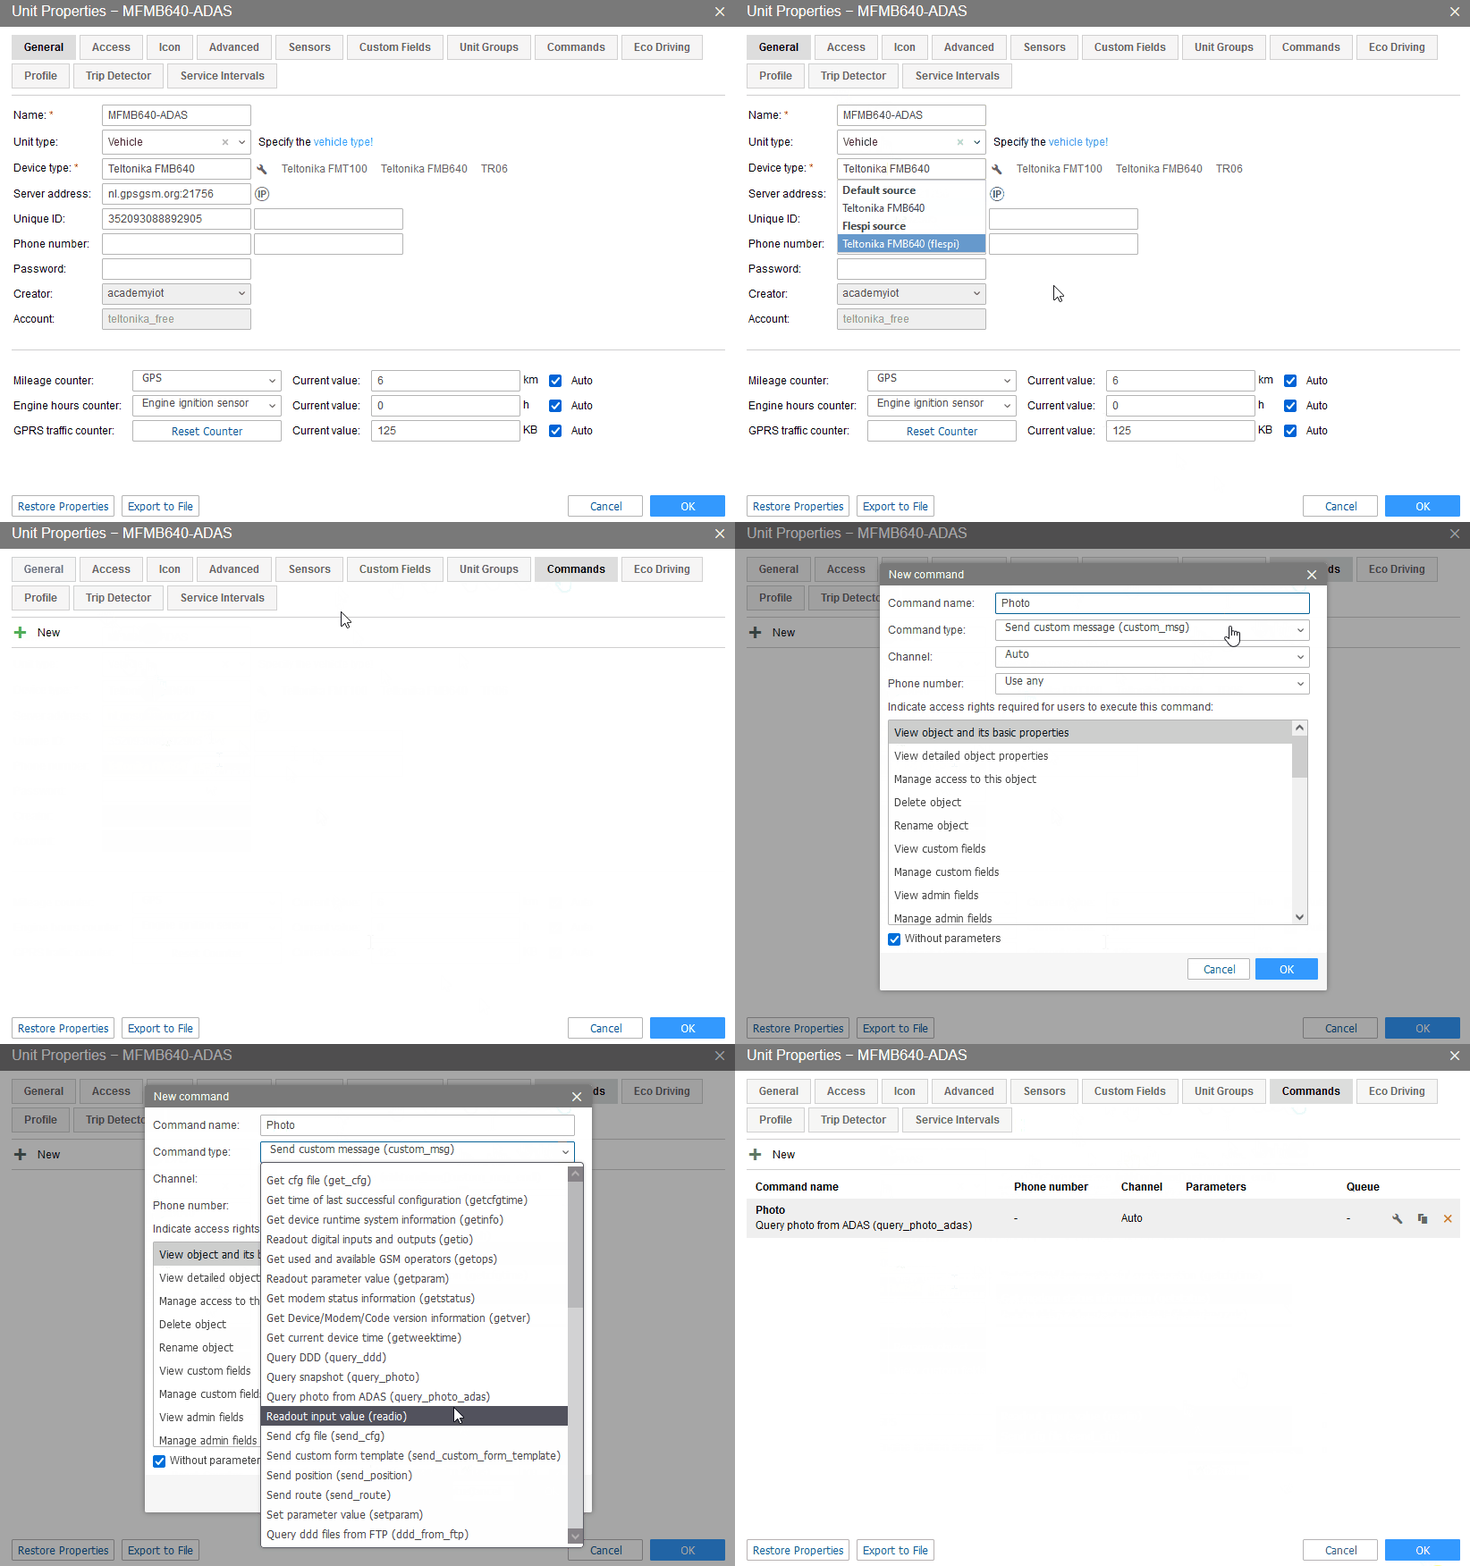
Setting the command to request a photo.
Go to "Units tab" and push on "wrench" icon.
Now select "Commands" and press new.
Then you should press "New" button to call out new window.
You'll need to create the name of the command and select the command type according to the GIF.
After that press ok and the command will appear.
Step 3
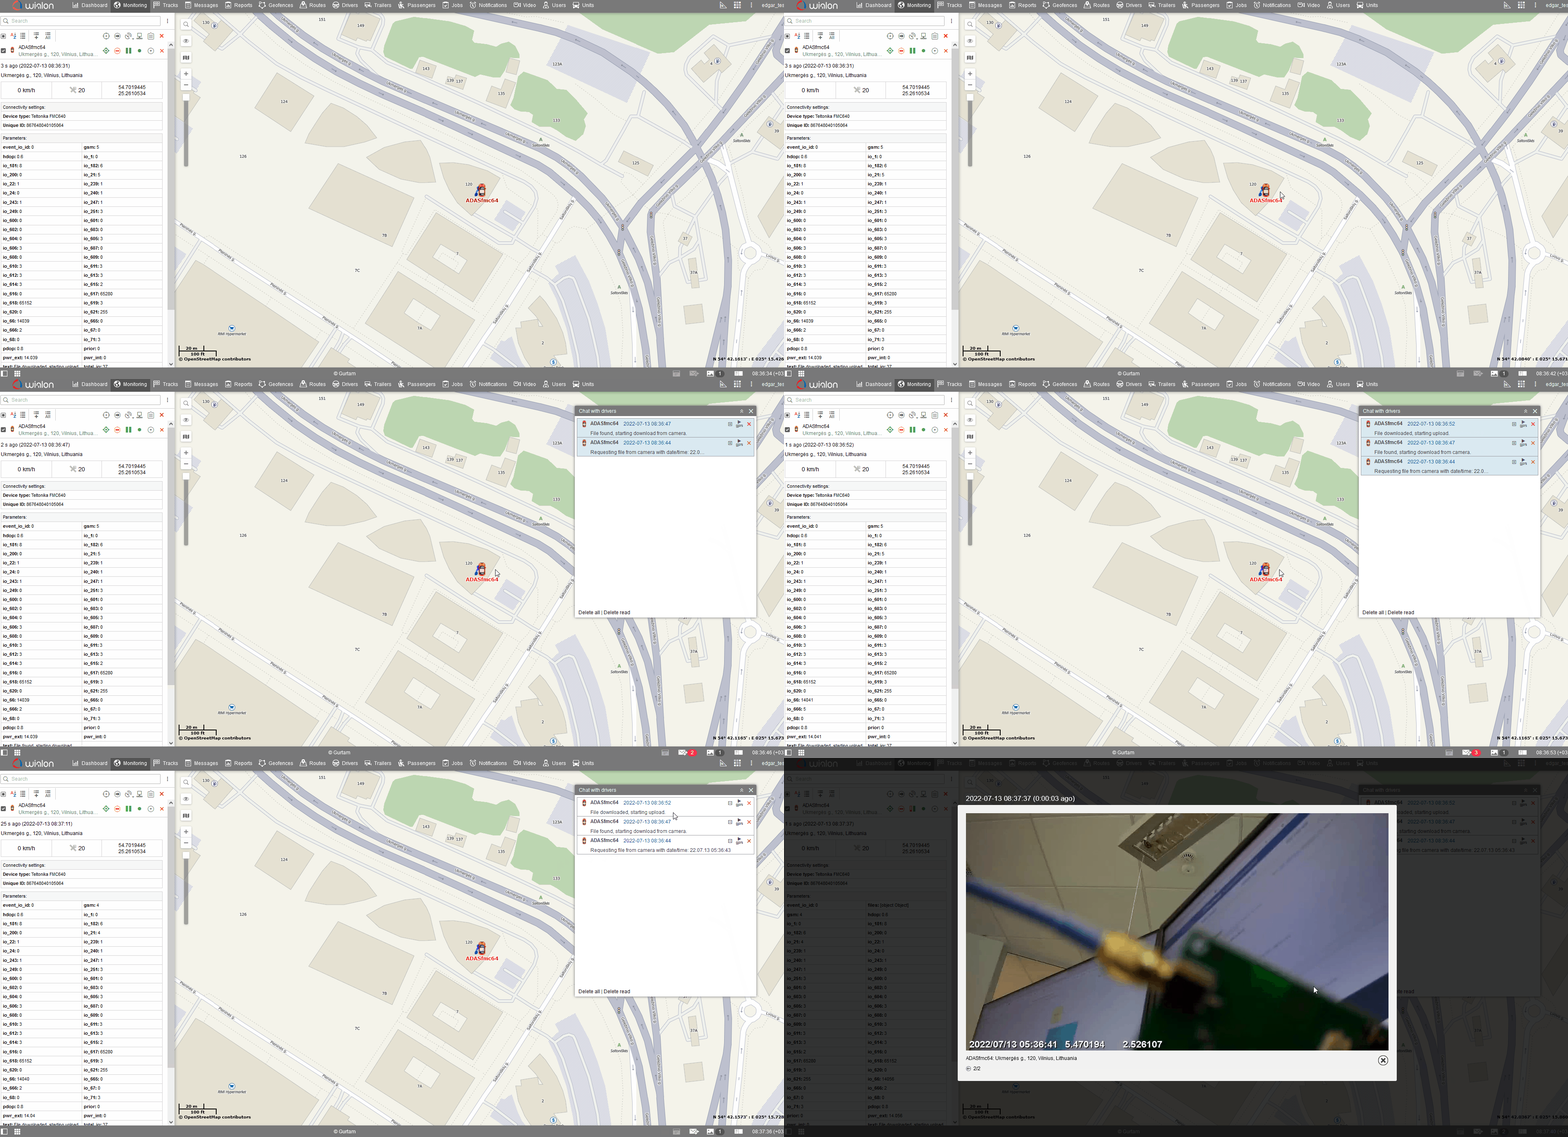
After the command was created, you should to go to the "Monitoring" tab, select needed device and press the arrow and select GPRS command.
After that you will see new window opened and a message where command was sent. A few more replies will be received with information that a photo was found and will be downloaded. Once the photo is downloaded, a notification icon will appear on the bottom-right corner, once clicked, the downloaded photo will appear on the screen.

