From Teltonika Telematics Wiki
Main Page > Video Solutions > Teltonika ADAS > Indicator Display Icons
Indicator Display
| Indicator Display for ADAS
|
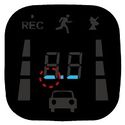
|
Left Turn Signal
The left under bar blinks when the left turn signal is active at 0km/h.
|
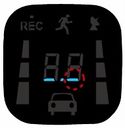
|
Right Turn Signal
The right under bar blinks when the right turn signal is active at 0km/h.
|
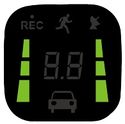
|
LDW Active
LDW is enabled.
|
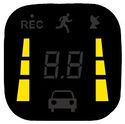
|
LDW Unavailable
LDW is not active.
|
|
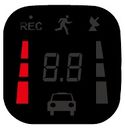
Left Departure Alert
When the vehicle departs the left lane.
|
|
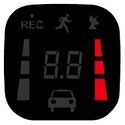
Right Departure Alert
When the vehicle departs the right lane.
|
|
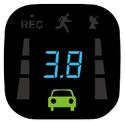
Front Vehicle Detection
When the vehicle ahead is in the host vehicle’s lane.
|
|
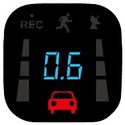
Forward Collision Warning
Indicates impending collision with the vehicle ahead
|
|
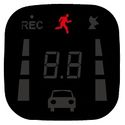
Pedestrian Collision Warning
Indicates impending collision with a pedestrian.
|
|
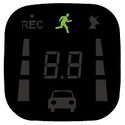
Pedestrian Detection
Displayed when a pedestrian is detected ahead.
|
|
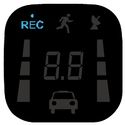
Recording without voice
DVR function is working and voice is not being recorded.
|
|
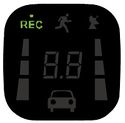
Recording with voice
DVR function is working and voice is being recorded.
|
|
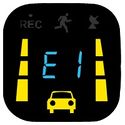
Camera Connection Error
Camera connection is not good. Contact your local distributor/installer.
|
|
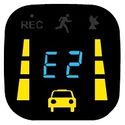
CAN Communication Error
CAN Communication has a problem. Contact your local distributor/installer.
|
|
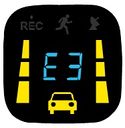
Camera View Block Error
The camera is covered by something. Remove something blocking camera vision.
|
|
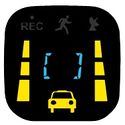
Low Visibility Indication
The performance of ADAS might be limited under the inclement weather condition.
|
| Indicator Display for ADAS Plus
|

|
Booting Mode
ADAS is turning on.
|
|
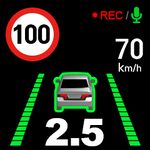
Driving Mode
Default mode when ADAS is turned on.
|

|
Left Turn Signal
The left under bar blinks when the left turn signal is active at 0km/h.
|

|
Right Turn Signal
The right under bar blinks when the right turn signal is active at 0km/h.
|

|
LDW Active
LDW is enabled.
|

|
LDW Unavailable
LDW is not active.
|

|
Left Departure Alert
When the vehicle departs the left lane.
|

|
Right Departure Alert
When the vehicle departs the right lane.
|

|
Front Vehicle Detection
When the vehicle ahead is in the host vehicle’s lane.
|

|
Forward Collision Warning
Indicates impending collision with the vehicle ahead
|

|
Pedestrian Collision Warning
Indicates impending collision with a pedestrian.
|

|
Pedestrian Detection
Displayed when a pedestrian is detected ahead.
|

|
Forward Proximity Warning
Front vehicle is within the range of FPW warning settings
|

|
Forward Collision Warning icon
Collision with front vehicle is impending.
|

|
Pedestrian Collision Warning icon
Collision with pedestrian is impending.
|

|
Speed Limit Detection icon
Speed limit sign is detected
|

|
Camera Connection Error
Camera connection is not good. Contact your local distributor/installer.
|

|
CAN Communication Error
CAN Communication has a problem. Contact your local distributor/installer.
|

|
Camera View Block Error
The camera is covered by something. Remove something blocking camera vision.
|

|
Low Visibility Indication
The performance of ADAS might be limited under the inclement weather condition.
|

|
Indicator communication error
|

|
SD card error
The SD card cannot be read. Please check if it is inserted or is not corrupted.
|
Indicator Settings
Display Turning On: Press the center button.
Display Turning Off: Press the center button until the display turns off. (Even if the display turns off, it gives a warning sound)
| Indicator Settings for ADAS
|
|
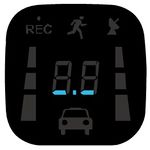
1) Working Mode
When it turns on, working mode operates.
Volume control is available, when indicator is in
the working mode.
Press the (-) button repeatedly to decrease
the volume, press the (+) button repeatedly to
increase the volume.
|
|
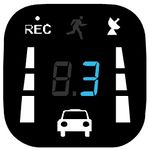
2) Brightness Control Mode
Press the center button once it changes to
brightness control mode.
Press the (-) and (+) button to decrease or
increase the brightness level and save the new settings.
The brightness level appears
in numbers.
Press the center button again, it goes to
left LDW sensitivity control mode. If there
is no button operation for 5 seconds, it
returns to working mode.
There are five available levels(1-5).
|
|
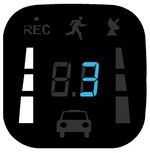
3) Left LDW Sensitivity Control Mode
Press the center button once it changes
to left LDW sensitivity control mode.
Press the (-) and (+) button to decrease or
increase the left LDW sensitivity and save
the new settings.
The left LDW sensitivity level appears in numbers.
Press the center button again, it goes to
Right LDW sensitivity control mode.
If there is no button operation for 5 seconds,
it returns to working mode.
There are five available levels(1-5).
|
|
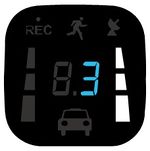
4) Right LDW Sensitivity Control Mode
Press the center button once it changes to
Right LDW sensitivity control mode.
Press
the (-) and (+) button to decrease or
increase the right LDW sensitivity and save
the new settings.
The right LDW sensitivity level appears in
numbers.
Press the center button again, it goes to
FCW sensitivity control mode.
If there is
no button operation for 5 seconds, it
returns to working mode.
There are five available levels(1-5).
|
|
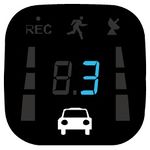
5) FCW Sensitivity Control Mode
Press the center button once it changes
to FCW sensitivity control mode.
Press the (-) and (+) button to decrease
or increase the FCW sensitivity and save
the new settings.
The FCW sensitivity level appears in
numbers.
Press the center button again, it goes to
SDA sensitivity control mode.
If there is no button operation for 5
seconds, it returns to working mode.
There are five available levels(1-5).
|
|
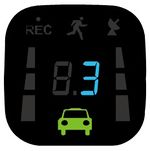
6) SDA Sensitivity Control Mode
Press the center button once it
changes to SDA sensitivity control mode.
Press the (-) and (+) button to decrease
or increase the SDA sensitivity and save
the new settings.
The SDA sensitivity level
appears in numbers.
Press the center button again, it goes to
FPW sensitivity control mode.
If there is no button operation for 5 seconds,
it returns to working mode.
There are five available levels(1-5).
|
|
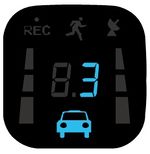
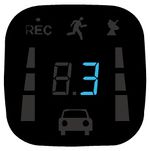
7) FPW Sensitivity Control Mode
Press the center button once it changes
to FPW sensitivity control mode.
Press the (-) and (+) button to decrease
or increase the FPW sensitivity and save
the new settings.
The FPW sensitivity level appears in
numbers.
Press the center button again, it goes
to Volume control mode.
If there is no button operation for 5
seconds, it returns to working mode.
There are three available levels(1-3).
|
|
8) Volume Control Mode
Press the center button once it
changes to volume control mode.
Press the (-) and (+) button to decrease
or increase the volume and save the
new settings.
The volume level appears in numbers.
Press the center button again, it goes
to working mode.
If there is no button operation for 5 seconds,
it returns to working mode.
There are five available levels(1-5).
|
| Indicator Settings for ADAS plus
|
|
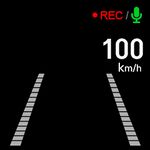
1) Working Mode
When it turns on, working mode operates.
Volume control is available, when indicator is in
the working mode.
Press the (-) button repeatedly to decrease
the volume, press the (+) button repeatedly
to increase the volume.
|

|
2) Brightness Control Mode
Press the center button once it changes to
brightness control mode.
Press the (-) and (+) button to decrease or
increase the brightness level and save the new settings.
The brightness level appears
in numbers.
Press the center button again, it goes to
left LDW sensitivity control mode. If there
is no button operation for 5 seconds, it
returns to working mode.
There are five available levels(1-5).
|
|
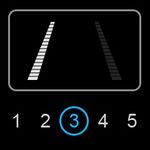
3) Left LDW Sensitivity Control Mode
Press the center button once it changes
to left LDW sensitivity control mode.
Press the (-) and (+) button to decrease or
increase the left LDW sensitivity and save
the new settings.
The left LDW sensitivity level appears in numbers.
Press the center button again, it goes to
Right LDW sensitivity control mode.
If there is no button operation for 5 seconds,
it returns to working mode.
There are five available levels(1-5).
|
|
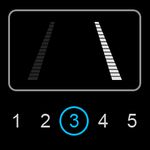
4) Right LDW Sensitivity Control Mode
Press the center button once it changes to
Right LDW sensitivity control mode.
Press
the (-) and (+) button to decrease or
increase the right LDW sensitivity and save
the new settings.
The right LDW sensitivity level appears in
numbers.
Press the center button again, it goes to
FCW sensitivity control mode.
If there is
no button operation for 5 seconds, it
returns to working mode.
There are five available levels(1-5).
|

|
5) FCW Sensitivity Control Mode
Press the center button once it changes
to FCW sensitivity control mode.
Press the (-) and (+) button to decrease
or increase the FCW sensitivity and save
the new settings.
The FCW sensitivity level appears in
numbers.
Press the center button again, it goes to
SDA sensitivity control mode.
If there is no button operation for 5
seconds, it returns to working mode.
There are five available levels(1-5).
|

|
6) SDA Sensitivity Control Mode
Press the center button once it
changes to SDA sensitivity control mode.
Press the (-) and (+) button to decrease
or increase the SDA sensitivity and save
the new settings.
The SDA sensitivity level
appears in numbers.
Press the center button again, it goes to
FPW sensitivity control mode.
If there is no button operation for 5 seconds,
it returns to working mode.
There are five available levels(1-5).
|

|
7) FPW Sensitivity Control Mode
Press the center button once it changes
to FPW sensitivity control mode.
Press the (-) and (+) button to decrease
or increase the FPW sensitivity and save
the new settings.
The FPW sensitivity level appears in
numbers.
Press the center button again, it goes
to Volume control mode.
If there is no button operation for 5
seconds, it returns to working mode.
There are three available levels(1-3).
|
|
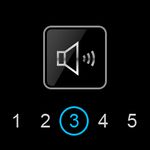
8) Volume Control Mode
Press the center button once it
changes to volume control mode.
Press the (-) and (+) button to decrease
or increase the volume and save the
new settings.
The volume level appears in numbers.
Press the center button again, it goes
to working mode.
If there is no button operation for 5 seconds,
it returns to working mode.
There are five available levels(1-5).
|
|
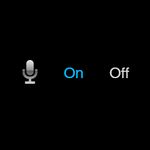
9) Voice Recording Control Mode
Press the (-) button for 3 seconds,
then it enters voice recording control
mode.
Two options (On/Off) are available.
Press the (-) and (+) button to select
each option and the center button to
save new settings.
If there is no button operation for
5 seconds, it returns to driving mode.
|
|
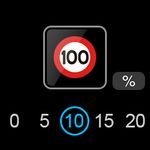
10) SLR Sensitivity Control Mode
Press the center button once, then it
changes to SLR sensitivity control mode.
Five levels (0, 5, 10, 15, 20) are available.
Press the (-) and (+) button to decrease
or increase the SLR sensitivity and save
new settings.
Press the center button again, then it
goes to volume control mode.
If there is no button operation for
5 seconds, it returns to driving mode.
|


