Configuring Blue Puck/Coin/Slim ID beacons
Configuring Blue Puck/Coin/Slim BLE advertising Beacon
1. Bluetooth® LE Blue Puck, Blue Coin and Blue Slim beacons are disabled by default. Configurations to these beacons are written through NFC. To do this download Device Manager Mobile by Ela from Google Play Store to your device, can be also downloaded to your Apple phone, tested with iPhone X model.
Note: Device that is used for configuring Blue Puck/Coin BLE advertising sensors must support NFC read/write functionality.
2. Follow these instructions to easily configure Blue Puck/Coin/Slim Bluetooth® LE advertising Beacon:
- Enable Bluetooth® and NFC on your Android-powered device.
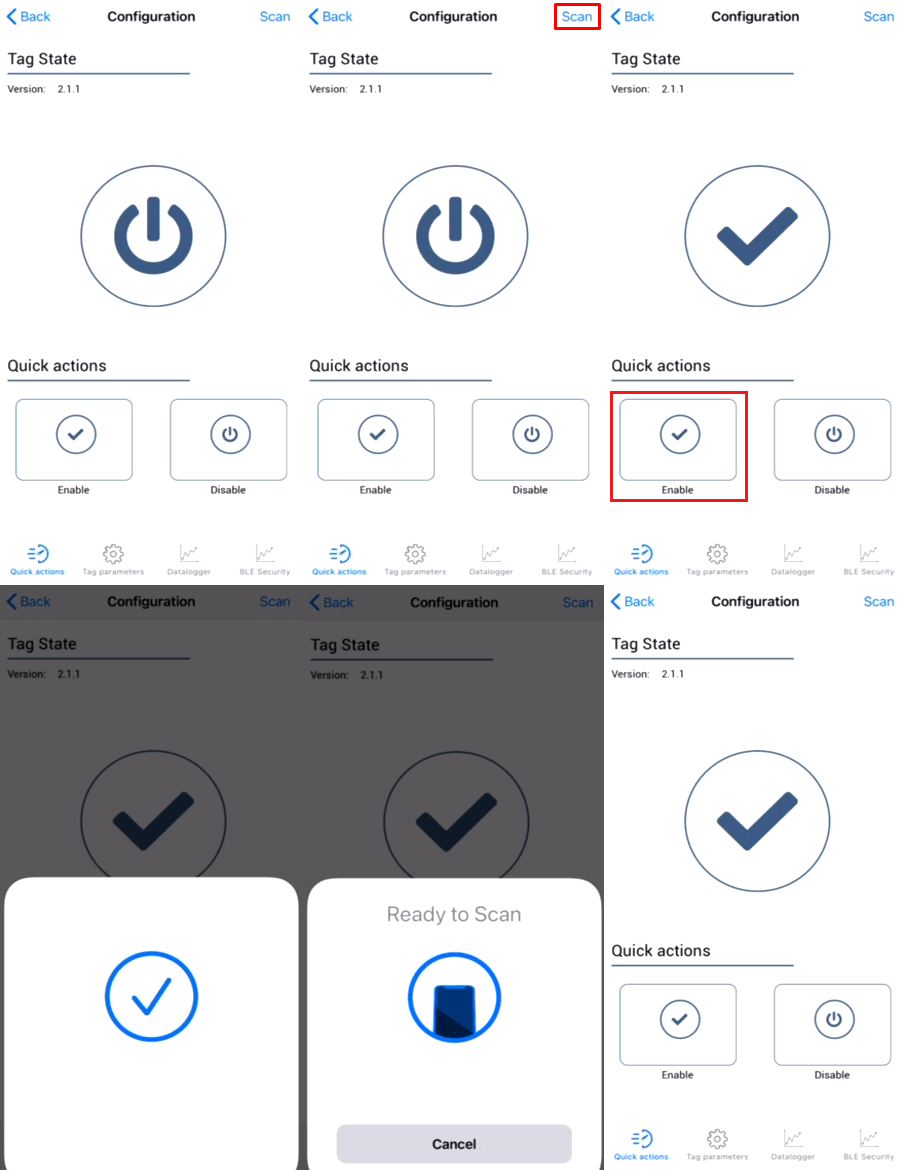
- Launch Device Manager Mobile on your device.
- Select Configuration.
- Place your device on top of Blue Puck/Coin/Slim BLE advertising Beacon to scan it.
- Click Enable to allow Blue Puck/Coin/Slim Beacon transmit advertising data.
- Place your device on top of Blue Puck/Coin/Slim BLE advertising Beacon again to scan the changes.
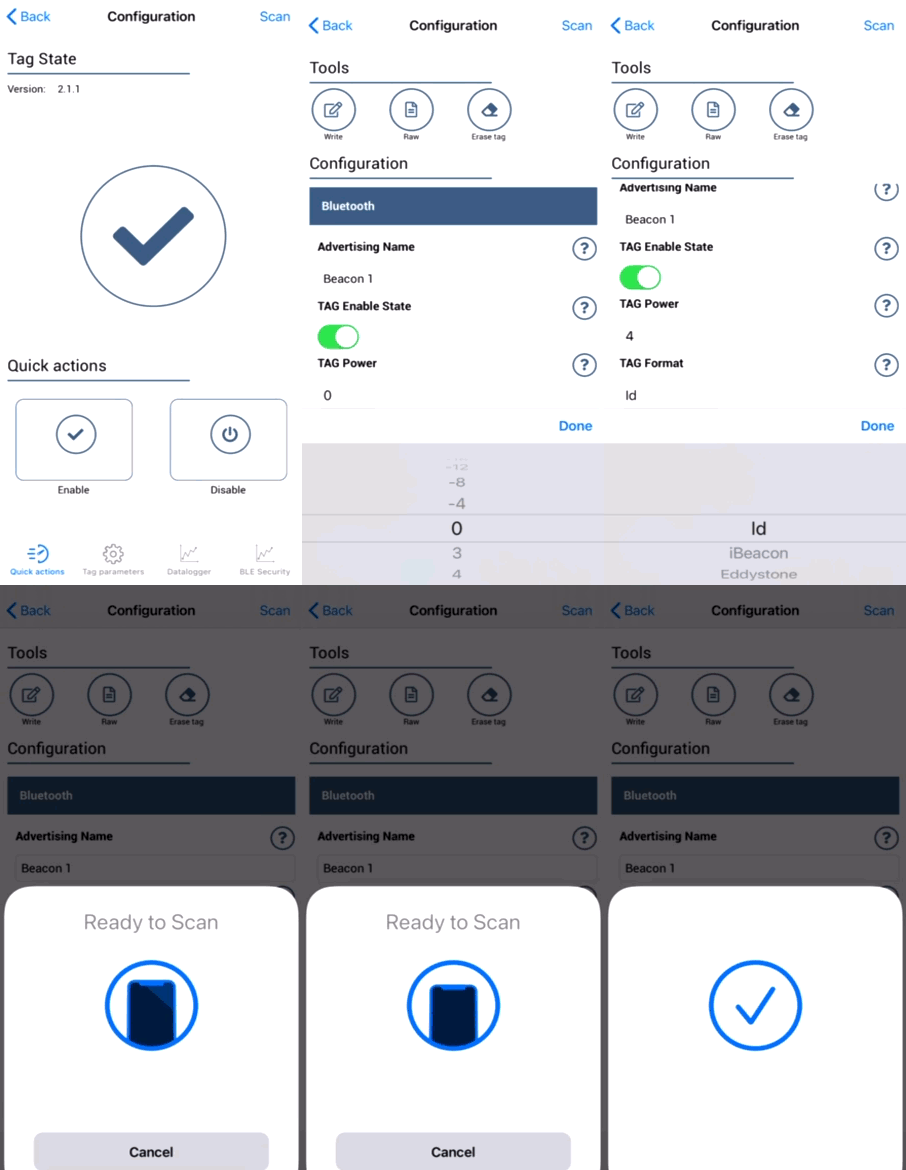
- We recommend to set Power to 4 to get the best possible distance.
- Set TAG Format to iBeacon.
- Set BLE Emit Period to 1 seconds to get best possible sensor detection.
- Click Write button.
- Place your device on top of Blue Puck/Coin/Slim BLE advertising sensor to write configuration to it.
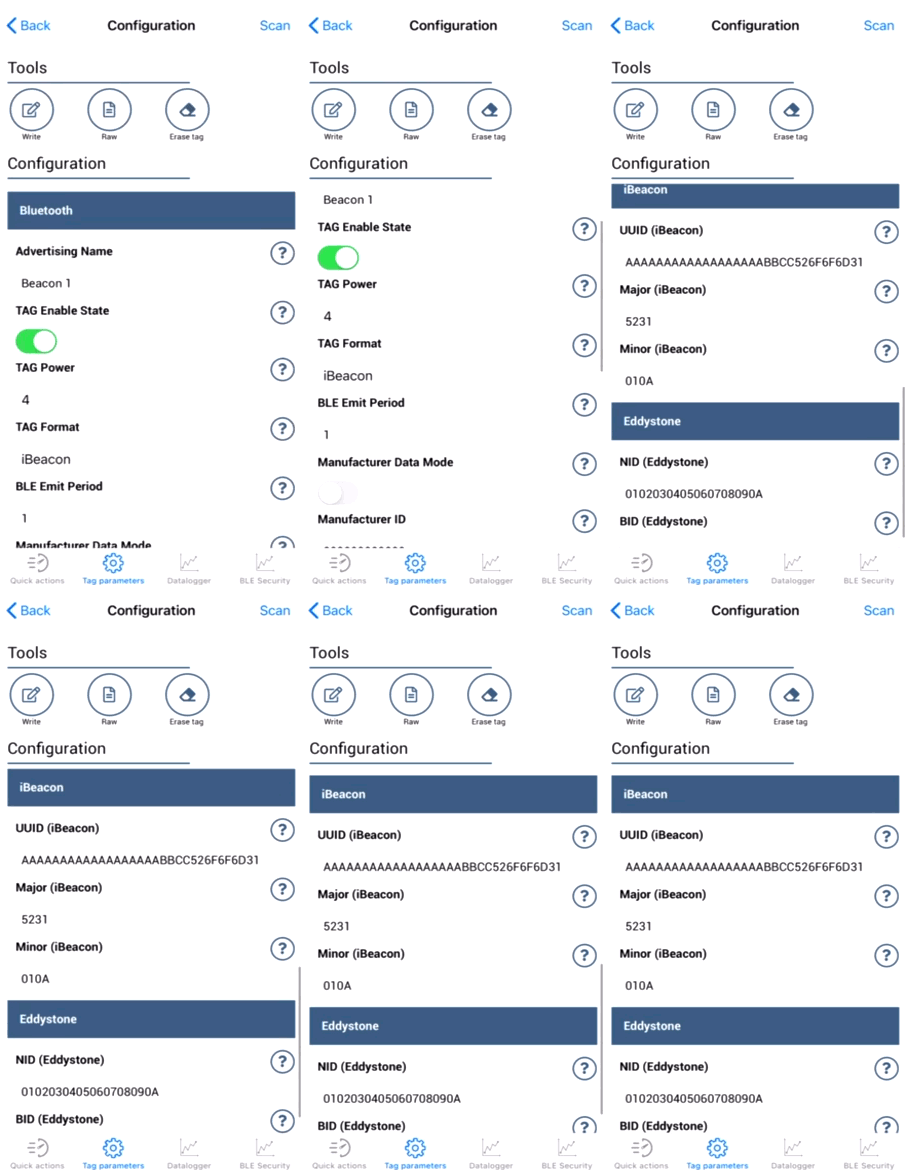
- Any Beacon ID can be typed in, as long as it in hex format.
Note: Beacon UUID must have 32 values set.
In the example below, Beacon UUID is AAAAAAAAAAAAAAAAAABBCC526F6F6D31
When converted from HEX to DEC, 526F6F6D31 means Room1, to make beacon identifying easier.
Major: 5231 when converted from HEX to DEC, it means R1
Minor: 010A
Configuring device
![]() Before Beacon configuration, visit how to set up your device for the very first data sending to the server:
Setting up your configuration for the very first data sending to the server
Before Beacon configuration, visit how to set up your device for the very first data sending to the server:
Setting up your configuration for the very first data sending to the server
These are instructions on how to easily configure ELA Blue Puck/Coin/Slim Beacon ID with Teltonika Configurator on GH5200 device.
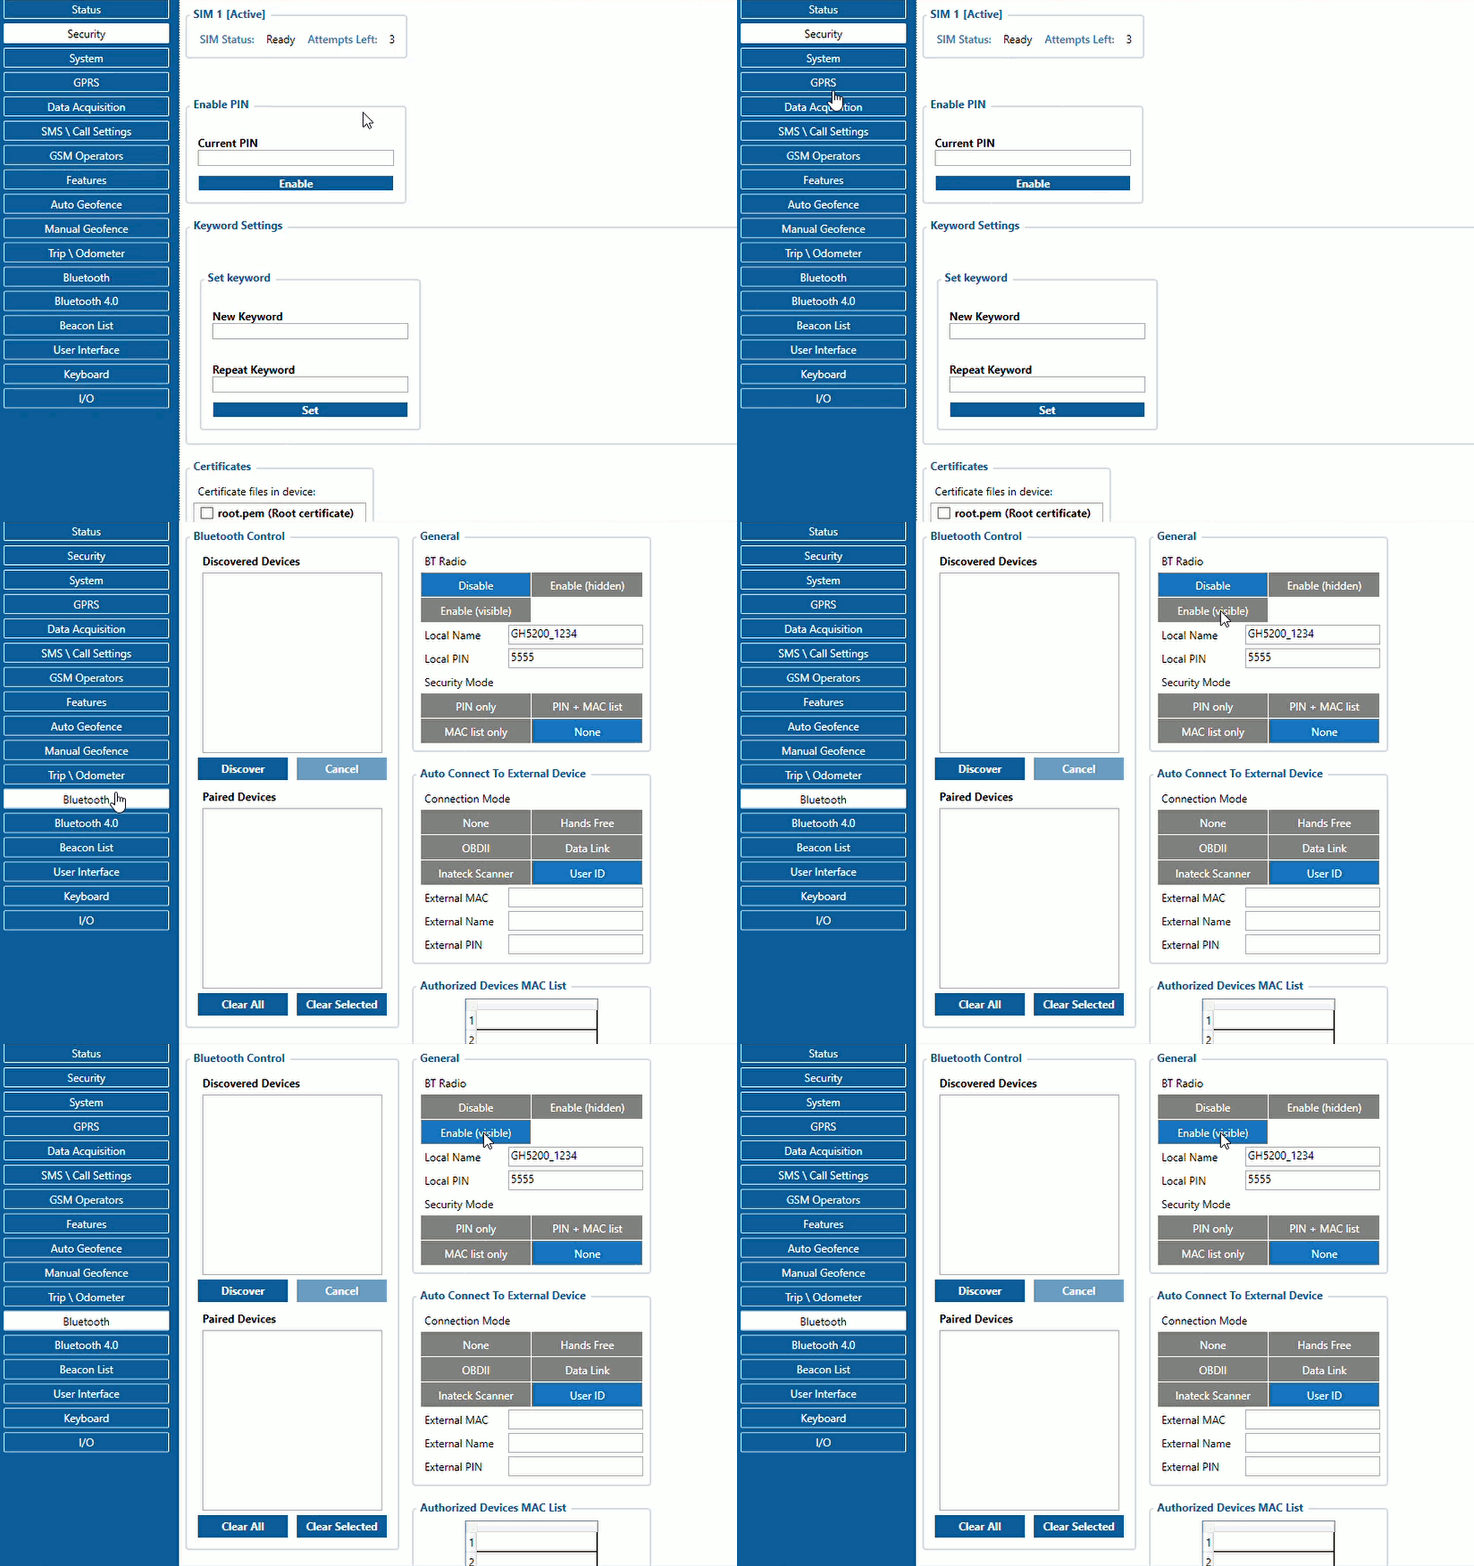
1. First the device Bluetooth® settings need to be configured. These are the required steps:
- Press Bluetooth® settings
- Turn on BT Radio by pressing Enable (hidden) or Enable (visible)
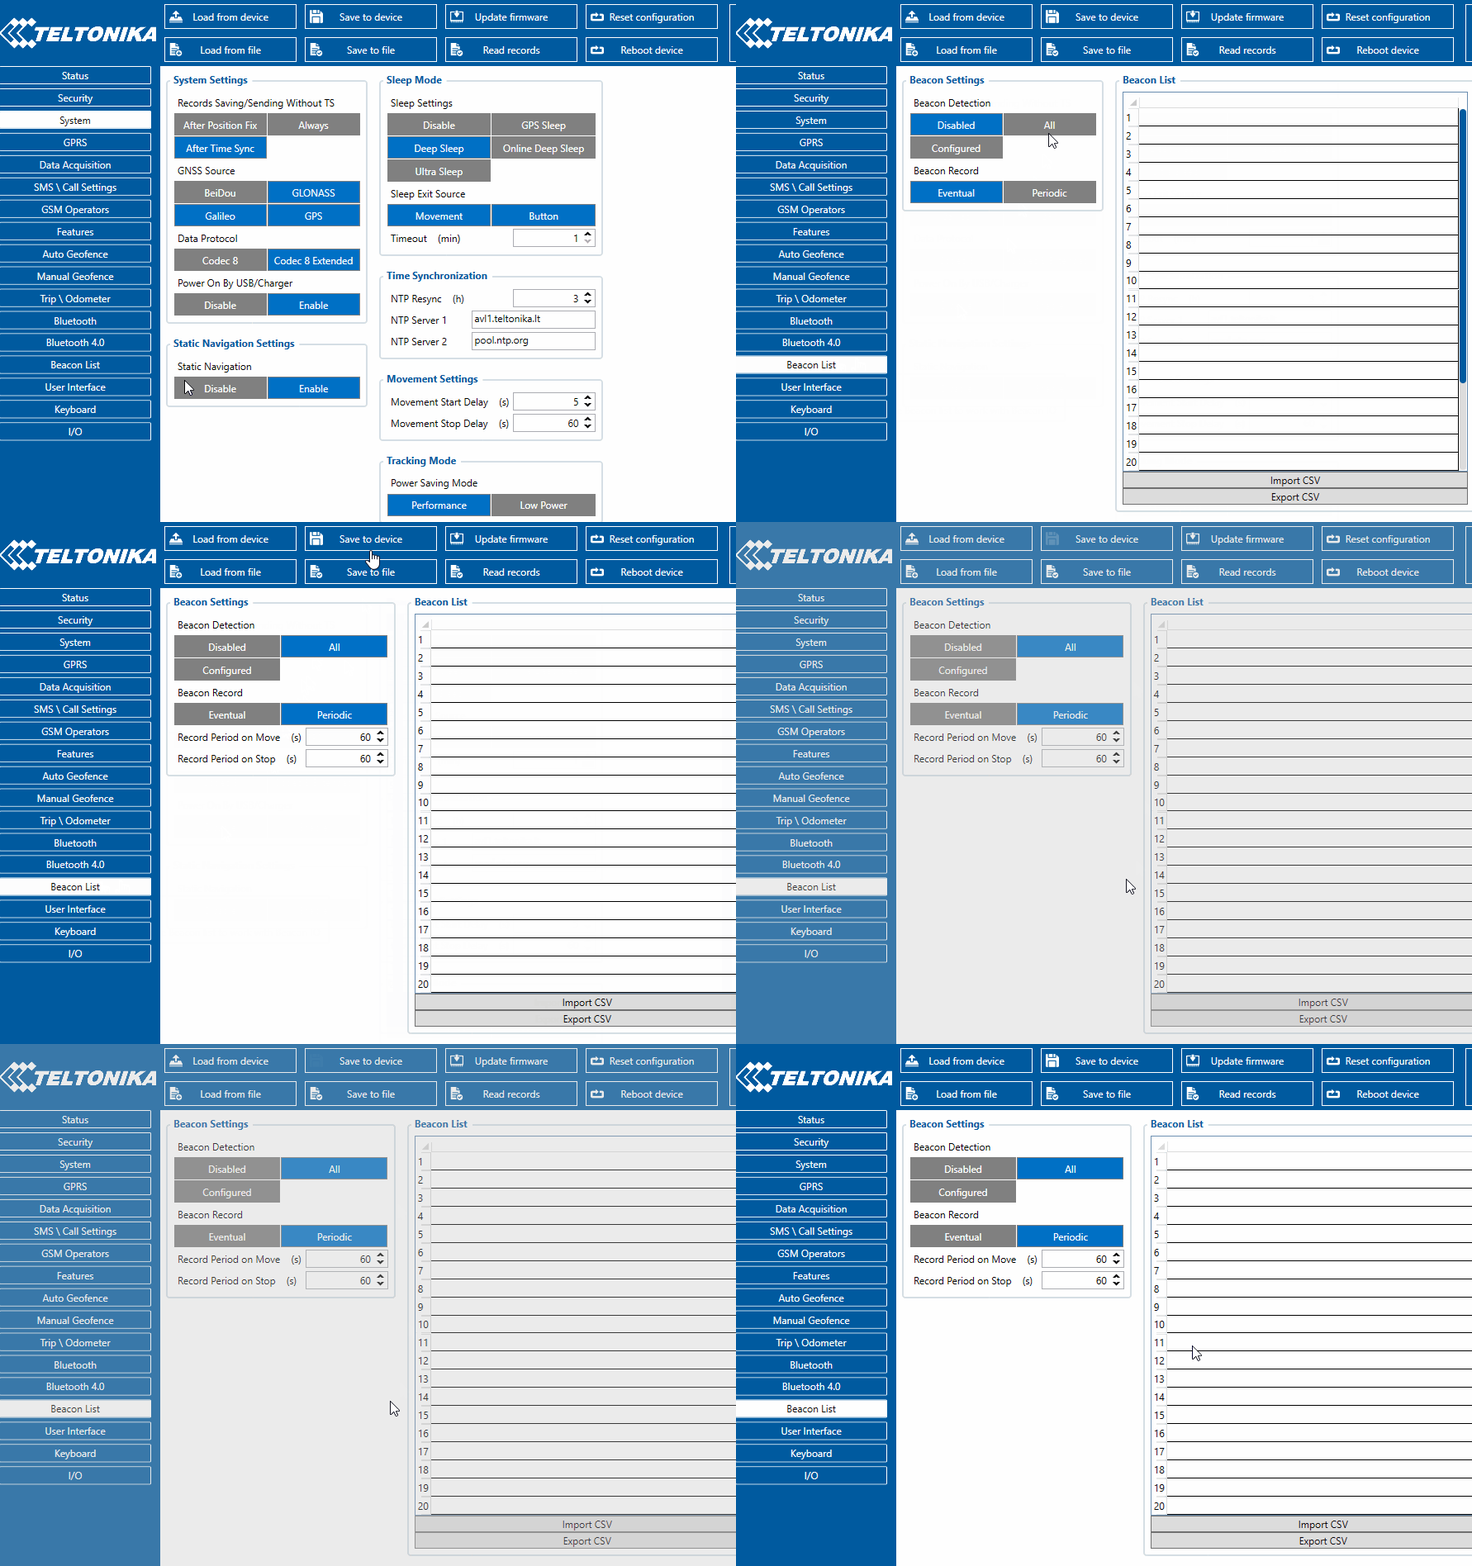
2. Press Beacon list tab.
- Select
AllorConfigured(for seeing only preferred beacons) in Beacon Detection options. - If you have selected
Configuredto see preferred beacons, you must add beacons to the Beacons list. - Select
Periodicoption - Set Periodic settings according to your needs.
- After all these steps press Save to device to save the configuration.
![]() To find out how to add beacons to the Beacons list, click on one of the devices:
TST100 | TFT100 | GH5200 | TMT250
To find out how to add beacons to the Beacons list, click on one of the devices:
TST100 | TFT100 | GH5200 | TMT250
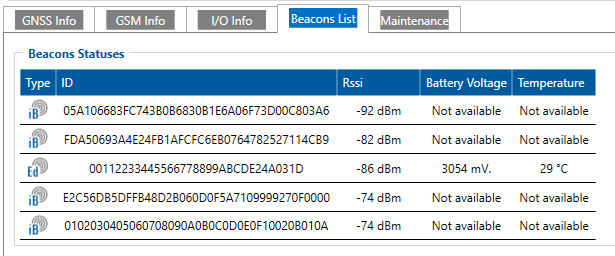
3. Now you can see detected Beacons in Status -> Beacons List
4. Example of the server view:

In the server view picture above, displayed:
- The date when the packet arrived to the server
- Device IMEI number
- AVL ID 385 – Beacon AVL ID
- Beacon ID and RSSI
Beacon 1 ID: 0102030405060708090A0B0C0D0E0F00020B010A
Beacon 1 Major: 020B
Beacon 1 Minor: 010A
RSSI: -60
Beacon 2 ID: AAAAAAAAAAAAAAAAAABBCC526F6F6D31
Beacon 2 Major: 5231
Beacon 2 Minor: 010A
RSSI: -56
Configured iBeacon packet data structure
Example of configured data parsing which comes with AVL ID 385
Two detected Beacons:
| 11210102030405060708090A0B0C0D0E0F00020B010AC421AAAAAAAAAAAAAAAAAABBCC526F6F6D315231010AC8 | ||
| Data Part1 | 11 | |
| First Beacon: | ||
| iBeacon with RSSI flag2 | 21 | |
| UUID (Beacon #1) | 0102030405060708090A0B0C0D0E0F00 | |
| Major | 020B | |
| Minor | 010A | |
| RSSI (Signal Strength: Signed 2's complement) | C4 (-60) | |
| Second Beacon: | ||
| iBeacon with RSSI flag2 | 21 | |
| UUID (Beacon #2) | AAAAAAAAAAAAAAAAAABBCC526F6F6D31 | |
| Major | 5231 | |
| Minor | 010A | |
| RSSI (Signal Strength: Signed 2's complement) | C8 (-56) | |
1 Data part 11 - 1 Record out of 1 Beacon record. First half byte specifies current record, second half specifies how many there are in total. For example: 23 - second record out of three records (that means the server can expect 1 more records with Event I/O ID 385). If the data does not fit in a single data transfer, they are separated. Data Part is used to determine if more data will be coming from the device. Maximum value of the Data part is 33.
2 Flags:
| Flags: | |
| 21 | iBeacon with RSSI |
| 23 | iBeacon with RSSI, Battery Voltage |
| 27 | iBeacon with RSSI, Battery Voltage, Temperature |
| 01 | Eddystone with RSSI |
| 03 | Eddystone with RSSI, Battery Voltage |
| 07 | Eddystone with RSSI, Battery Voltage, Temperature |
