ECAN01: Difference between revisions
Appearance
No edit summary |
|||
| Line 105: | Line 105: | ||
==Set up ECAN01== | ==Set up ECAN01== | ||
# Gently remove {{{model|FMB1YX}}} '''cover''' using '''plastic pry tool''' from both sides.<p><b>Note:</b> To properly open a new case please watch this [https://youtu.be/PBXVNXfRjg0 video].</p> | |||
# Insert '''{{{sim_type|Micro-}}}SIM''' card as shown with '''PIN request disabled''' or read '''[[{{{model|FMB1YX}}} Security info|Security info]]''' how to enter it later in [[Teltonika Configurator]]. Make sure that {{{sim_type|Micro-}}}SIM card '''cut-off corner''' is pointing forward to slot. {{{dual_sim|'''SIM slot 1''' is closer to PCB, '''SIM slot 2''' is the upper one.}}} | |||
{{{be_battery|# Connect '''battery''' as shown to device. Position the battery in place where it does not obstruct other components. | |||
# After '''configuration''', see “'''[[{{{model|FMB1YX}}}_First_Start#PC Connection (Windows)|PC Connection (Windows)]]'''”, attach device '''cover''' back.}}} | |||
[[Image:{{{sim_insert_pic1|Fmb120_cover_1.png}}}|260px]][[Image:{{{sim_insert_pic2|Fmb120_cover_2.png}}}|260px]][[Image:{{{sim_insert_pic3|Fmb120_cover_3.png}}}|260px]][[Image:{{{sim_insert_pic4|Fmb120_cover_4.png}}}|260px]] | |||
==ECAN01 Certification & Approvals== | ==ECAN01 Certification & Approvals== | ||
Revision as of 09:55, 22 January 2020
Main Page > EOL Products > ECAN01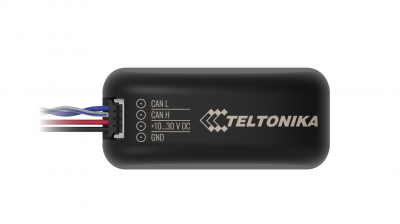
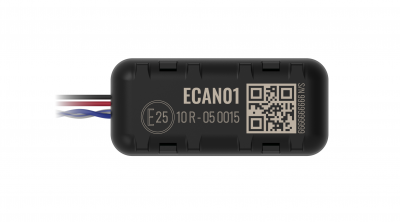
ECAN01 (Easy-CAN) is contactless adapter used to read vehicle CAN Bus data. ECAN01 (Easy-CAN) adapter should be used in combination with:
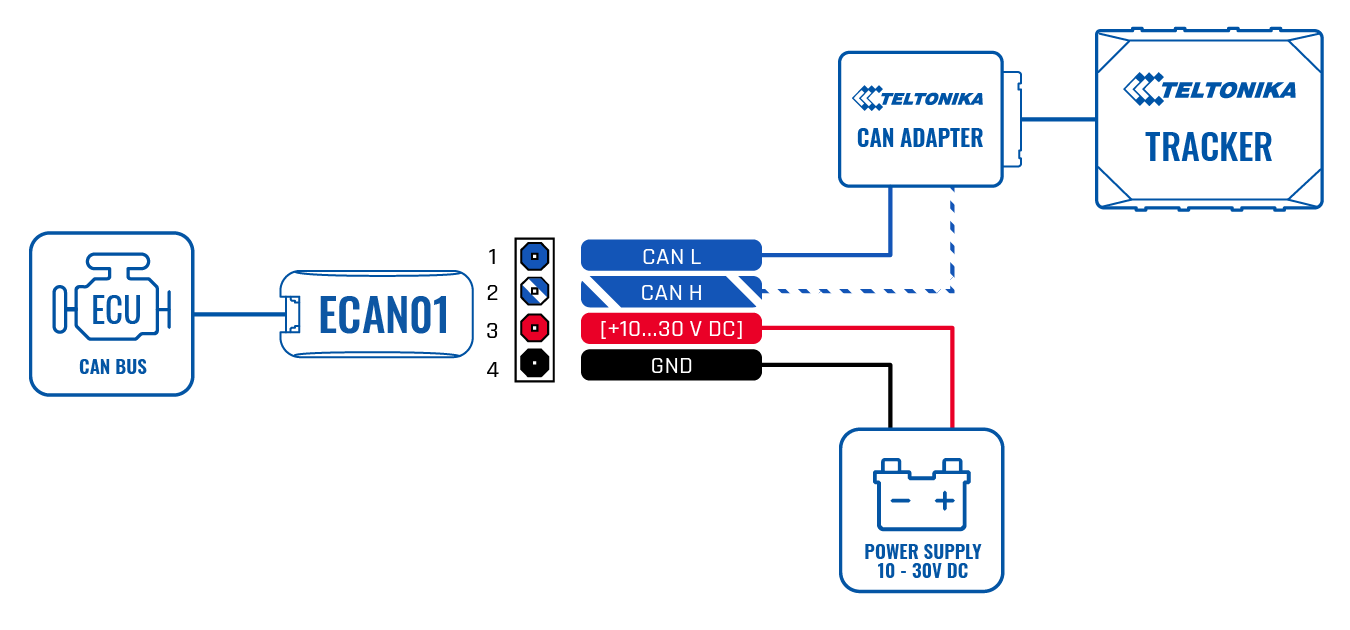
It reads can bus data through the isolation of wires without damaging them and forwards signals to tracking device.
Features
- Easy-CAN collects vehicle data from CAN bus without damaging the wires
- Powered from on-board power source
- Reads the signals through the isolation of CAN bus wires
- Easy to install and operate
Technical features
| PARAMETER | VALUE | |||
|---|---|---|---|---|
| Minimum | Typical | Maximum | Unit | |
| Supply Voltage | ||||
| Supply Voltage (Recommended Operating Conditions) | +10 | +12 | +30 | V |
| Current Consumption | ||||
| Working Mode | 6.9 | mA | ||
| Sleep Mode | 1.2 | mA | ||
| Operating Temperature | ||||
| Operating Temperature | -25 | +85 | °C | |
| Protection | ||||
| Internal resettable fuse (max 33 V) | 750 | mA | ||
- Dimensions 39.8 x 18 x 16.7 mm
- CAN-BUS speeds up to 1000 kb/s
Pinout
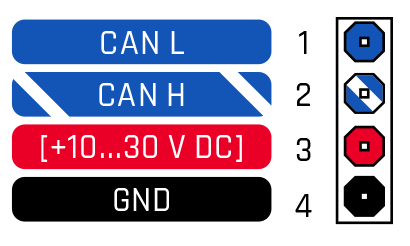
| PIN NUMBER | PIN NAME |
DESCRIPTION |
|---|---|---|
| 1 | CAN L | (Blue) Connect to CAN L input of CAN BUS converter |
| 2 | CAN H | (White/Blue) Connect to CAN H input of CAN BUS converter |
| 3 | VCC | (RED) Power supply (10-30) V DC (+) |
| 4 | GND (-) | (Black) Ground wire (10-30) V DC (-) |
Wiring scheme
Set up ECAN01
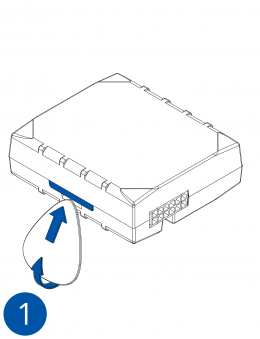
- Gently remove FMB1YX cover using plastic pry tool from both sides.
Note: To properly open a new case please watch this video.
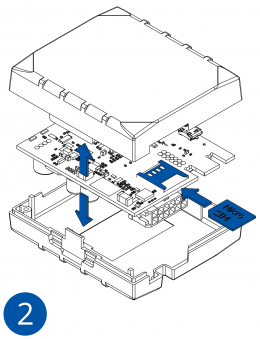
- Insert Micro-SIM card as shown with PIN request disabled or read Security info how to enter it later in Teltonika Configurator. Make sure that Micro-SIM card cut-off corner is pointing forward to slot. SIM slot 1 is closer to PCB, SIM slot 2 is the upper one.
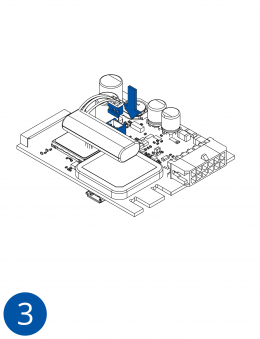
- Connect battery as shown to device. Position the battery in place where it does not obstruct other components.
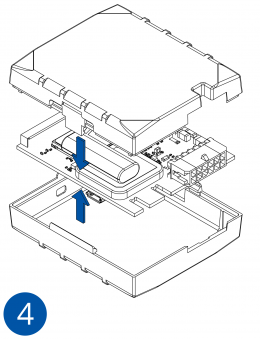
- After configuration, see “PC Connection (Windows)”, attach device cover back.
ECAN01 Certification & Approvals
Nomenclature, classification codes
FAQ
- How to install SIMPLE-CAN with LV-CAN200/ALL-CAN300 using:
- FMB110
- FMB120
- FMB122
- FMB125
- FMB110
- FMA120
- FMB630
- FMB640
- FM6300
- FM6320
- FM36M1
- FM3622
- FM3612
YouTube
Teltonika CAN adapters Part 1: Introduction
Teltonika CAN adapters Part 2: Installation

