How to capture direct log from FM device?
How does it work?
All our devices are able to transmit their current state when they are connected to PC using USB cable or over the air using Fota Web.
Log file is used to detect errors and provide information when device is operating unexpectedly.
Using filters for different issues
Always use login and password before commnad like with all other commands for FMB devices How to send an sms
Connectivity issue
03.27 base -> log2sdfilterset 0;11;12;13;18;2;1 03.28/29 base -> log2sdfilterset 0;3;11;12;13;19;18;1
OBD/CAN log
log2sdfilterset 0;3;4;2;1
GPS accuracy issue
log2sdfilterset 0;3;17;1
Accelerometer, calibration issue
log2sdfilterset 0;3;2;22;21;1
BLE sensors/beacons
log2sdfilterset 0;3;2;20;1
CarSharing FW (BT/BLE/CAN filter)
log2sdfilterset 0;3;7;8;4;1
1-wire issue
log2sdfilterset 0;3;2;5;1
TimeSync issue
log2sdfilterset 0;3;6;1
DOUT control/Immo issue
log2sdfilterset 0;3;2;10;14;1
Note: Filters are applicable for following Tracker groups:
- Basic Trackers;
- Fast & Easy Trackers;
- Advanced Trackers;
- OBD Trackers;
- CAN Trackers & Adapters.
Groups can be found in landing page
| After issue is reproduced and logs are collected, please, remove filters by sending -> log2sdfilterset 0 - SMS command! |
Steps to collect log file through FOTA WEB
Send web_connect sms command to device after log download task is assigned.
Steps to collect log file through Terminal.exe
Required Terminal application for log capturing can be downloaded here:[Terminal software.zip]
After connecting device to PC, it creates two ports:
- USB Debug Port - used for modem trace.
- USB Modem Port - used for terminal log.
If connected device is not recognized by PC, please install appropriate drivers.
Download Teltonika COM port driver from the link: COM port driver
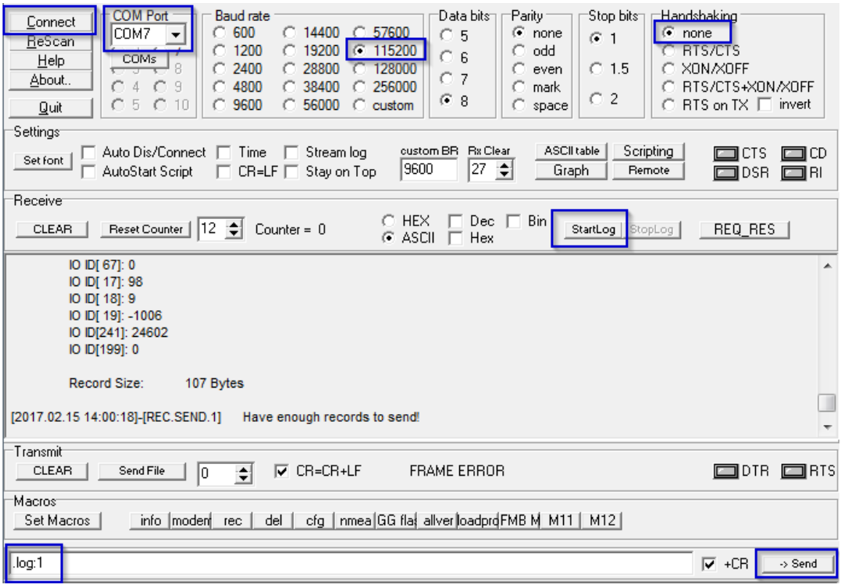
Follow these steps to start log:
- select COM port;
- select the baud rate;
- handshaking parameters;
- click connect and "Start Log" button.
If log is not running, please send .log:1 command (see picture below). Now you are able to monitor all internal processes happening in the device. All logged process is saved in the txt file.
Note: Send command .log:0 to stop logging.

Provide captured log to your Teltonika Sales Manager or Teltonika Support team for further investigation.
Log capturing using Teltonika Configurator
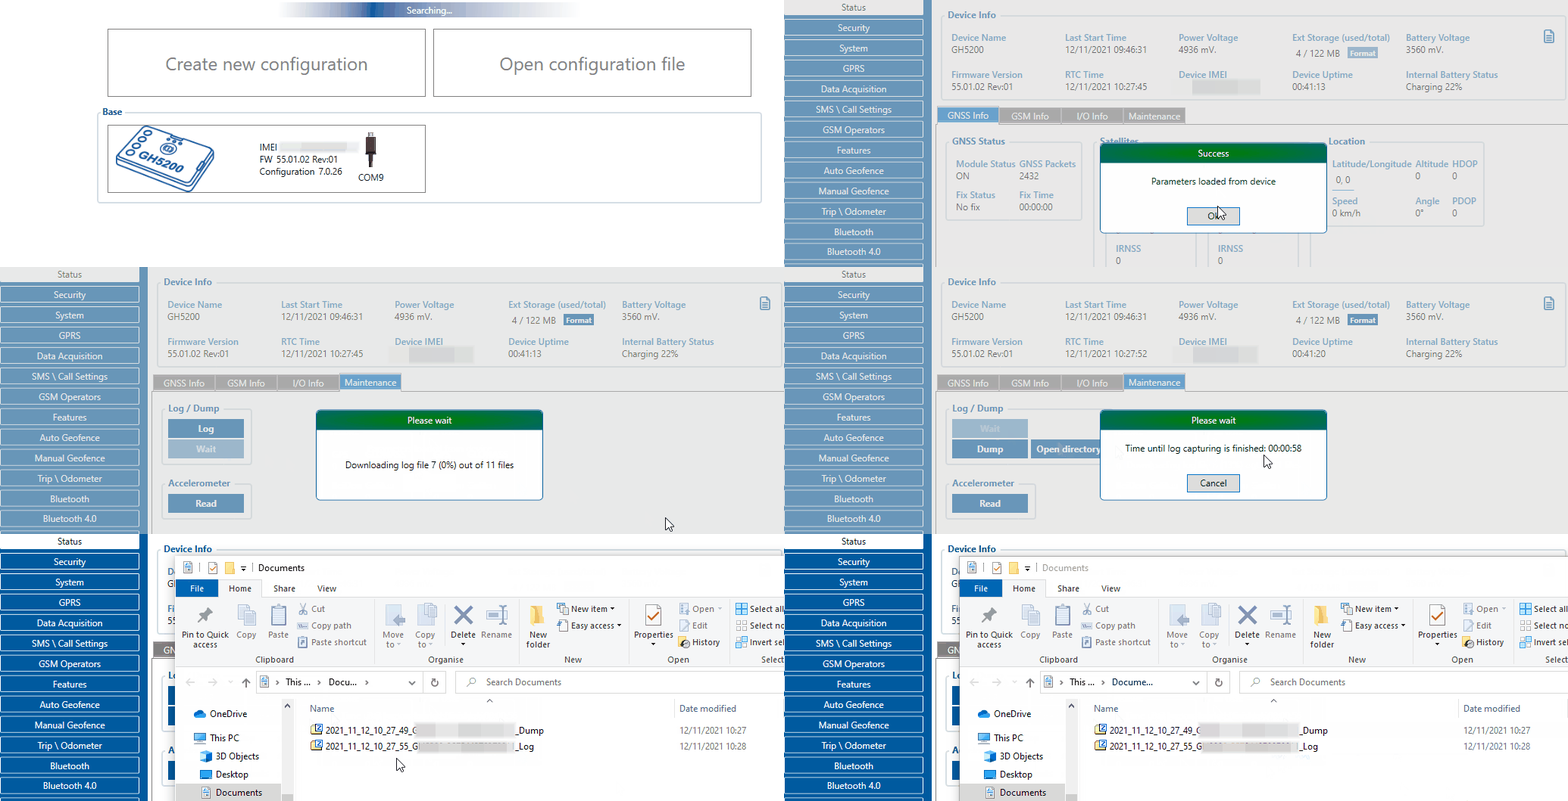
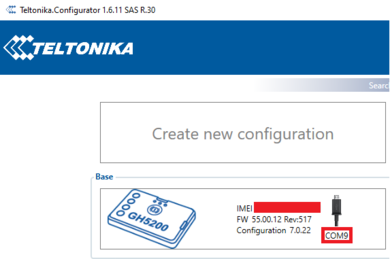
To retrieve logs from device, connect it via USB to PC and open Teltonika Configurator software.
- Log files - Provide live information when the issue is happening. Log files can be taken via configurator.
- Dump files - Provide files that the device logged automatically. You have to make sure to take them from FOTA WEB or configurator.
Follow these quick steps to get all the necessary debug information in just over 10 minutes.
- Open configurator debug window: Open the configurator with the device connected to PC. Go to Status section -> Maintenance window.
- Take log files that are already stored in the device: Click "Dump" to take the information from the device containing logs from the past that device made automatically. If the issue happened 2-3 hours ago we will see it in these files.
- Note 1: If the device is installed in a vehicle and deployed in the field you can use FOTA WEB to download these files remotely.
- Make LOG file during/replicating the issue: If you want to repeat the issue now, you can use logging functionality accessed in the same window. Just start logging by clicking "Log" replicate the issue and when the log ends to attach it to the query. When logs are made they export your current configuration as well.
- Note 1: For example, you should send SMS during the logging period if you claim that your device is not receiving SMS.
- Note 2: For troubleshooting remote vehicles download DUMP files via FOTA and download them as soon as possible after replicating the issue.
- Find DUMP/LOG files: After the logging is done "Open directory" button in the configurator to find your DUMP, LOG, and CFG files.
- Taking configuration file separately: If you have not made a DUMP or log file in previous steps, export your configuration file by using the "Save to file" button.
- Note 1: In the GIF file is saved to the Documents folder for quick access by pressing the "Open directory" button in the configurator. You may choose a different save location.

Provide captured log to your Teltonika Sales Manager or Teltonika Support team for further investigation.
Other Log capture guides
OBDII Logging
CAN adapter logging

