Difference between revisions of "DSM First Start"
From Wiki Knowledge Base | Teltonika GPS
MindaugasK (talk | contribs) |
|||
| (38 intermediate revisions by 3 users not shown) | |||
| Line 1: | Line 1: | ||
| − | + | __TOC__ | |
| − | |||
| − | |||
==DSM connection scheme== | ==DSM connection scheme== | ||
| + | [[File:DSM connection scheme.jpg|center]] | ||
| − | + | ==PC Calibration== | |
| + | [[File:DSM_Calib.png | right | 320x320px]] | ||
| + | Driver Setup (ONLY SUPPORTS WINDOWS OS) | ||
| + | * NOTE: Before you connect or start calibration, please install RNDIS driver first. | ||
| + | Calibration Setup | ||
| + | * Access DSM Calibration page via PC | ||
| + | ** Connect DSM to PC using Micro USB cable with 5 pins. | ||
| + | ** Power on DSM. If you hear repeated beep sound, this means DSM is properly connected to computer. | ||
| + | ** Activate the browser and enter into http://20.0.0.1:18087/ to access DSM calibration page. Google Chrome is recommended. | ||
| + | ** If you see the page below, please select language you want and sign in using following information | ||
| + | ‐ ID: admin ‐ Password: 1234 | ||
| − | + | ==== Calibration ==== | |
| + | * Select Speed Type | ||
| + | ** GPS Speed setting - GPS antenna is embedded on DSM. If GPS work correctly, detected is shown. If GPS doesn’t work for 5 mins, Fail is shown. | ||
| + | [[File:DSM Calib2.png|400px|center-left]] [[File:DSM Calib3.png|400px|center-right]] | ||
| − | + | ==== CAN Speed setting ==== | |
| + | *DSM can get speed through CAN as well. | ||
| + | *DSM only recognizes encrypted CAN data from our Database site; http://info.mdas.co.kr | ||
| − | + | Please download can file from the DB and upload to system. | |
| − | [[File: | + | [[File:Mdas1.0.png|frameless|450x450px]] |
| − | + | ==== Verify Speed Signal ==== | |
| + | You can check the speed data is coming correct by test drive. | ||
| − | + | If there is a deviation, please use the following correction method. | |
| − | [[File: | + | Please click the “Correction” button when you drive at 40km/h (24mph). Then, DSM will set new speed automatically. |
| + | [[File:Mdas1.1.png|450x450px]] | ||
| − | + | ==== Camera Setting ==== | |
| − | + | # Place your face inside the guide box. The face box should fit inside the guide box to proceed to next step. | |
| + | # Wait 3 seconds to complete and save camera setting. | ||
| + | # When the setting is complete, the page will change like below and the unit will make multiple beeps. | ||
| + | [[File:Auto Camera Setting img.jpg|450x450px]] | ||
| − | + | ==== DSM Setup ==== | |
| − | |||
| − | |||
| − | |||
| − | |||
| − | |||
| − | |||
| − | |||
| − | |||
| − | |||
[[Category:DSM]] | [[Category:DSM]] | ||
Revision as of 12:00, 5 January 2023
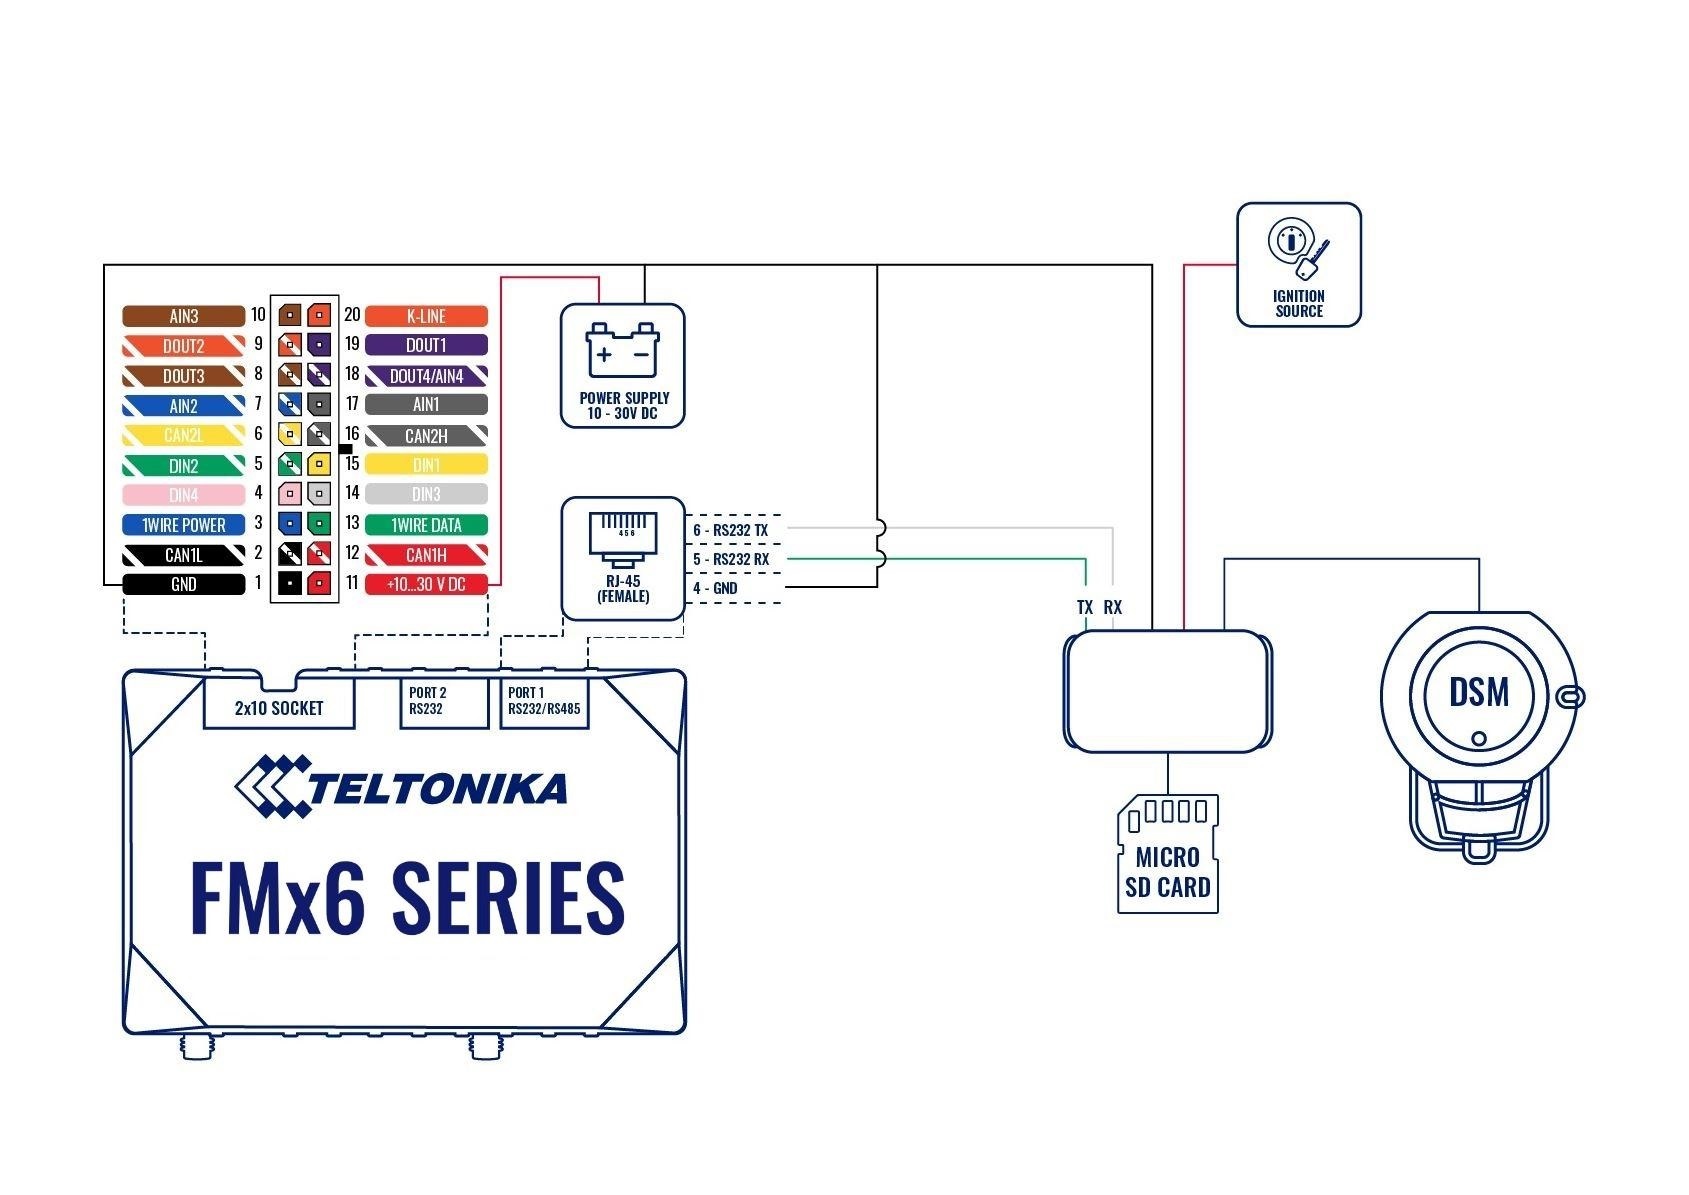
Main Page > Video Solutions > DSM > DSM First StartDSM connection scheme
PC Calibration
Driver Setup (ONLY SUPPORTS WINDOWS OS)
- NOTE: Before you connect or start calibration, please install RNDIS driver first.
Calibration Setup
- Access DSM Calibration page via PC
- Connect DSM to PC using Micro USB cable with 5 pins.
- Power on DSM. If you hear repeated beep sound, this means DSM is properly connected to computer.
- Activate the browser and enter into http://20.0.0.1:18087/ to access DSM calibration page. Google Chrome is recommended.
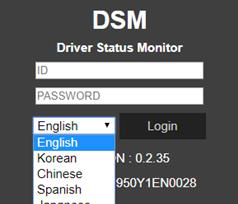
- If you see the page below, please select language you want and sign in using following information
‐ ID: admin ‐ Password: 1234
Calibration
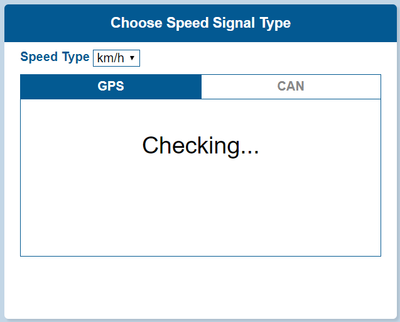
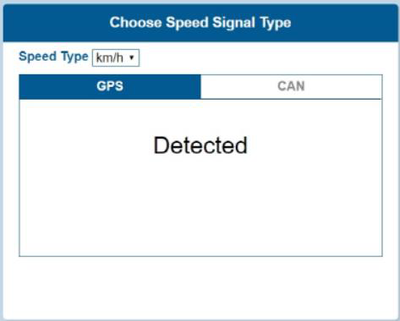
- Select Speed Type
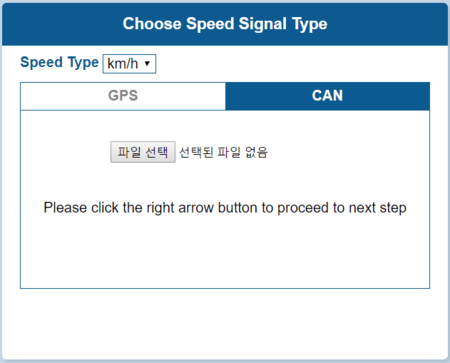
- GPS Speed setting - GPS antenna is embedded on DSM. If GPS work correctly, detected is shown. If GPS doesn’t work for 5 mins, Fail is shown.
CAN Speed setting
- DSM can get speed through CAN as well.
- DSM only recognizes encrypted CAN data from our Database site; http://info.mdas.co.kr
Please download can file from the DB and upload to system.
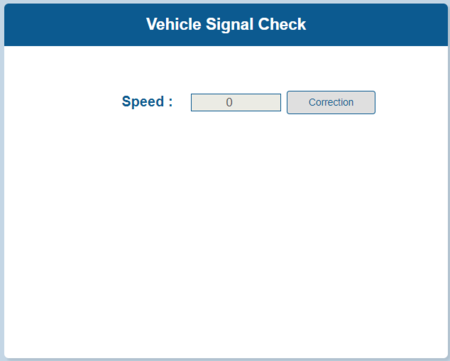
Verify Speed Signal
You can check the speed data is coming correct by test drive.
If there is a deviation, please use the following correction method.
Please click the “Correction” button when you drive at 40km/h (24mph). Then, DSM will set new speed automatically.
Camera Setting
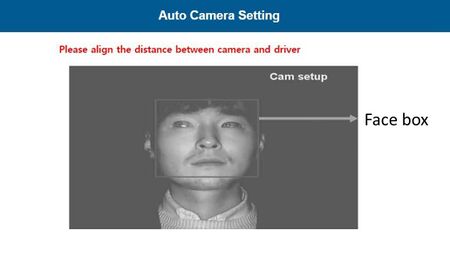
- Place your face inside the guide box. The face box should fit inside the guide box to proceed to next step.
- Wait 3 seconds to complete and save camera setting.
- When the setting is complete, the page will change like below and the unit will make multiple beeps.
