ECAN02: Difference between revisions
Appearance
| Line 138: | Line 138: | ||
* [[ECAN02 WEEE|WEEE]] | * [[ECAN02 WEEE|WEEE]] | ||
==Certification & Approvals== | |||
*[[ECAN02 RoHS]] | |||
==Nomenclature, classification codes== | ==Nomenclature, classification codes== | ||
*[[ECAN02 LITAR]] | *[[ECAN02 LITAR]] | ||
*[[ECAN02 EAN]] | *[[ECAN02 EAN]] | ||
*[[ECAN02 HS]] | *[[ECAN02 HS]] | ||
*[[ECAN02 ECCN]] | *[[ECAN02 ECCN]] | ||
Revision as of 09:48, 9 July 2024
Main Page > CAN Trackers & Adapters > ECAN02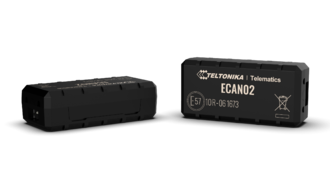
ECAN02 is contactless adapter used to read vehicle CAN Bus data. ECAN02 adapter should be used in combination with:
- LV-CAN200
- ALL-CAN300
- FMB140, FMB150, FMC150, FMM150
- FMB640, FMB630, FM6320, FM6300 to read J1939 CAN data.
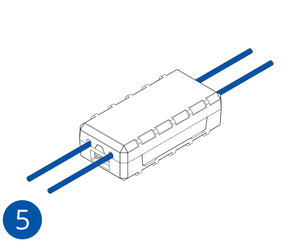
It reads can-bus data through the isolation of wires without damaging them and forwards signals to the tracking device.
Features
- ECAN02 collects vehicle data from CAN bus without damaging the wires
- Powered from an on-board power source
- Reads the signals through the isolation of CAN bus wires
- Easy to install and operate
YouTube
Technical features
| PARAMETER | VALUE | ||||
|---|---|---|---|---|---|
| Minimum | Typical | Typical | Maximum | Unit | |
| Supply Voltage | |||||
| Supply Voltage (Recommended Operating Conditions) | +10 | +12 | +24 | +30 | V |
| Current Consumption | |||||
| Working Mode | 4.21 | mA | |||
| Sleep Mode | 1.47 | mA | |||
| Operating Temperature | |||||
| Operating Temperature | -40 | +85 | °C | ||
| Protection | |||||
| Internal resettable fuse (max 33 V) | 750 | mA | |||
- Dimensions 39 x 12 x 19 mm
- CAN-BUS speeds up to 1000 kb/s
- Fuse is protecting devices from high current peaks. If the voltage exceeds 33V (i.e. 35V) then protection diode stabilizes device voltage to 33V and the current value will increase accordingly.
Pinout
| PIN NUMBER | PIN NAME |
DESCRIPTION |
|---|---|---|
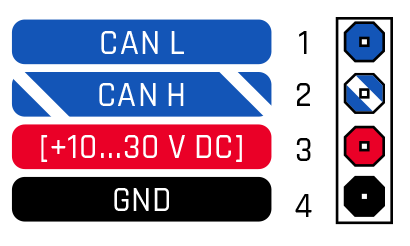
| 1 | CAN L | (Blue) Connect to CAN L input of CAN BUS converter |
| 2 | CAN H | (White/Blue) Connect to CAN H input of CAN BUS converter |
| 3 | VCC | (RED) Power supply (10-30) V DC (+) |
| 4 | GND (-) | (Black) Ground wire (10-30) V DC (-) |
Wiring scheme
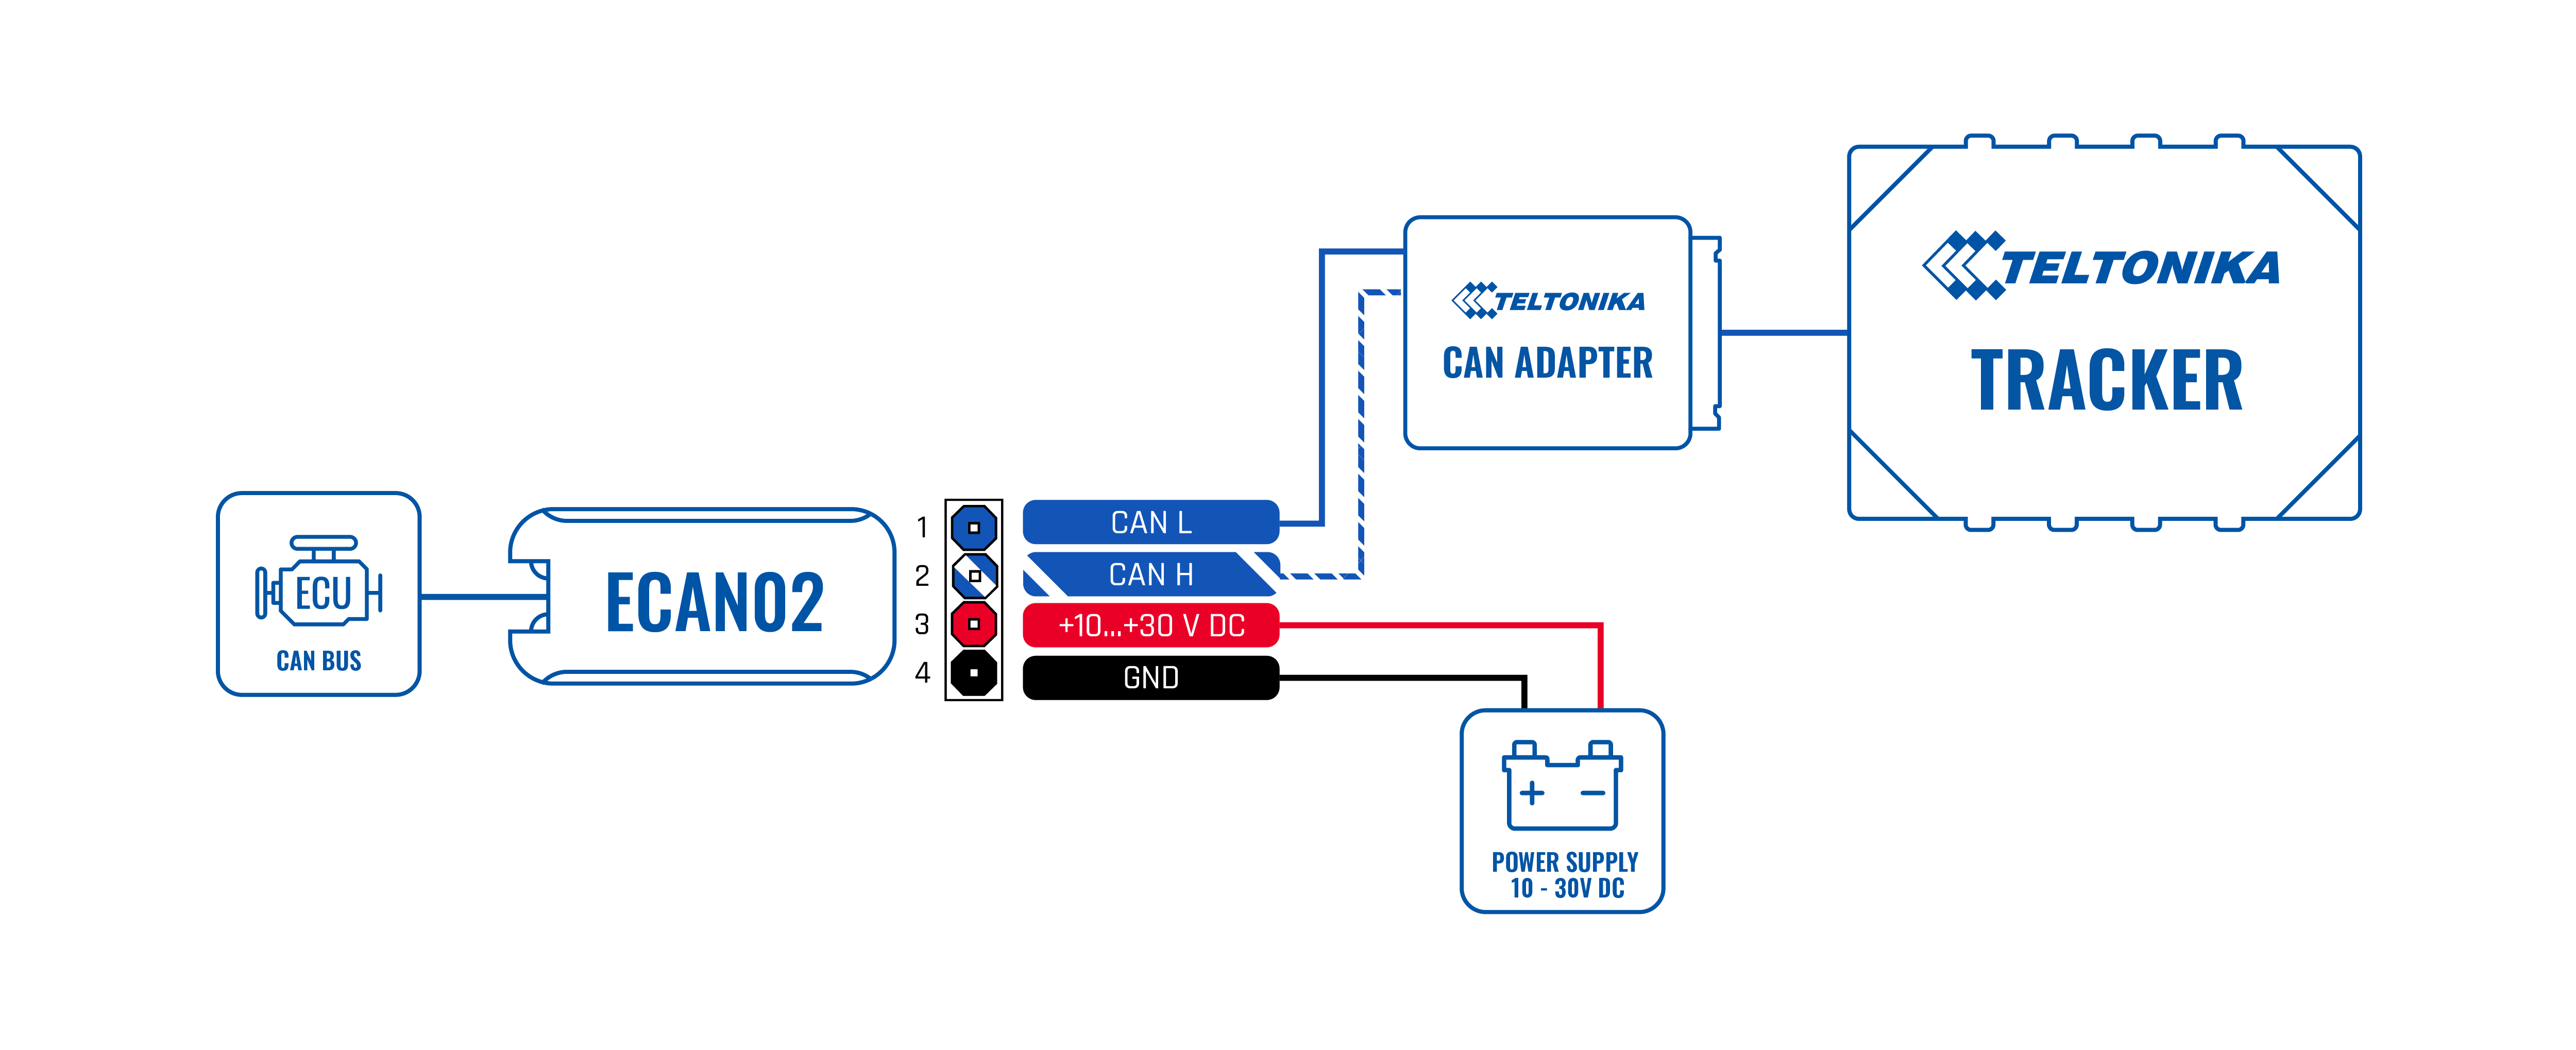
Setup ECAN02
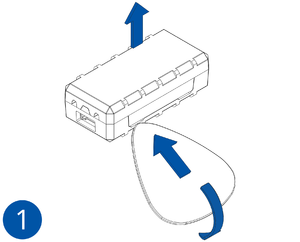
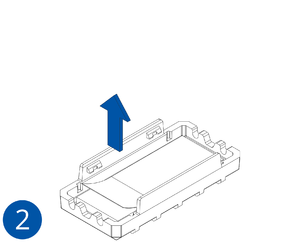
- Gently open the ECAN02 cover using a plastic pry tool from both sides.
- Remove backing material on double-sided adhesive tape.
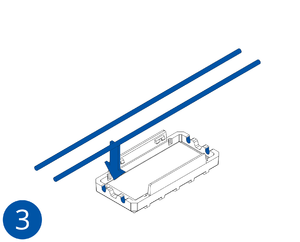
- Insert CAN wires. Please make sure that the correct slots are used (CAN High/CAN Low).
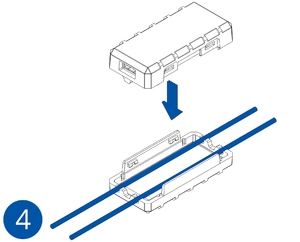
- Close the device.
- Device is ready-to-use.
Certification & Approvals
Memberships
Certification & Approvals
Nomenclature, classification codes
FAQ
- How to install ECAN02 with LV-CAN200/ALL-CAN300 using:
- FMB110
- FMB120
- FMB122
- FMB125
- FMB130
- FMC125
- FMC130
- FMC13A
- FMM125
- FMM130
- FMM13A
- FMB225
- FMB230
- FMC225
- FMC230
- FMM230
Product Change Notifications
ECAN02 Product Change Notifications
Promotional Material
Downloads
Manuals & Documentation
| ECAN02 Datasheet (EN) | (Updated on: 2023-06-21) | |
| ECAN02 flyer | (Updated on: 2023-06-22) | |
| ECAN01 vs ECAN02 flyer | (Updated on: 2023-06-22) |

