Difference between revisions of "FOTA WEB Getting Started"
(fm.teltonika.lt was changed to fota.teltonika.lt) |
|||
| (26 intermediate revisions by 2 users not shown) | |||
| Line 93: | Line 93: | ||
'''Please''' contact Teltonika's support for more information from where to download base firmware, configurator, user manual and protocols from. | '''Please''' contact Teltonika's support for more information from where to download base firmware, configurator, user manual and protocols from. | ||
| − | ==='''Default FOTA configuration settings:'''=== | + | ==='''Default FOTA WEB configuration settings:'''=== |
| − | '''Domain:''' | + | '''Domain:''' fota.teltonika.lt<br /> |
'''Port:''' 5000 <br /> | '''Port:''' 5000 <br /> | ||
| − | '''Period:''' 720 minutes (every 720 minutes device shall connect to FOTA)<br /> | + | '''Period:''' 720 minutes (every 720 minutes device shall connect to FOTA WEB)<br /> |
| − | [[ | + | [[File:Fota.teltonika.lt.png|center|thumb]] |
| + | <br /> | ||
<br /> | <br /> | ||
| − | |||
==='''Using VPN SIM cards'''=== | ==='''Using VPN SIM cards'''=== | ||
| Line 106: | Line 106: | ||
If your SIM cards are within Mobile Operator’s VPN (private APN), the following must be ensured and paid special attention. | If your SIM cards are within Mobile Operator’s VPN (private APN), the following must be ensured and paid special attention. | ||
<br /> | <br /> | ||
| − | '''1.''' Must ensure that domain '''http:// | + | '''1.''' Must ensure that domain '''http://fota.teltonika.lt''' can be resolved from within Operator’s network.<br /> |
'''2.''' Following IP and ports (egress) must be allowed by the operator. | '''2.''' Following IP and ports (egress) must be allowed by the operator. | ||
<br /> | <br /> | ||
| Line 116: | Line 116: | ||
**7000 ('''required for FM36YX models only''')<br /> | **7000 ('''required for FM36YX models only''')<br /> | ||
| − | When using VPN SIM cards, you should still configure '''http:// | + | When using VPN SIM cards, you should still configure '''http://fota.teltonika.lt''' domain in your configurator, '''not''' the plain IP address. |
=='''Web Access'''== | =='''Web Access'''== | ||
<br /> | <br /> | ||
| − | FOTA is reached using domain address '''http:// | + | FOTA WEB is reached using domain address '''http://fota.teltonika.lt'''. FOTA WEB uses HTTP ports 80 and 85 for authentication so if your network has HTTP proxy service or is blocking outgoing traffic – make sure that those two ports are added to exceptions in network proxy service and firewall. |
<br> | <br> | ||
{| class="wikitable" style="width: 100%;" | {| class="wikitable" style="width: 100%;" | ||
|- | |- | ||
| − | | style="width: 30%; border: 1px solid white; background: white;" |'''1.''' Invitation for FOTA is being delivered to user e-mail. You can press | + | | style="width: 30%; border: 1px solid white; background: white;" |'''1.''' Invitation for FOTA WEB is being delivered to user e-mail. You can press „Click Here“ button or use URL provided in the e-mail. |
| − | | style="width: 30%; border: 1px solid white; background: white; " |'''2.''' After pressing the button or following URL you will be asked to write | + | | style="width: 30%; border: 1px solid white; background: white; " |'''2.''' After pressing the button or following URL you will be asked to write password and confirm the same password with the second verification for Your account. Make sure to follow the mentioned comments to save the password successfully. |
| − | | style="width: 30%; border: 1px solid white; background: white; " |'''3.''' Last step is logging in FOTA with your newly created account by entering e-mail address and password | + | | style="width: 30%; border: 1px solid white; background: white; " |'''3.''' Last step is logging in FOTA WEB with your newly created account by entering e-mail address and password which you used in the creation process. |
|- | |- | ||
| − | | style="width: | + | | style="width: 33%; border: 1px solid white; background: white; text-align: center;" |[[Image:FOTA_invi.png|400px|center]] |
| − | | style="width: | + | | style="width: 33%; border: 1px solid white; background: white; text-align: center;" |[[Image:FOTA Fr.png|400px|center]] |
| − | | style="width: | + | | style="width: 33%; border: 1px solid white; background: white; text-align: center;" |[[Image:FOTA_login.png|400px|center]] |
|- | |- | ||
| + | | style="width: 33%; border: 1px solid white; background: white;" |'''4.''' Please read carefully and accept our term and conditions at the first time using FOTA WEB systems. | ||
| + | | style="width: 33%; border: 1px solid white; background: white;" | | ||
| + | | style="width: 33%; border: 1px solid white; background: white;" | | ||
| + | |- | ||
| + | | style="width: 33%; border: 1px solid white; background: white; text-align: center;" |[[Image:FOTA_terms.png|400px|center]] | ||
| + | | style="width: 33%; border: 1px solid white; background: white;" | | ||
| + | | style="width: 33%; border: 1px solid white; background: white;" | | ||
|} | |} | ||
=='''Overview'''== | =='''Overview'''== | ||
| − | + | ==='''Device section'''=== | |
| − | ''' | + | |
| + | This area provides a basic overview of individual or filtered devices while allowing single or multiple selections for '''Task''' afterward. | ||
| + | You can read more about this section here: [[FOTA WEB Devices]] | ||
| + | [[Image:DeviceSection.png|1000px|center]]<br /> | ||
| − | ===''' | + | ==='''Devices dashboard'''=== |
| − | + | Present the live status of your fleet, you will be able to see the active device, assigned tasks, model, firmware versions and more. | |
| − | [[Image: | + | [[Image:FOTADashboard.png|1000px|center]]<br /> |
| − | ==='''Filter section'''=== | + | ==='''Filter and task section'''=== |
Filter provides means to easily access devices that you need by combining different filters: Company, device Model, Firmware, and more. | Filter provides means to easily access devices that you need by combining different filters: Company, device Model, Firmware, and more. | ||
| − | [[Image: | + | The main part where the different tasks is selected and grouping for the devices done. |
| + | [[Image:Filterandtask.png|1000px|center]]<br /> | ||
==='''Navigation menu'''=== | ==='''Navigation menu'''=== | ||
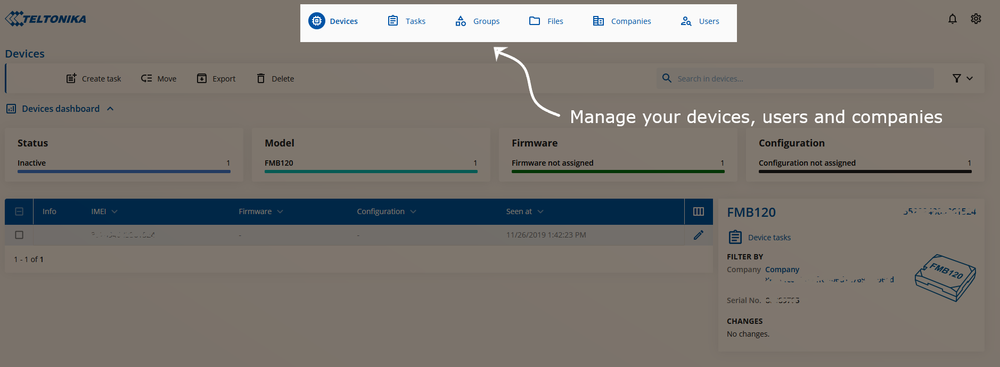
Different FOTA tabs for complete management of registered Devices, Companies, and users. | Different FOTA tabs for complete management of registered Devices, Companies, and users. | ||
| − | [[Image: | + | [[Image:NavigationOverwiew.png|1000px|center]]<br /> |
| + | |||
| + | ==='''User Settings'''=== | ||
| + | |||
| + | User settings selection. This is the part where you manage your account settings, change your password, language (currently the available selection is English, Lithuanian, Russian, Spanish, Portuguese and French), receive notifications and change your Time zone. You can read more about these settings here: [[FOTA WEB Account Settings]] | ||
| + | [[Image:UserOverwiew.png|1000px|center]]<br /> | ||
| − | Next chapter '''[[ | + | Next chapter '''[[FOTA WEB Dashboard|Dashboard]]''' |
| − | [[Category:FOTA]] | + | [[Category:FOTA WEB]] |
Latest revision as of 10:16, 8 April 2024
Main Page > Software & Applications > FOTA WEB > FOTA WEB Getting StartedRequirements
| IMPORTANT!!! | 1. All FMBXXX devices except for FMB64X should have at least 01.03.03.Rev.00 firmware version installed. 2. FMB64X should have at least 00.02.05 version installed. 3. FM36YX devices should have at least 01.12.00.Rev.02 version installed. (FM36YX Fota functionality for firmware update only) |
| Supported devices by family |
|---|
Please contact Teltonika's support for more information from where to download base firmware, configurator, user manual and protocols from.
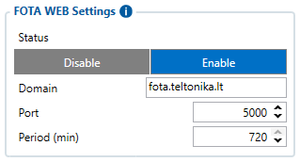
Default FOTA WEB configuration settings:
Domain: fota.teltonika.lt
Port: 5000
Period: 720 minutes (every 720 minutes device shall connect to FOTA WEB)
Using VPN SIM cards
If your SIM cards are within Mobile Operator’s VPN (private APN), the following must be ensured and paid special attention.
1. Must ensure that domain http://fota.teltonika.lt can be resolved from within Operator’s network.
2. Following IP and ports (egress) must be allowed by the operator.
- IP: 35.156.7.140
- Ports:
- 5000
- 6000
- 7000 (required for FM36YX models only)
- 5000
When using VPN SIM cards, you should still configure http://fota.teltonika.lt domain in your configurator, not the plain IP address.
Web Access
FOTA WEB is reached using domain address http://fota.teltonika.lt. FOTA WEB uses HTTP ports 80 and 85 for authentication so if your network has HTTP proxy service or is blocking outgoing traffic – make sure that those two ports are added to exceptions in network proxy service and firewall.
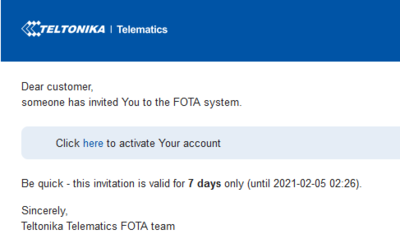
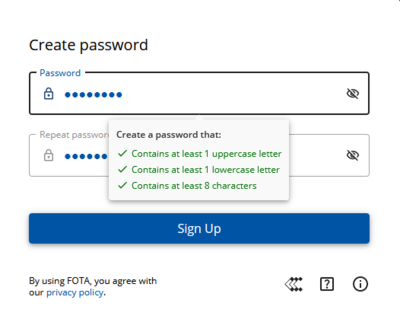
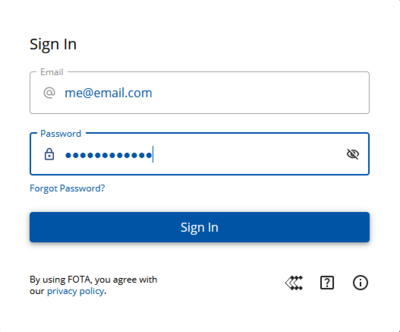
| 1. Invitation for FOTA WEB is being delivered to user e-mail. You can press „Click Here“ button or use URL provided in the e-mail. | 2. After pressing the button or following URL you will be asked to write password and confirm the same password with the second verification for Your account. Make sure to follow the mentioned comments to save the password successfully. | 3. Last step is logging in FOTA WEB with your newly created account by entering e-mail address and password which you used in the creation process. |
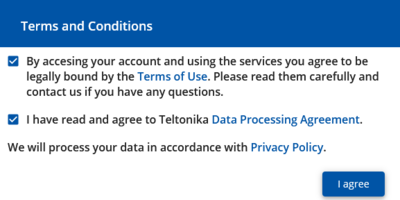
| 4. Please read carefully and accept our term and conditions at the first time using FOTA WEB systems. | ||
Overview
Device section
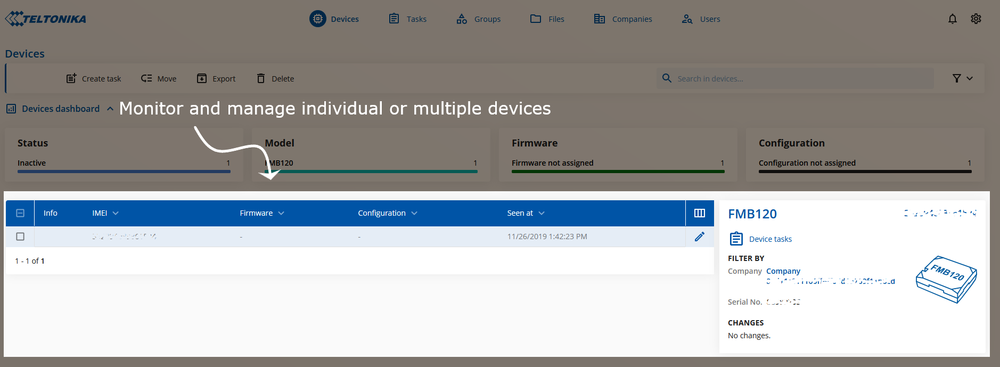
This area provides a basic overview of individual or filtered devices while allowing single or multiple selections for Task afterward.
You can read more about this section here: FOTA WEB Devices
Devices dashboard
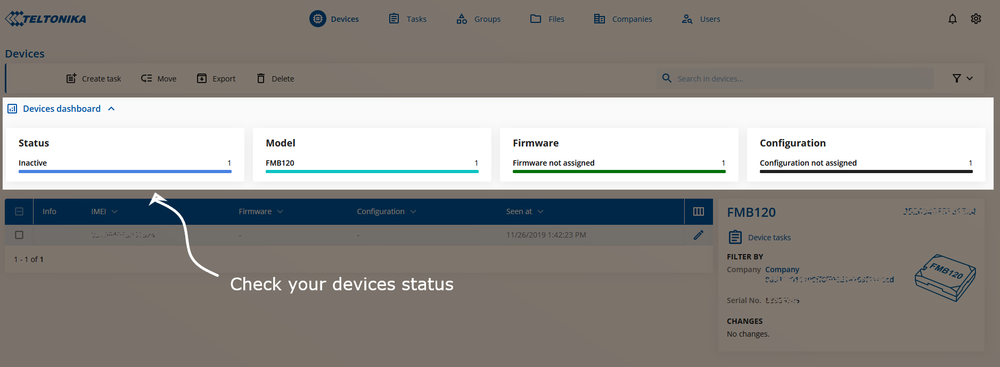
Present the live status of your fleet, you will be able to see the active device, assigned tasks, model, firmware versions and more.
Filter and task section
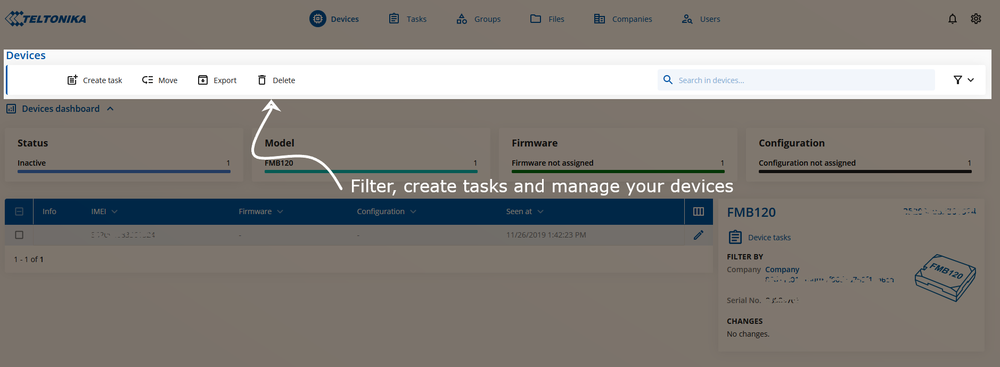
Filter provides means to easily access devices that you need by combining different filters: Company, device Model, Firmware, and more. The main part where the different tasks is selected and grouping for the devices done.
Different FOTA tabs for complete management of registered Devices, Companies, and users.
User Settings
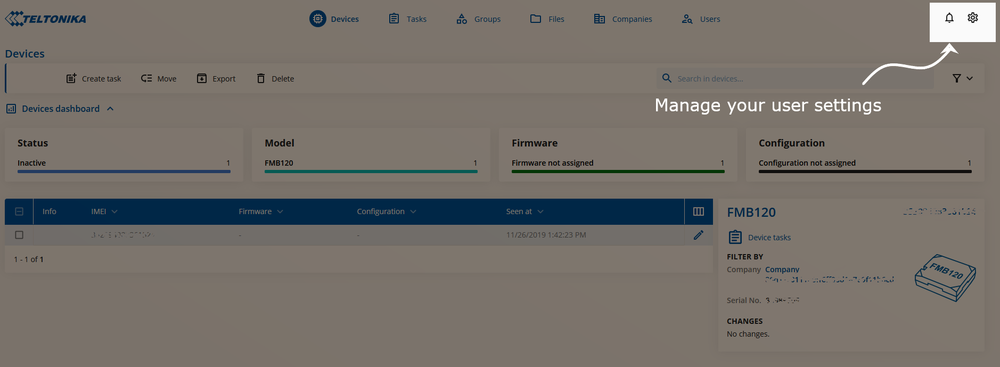
User settings selection. This is the part where you manage your account settings, change your password, language (currently the available selection is English, Lithuanian, Russian, Spanish, Portuguese and French), receive notifications and change your Time zone. You can read more about these settings here: FOTA WEB Account Settings
Next chapter Dashboard
